Site seems to be experiencing intermittent load issues. If site doesn't present the login screen, try clicking on 'login'

Started a table saw sled

Post Reply
User avatar
BrokenolMarine
Ranch Foreman
Posts: 7471
Joined: Sat Nov 26, 2016 8:28 am
Location: South Central Oklahoma in the mountains
United States of America

Started a table saw sled

Post by BrokenolMarine » Sat Sep 28, 2019 3:55 pm

While waiting for some items to come in for the cutting board project. For those not familiar, the sled lets you safely cut larger pieces of wood on the saw more accurately, and placing a stop block or wedge in the sled, make repeated or accurate angled cuts.

I have taken a few pics and will try and post some up. ;) I was especially mindful of a couple larger projects looming on the horizon. (Cough... Kitchen ... Cough ... Cabinets... Choke.) :o

:lol:
You can tell a lot about the character of a man...
by the way he treats those who can do nothing for him.

I don't look back at the things I can no longer do, I just look forward to the things I still can.

User avatar
Ernie
Drover
Posts: 2542
Joined: Thu Mar 07, 2019 8:07 pm
Location: Southwestern Lower Michigan
United States of America

Re: Started a table saw sled

Post by Ernie » Sat Sep 28, 2019 5:35 pm

Ya, the kitchen cabinet project is on my long list.

User avatar
markiver54
Deputy Marshal
Posts: 11122
Joined: Sun Nov 04, 2018 11:49 am
Location: Biue Ridge Mountains, NC
United States of America

Re: Started a table saw sled

Post by markiver54 » Sat Sep 28, 2019 6:45 pm

Yes Jim, been meaning to make a sled for quite a while. As you know, there are many different options depending on your table and space. I know space does not limit you though.
I will be interested to see yours!
I'm your Huckleberry

User avatar
BrokenolMarine
Ranch Foreman
Posts: 7471
Joined: Sat Nov 26, 2016 8:28 am
Location: South Central Oklahoma in the mountains
United States of America

Re: Started a table saw sled

Post by BrokenolMarine » Sat Sep 28, 2019 6:55 pm

It has been a frustrating experience so far. The super glue I am using is old and slow to cure, irritating to say the least. The sled is wide, so hard to get the perfectly squared cuts you might think you need. As I post the build, you will understand my last reference. :D

As with everything I do in the shop, I learn every step. .There are No mistakes, only opportunities to learn and improve myself. ;) Somedays more than others. :lol:
You can tell a lot about the character of a man...
by the way he treats those who can do nothing for him.

I don't look back at the things I can no longer do, I just look forward to the things I still can.

User avatar
markiver54
Deputy Marshal
Posts: 11122
Joined: Sun Nov 04, 2018 11:49 am
Location: Biue Ridge Mountains, NC
United States of America

Re: Started a table saw sled

Post by markiver54 » Sat Sep 28, 2019 7:06 pm

Have watched lots of videos on this and does not seem too hard. just have not gotten around to it yet. From our conversation, I'm sure you understand why.
I'm your Huckleberry

User avatar
BrokenolMarine
Ranch Foreman
Posts: 7471
Joined: Sat Nov 26, 2016 8:28 am
Location: South Central Oklahoma in the mountains
United States of America

Re: Started a table saw sled

Post by BrokenolMarine » Mon Sep 30, 2019 12:06 pm

Narrative with PICS... :P

Doesn't seem hard. :twisted: :twisted: :twisted:

Oh, it's not. If you aren't worried about tracking smooth, accuracy, and the like. If you have good glue, not old, and aren't gimpy and in pain. :D Old and forgetful. All this will make sense as we take this trek. Mistakes, (learning opportunities,) were created. ;)

After watching dozens of videos on this project, I decided to go with 3/4 ply since I (a) had some on hand, and (b) wanted the extra weight for stability and because most of the stuff I was going to cut on the sled would have weight itself. 3/4's it is... The first step was to decide on the size. I knew I wanted to be able to cut stock at least 24" across, anything wider I'd use the skill saw and special jigs I'd bought. I figured I'd make the sled the width of the table. Full support of the off cut and the primary. :)

First step was cutting the 1/2 sheet of ply and I knew I needed the 24" wide piece, two 4" wide pieces for the front fence and two 5" wide pieces for the back fence. I cut them at 24-1/4 and added 1/4 inch to the other 4 pieces as well. That way a cleanup pass against the fence later would still leave the full size I wanted with the 1/8" blade. The Rails would be 1-1/2 inch thick per the recommendations in the various videos and the first step in the process was to glue those up. It used every carpenters clamp in the shop. ALL of them.
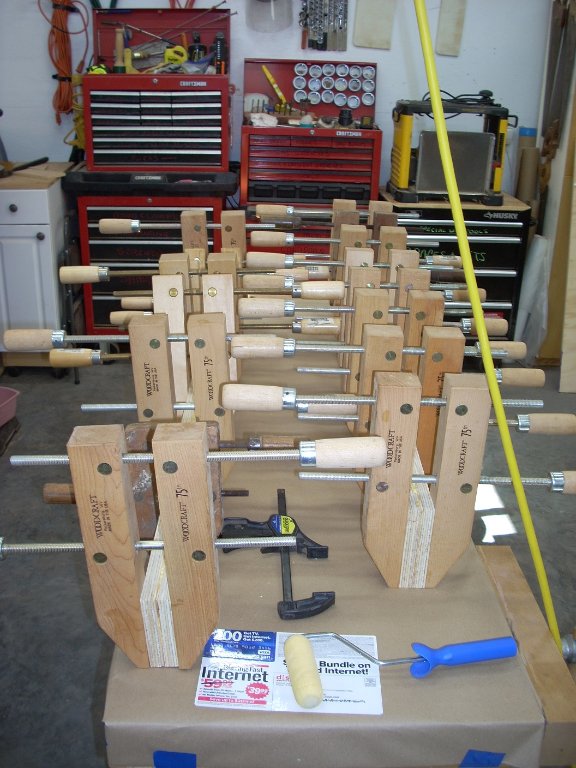

01 rail glue up.jpg
01 rail glue up.jpg (134.99 KiB) Viewed 5247 times
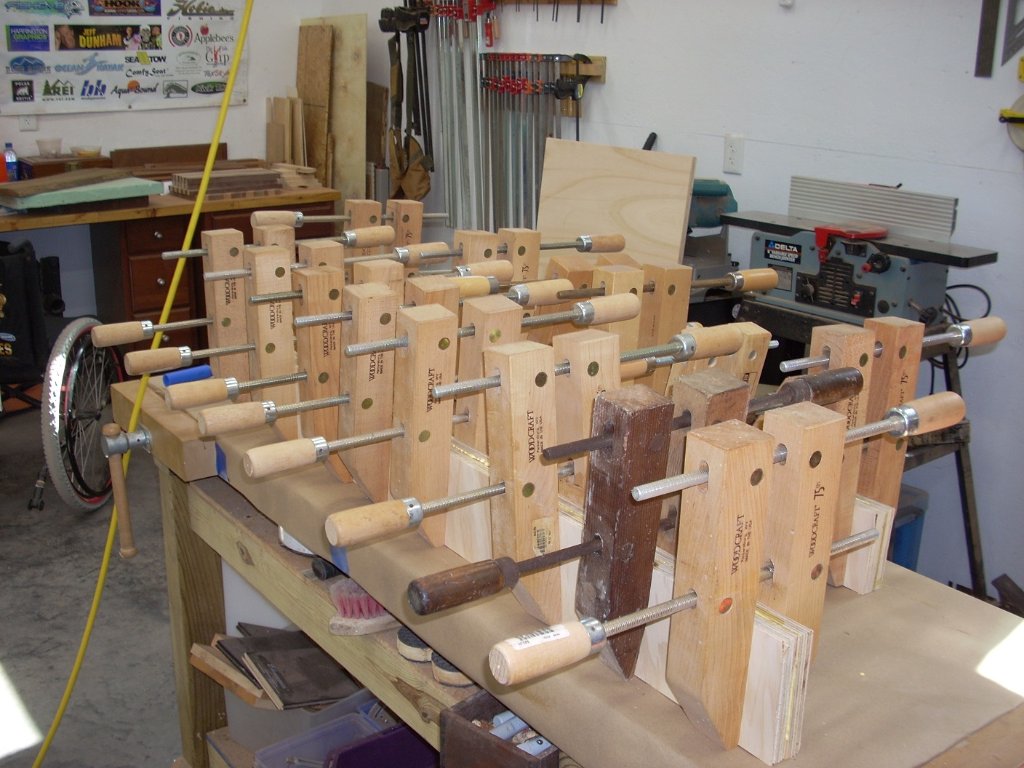
02 glue up view 2.jpg
02 glue up view 2.jpg (179.23 KiB) Viewed 5247 times

While the rail glue up dried, I went to work on the runners. They were going to be made from maple, as all the videos recommended hardwood or any of the plastics. They recommended staying away from the softwoods or plywood as they would wear quickly and all your work would soon result in a sled that had side to side movement, allowing variation in the cuts. I cut the rails to fit snugly but run smoothly. The videos recommended placing the rails in the slots on the table on top of pennies or washers to raise them slightly, with a few drops of super glue on them to properly align them, with them bottom of your sled squared to the fence. Weight the bottom on the table and let it sit. When you remove it, you can attach the two rails with a screw at each end then check for tight fit but smooth movement.
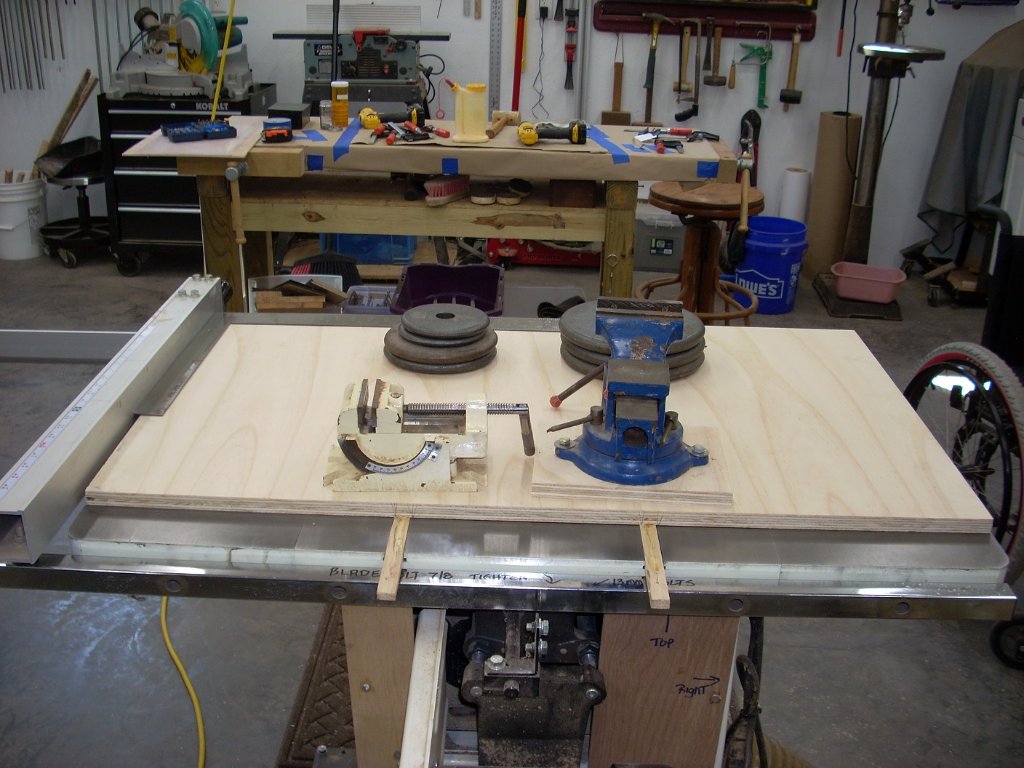

03 sticking the rails.jpg
03 sticking the rails.jpg (176.8 KiB) Viewed 5247 times

This was the worst part of the entire build. First my superglue was about a year old, and failed to hold on the wood. Every time I pulled the bottom of the sled up, one rail or the other would pop loose. I finally gave up and used Titebond. Then carefully, before lifting, slid the sled backward and clamped the back end of the sled rails to the bottom. I then tilted the sled bottom up, fully supporting both rails and then clamping the front end of the rails to the bottom.
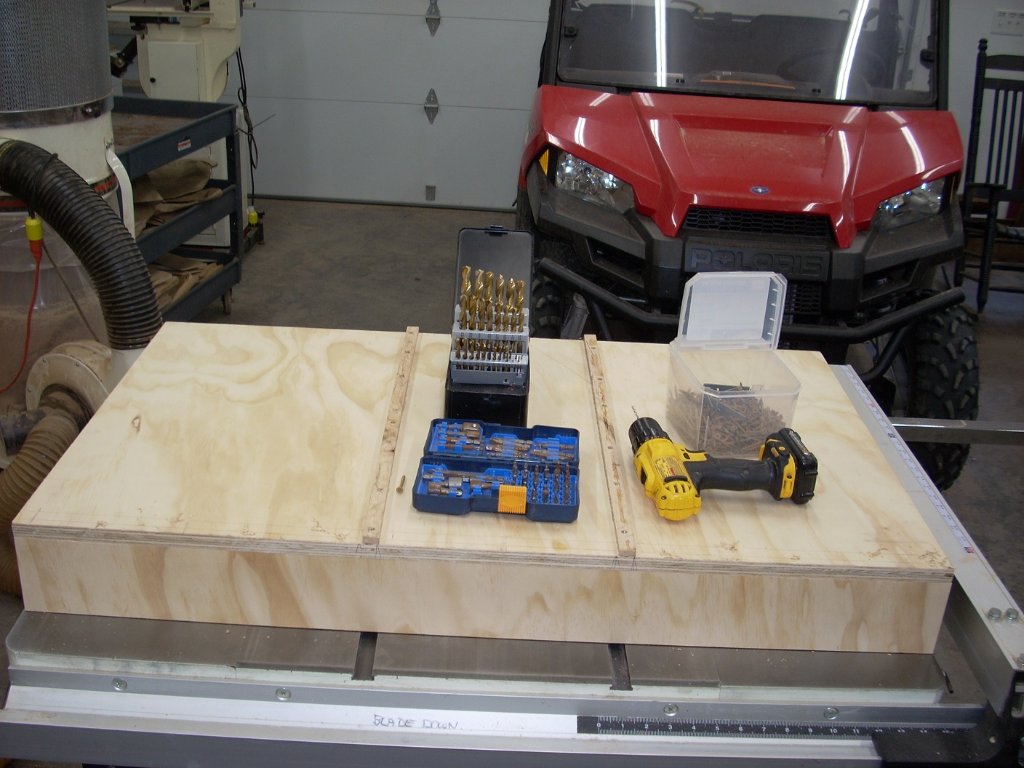
04 screw em on.jpg
04 screw em on.jpg (160.34 KiB) Viewed 5247 times

I transferred the inverted bottom of the sled to the workbench and put a screw at each end and then put it back on the saw and tried to slide it back and forth, and found it binding. I used the rabbit plane to trim the runners until the rails slid smoothly but still held the sled tightly. HOURS spent attaching the rails. Gee, in the video this was a fifteen minute evolution. :evil:

Next up, was attaching the front rail and I got set to check for critical alignment. Then I remembered the front rail is there only for stability and to keep the bottom from separating. I spread glue, and clamped the rail across the front aligning it with the front edge of the sled and left it to dry overnight.
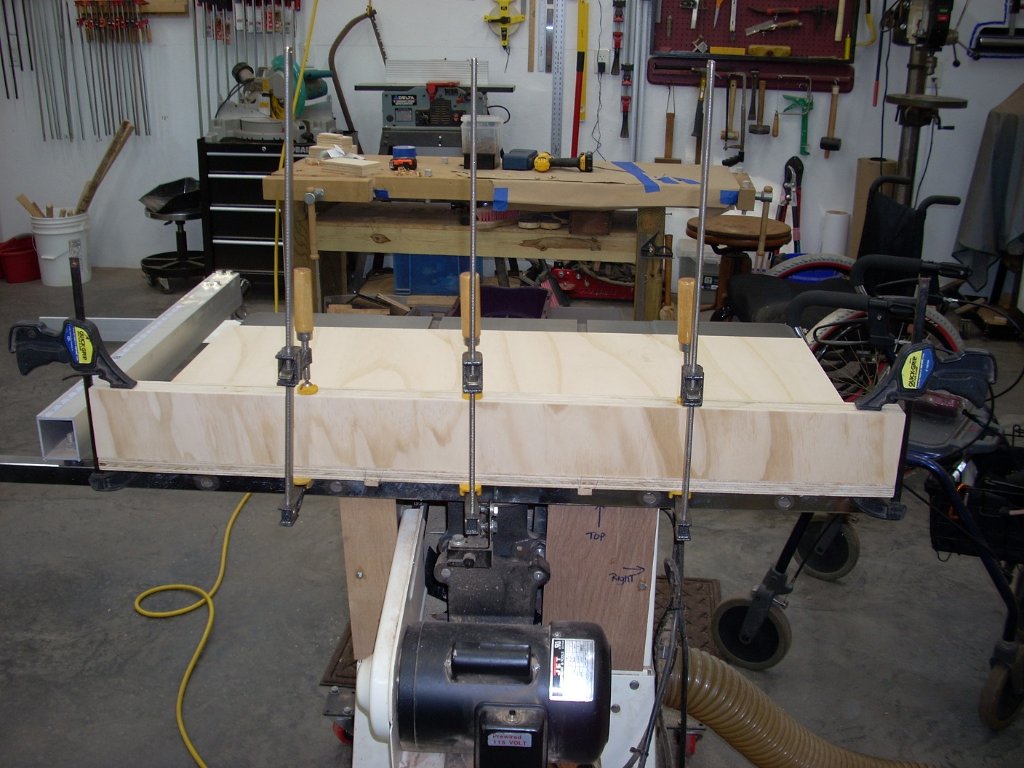
05 front rail.jpg
05 front rail.jpg (182.64 KiB) Viewed 5247 times

The next morning, I came back out and inverted the sled once again and zig zagged screws about every three inches down both edges, staying away from the middle glue line on the lamination. I also did NOT put any screws in the middle section of the rail between the runners at this time, since we DON'T know the exact location of the saw kerf. :?

Now for the most critical part of the entire build, the installation of the back rail. Many aligned the back rail using the fence as a guide, but the critical relationship in my opinion here is the rail and the blade. I ran the saw kerf three quarters down the sled bottom and used a framing square to align the back rail to the best of my ability with old eyes, and clamped it in place.
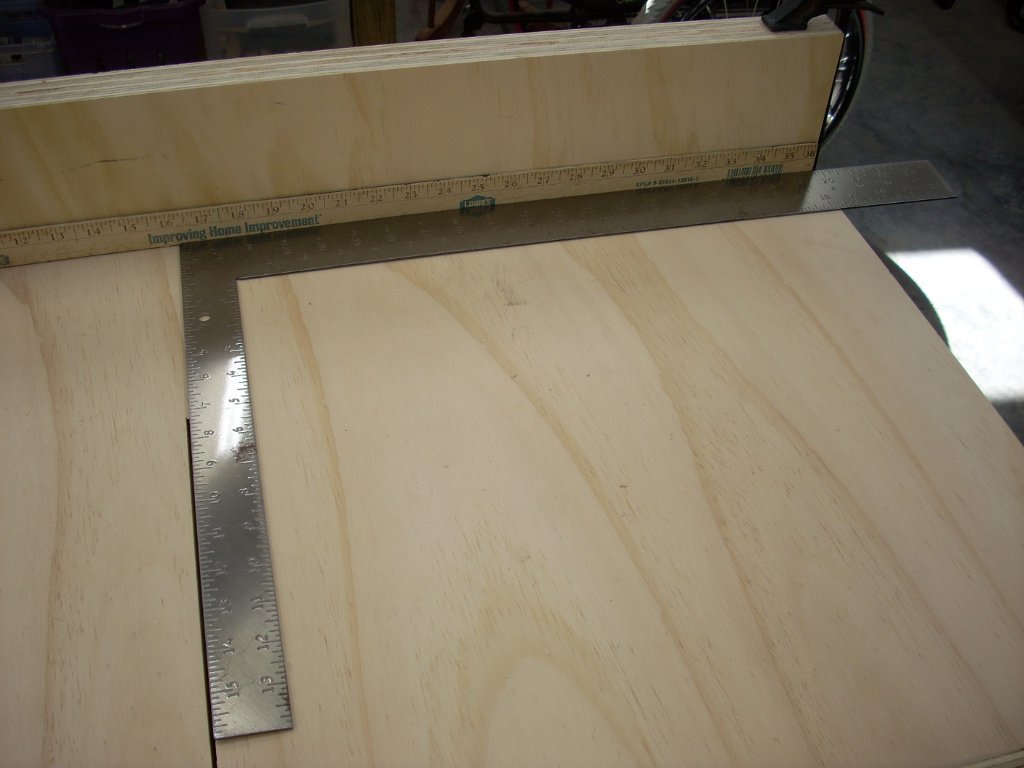
06 alignment of the back rail.jpg
06 alignment of the back rail.jpg (115.03 KiB) Viewed 5247 times
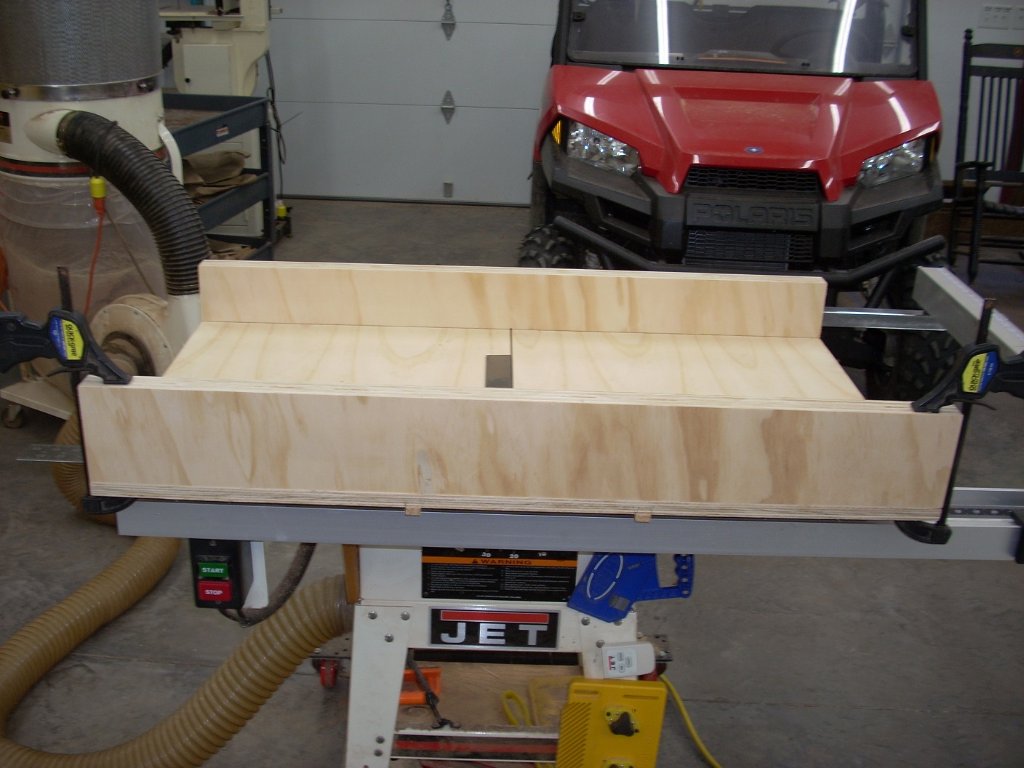
07 position the back rail.jpg
07 position the back rail.jpg (144.33 KiB) Viewed 5247 times

I had predrilled the holes prior to installing the rail, so I put ONE nail in each end, then reinstalled the rail on the saw, and made the necessary five cuts for the five cut test to check for the accuracy of my alignment. (Four edge cuts on a square of luane, then a 2" strip cut off one side.) I then measured each end of the strip to check the accuracy of the cut. If there is a difference, you divide the difference by two and correct the error on the necessary end of the fence. MY strip of 2" luane measured 2.01 inches and 2.06 inches. I was off .05 inches for an error of .025 inches. I decided that for woodworking two hundreds of an inch error was well within MY range of acceptability. :D

I removed the sled, re-inverted it on the workbench and installed the rest of the screws in the pre-drilled holes, and then drilled the holes on either side of the kerf in the center section between the rails for the front and back rails and placed screws in those. All were countersunk and insured they were just below the surface so they didn't mar the surface of the saw table. I now had a working sled.
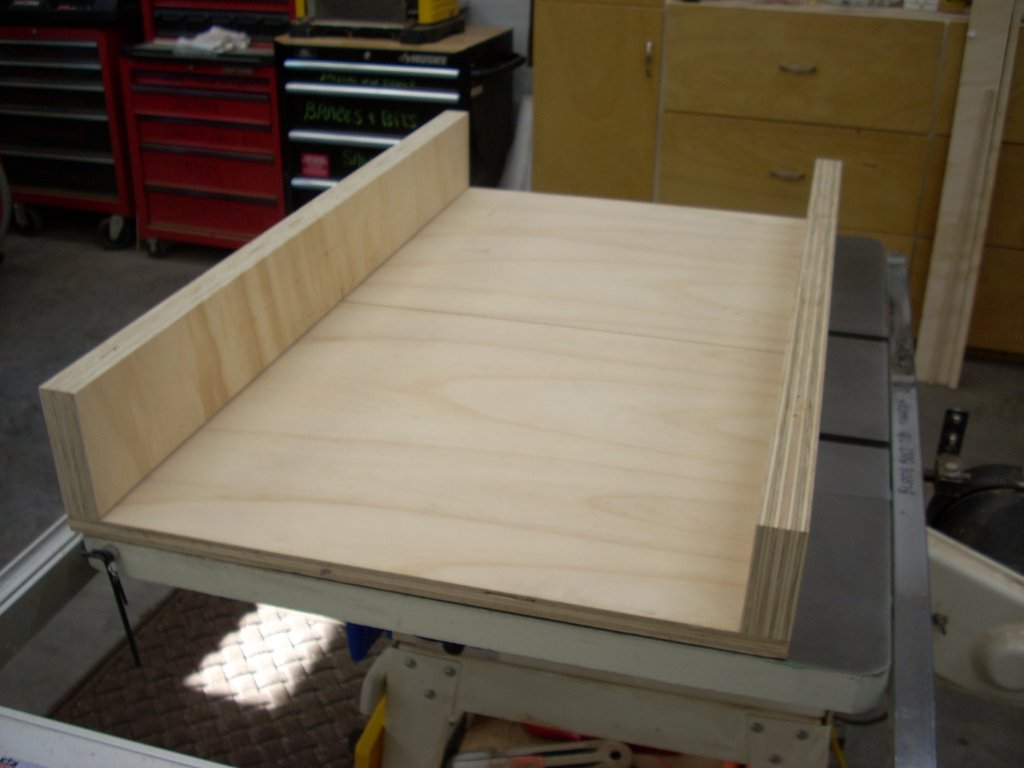
08 working sled.jpg
08 working sled.jpg (110.41 KiB) Viewed 5247 times

Time to install the rail for the stop block. I had some track normally used on the kayaks, made by YakAttack. Great product.
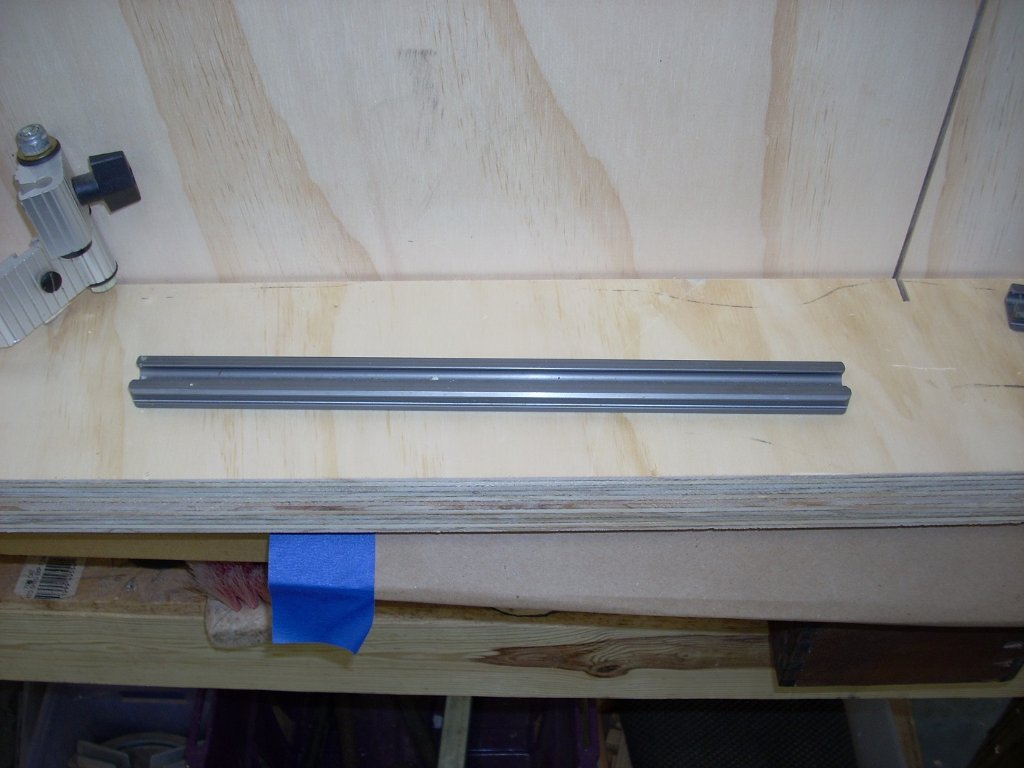
09 rail track for stop block.jpg
09 rail track for stop block.jpg (129.93 KiB) Viewed 5247 times

My plan was to use the old stop block off the miter for the table saw that I had removed and tossed as it got in the way on the miter. I had tested it and it worked in theory. I installed the track on the face of the rail even with the top edge. Testing the stop block, it would work with wide boards but nothing 1" or less. Fail... :roll: Hmmm? Maybe if I trim it.

10 Stop block fail.jpg
10 Stop block fail.jpg (125.44 KiB) Viewed 5247 times

So I trimmed off the foot of the back edge of the stop block then polished off the roughness. If it worked well I would use the 220, 320, and 400 grit to make is shine. Nope, still didn't work at all.
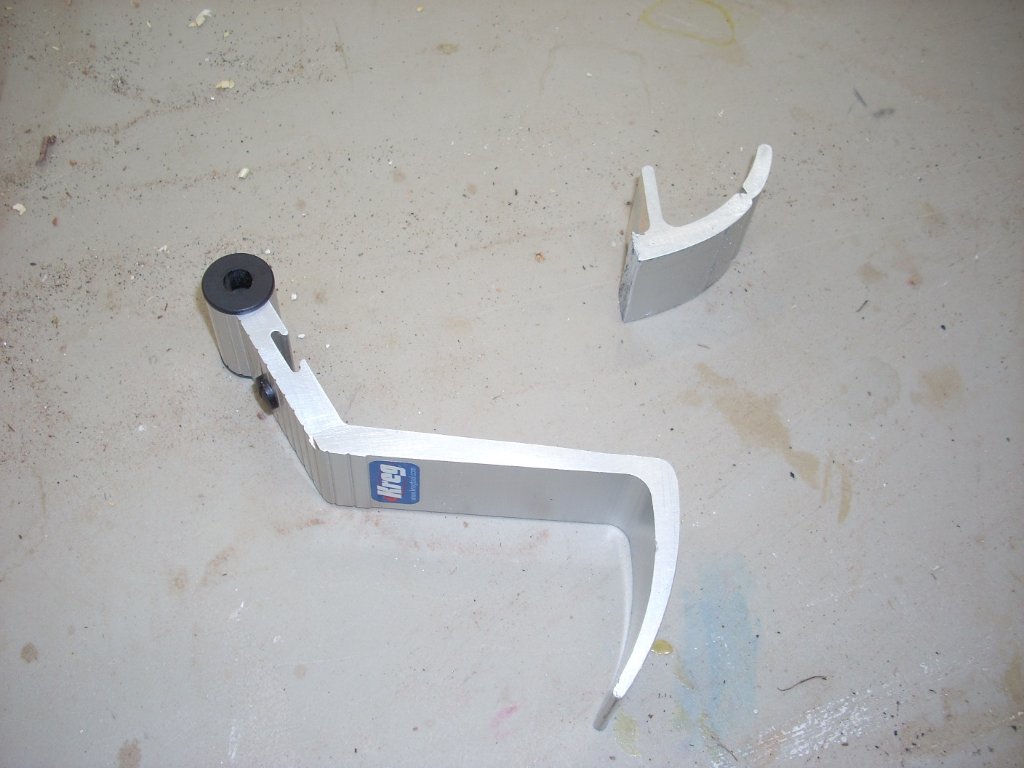
11 adapt and overcome.jpg
11 adapt and overcome.jpg (125.33 KiB) Viewed 5247 times
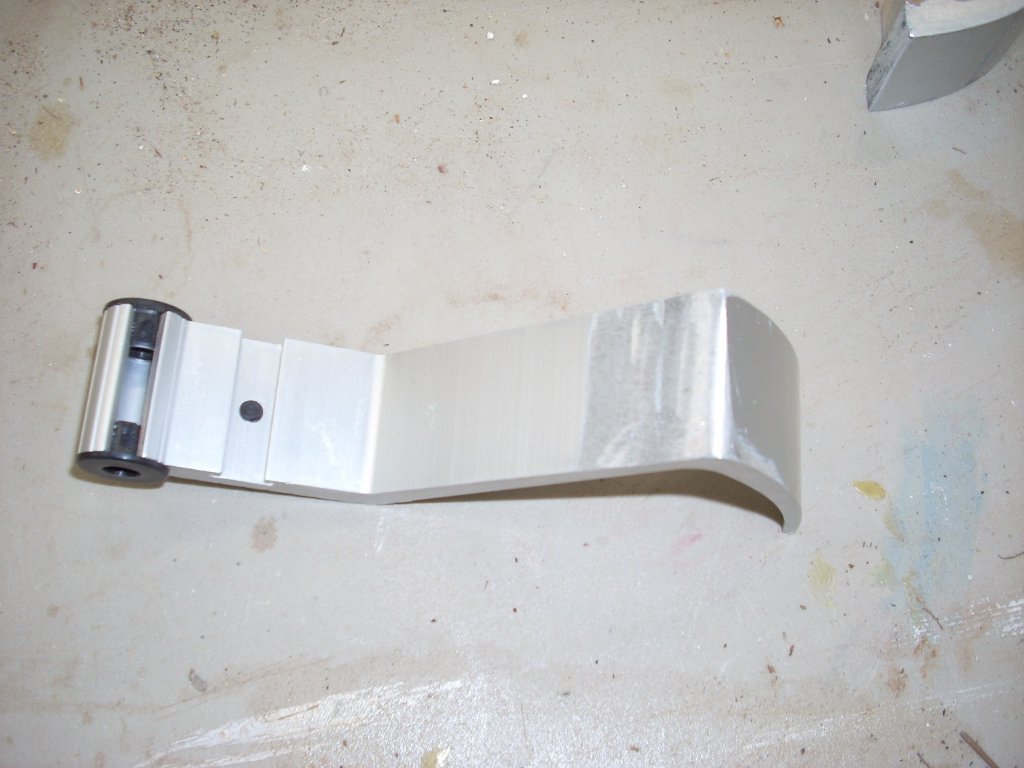
12 polish and smooth.jpg
12 polish and smooth.jpg (131.22 KiB) Viewed 5247 times


A puzzle since it worked so well before. Late that evening, sitting watching Justified on Prime, it hit me. I had placed the track on TOP of the rail... Idjit. :oops: :oops: :oops:
Little things you forget come back to haunt you. Not that much fun. :( Meh, I'll just make a custom stop block that LOOKS good and works better. :P


So, I dug around in the scrap bin and found some leftovers from the cutting board builds, and started playing with them. Yup, this will work.
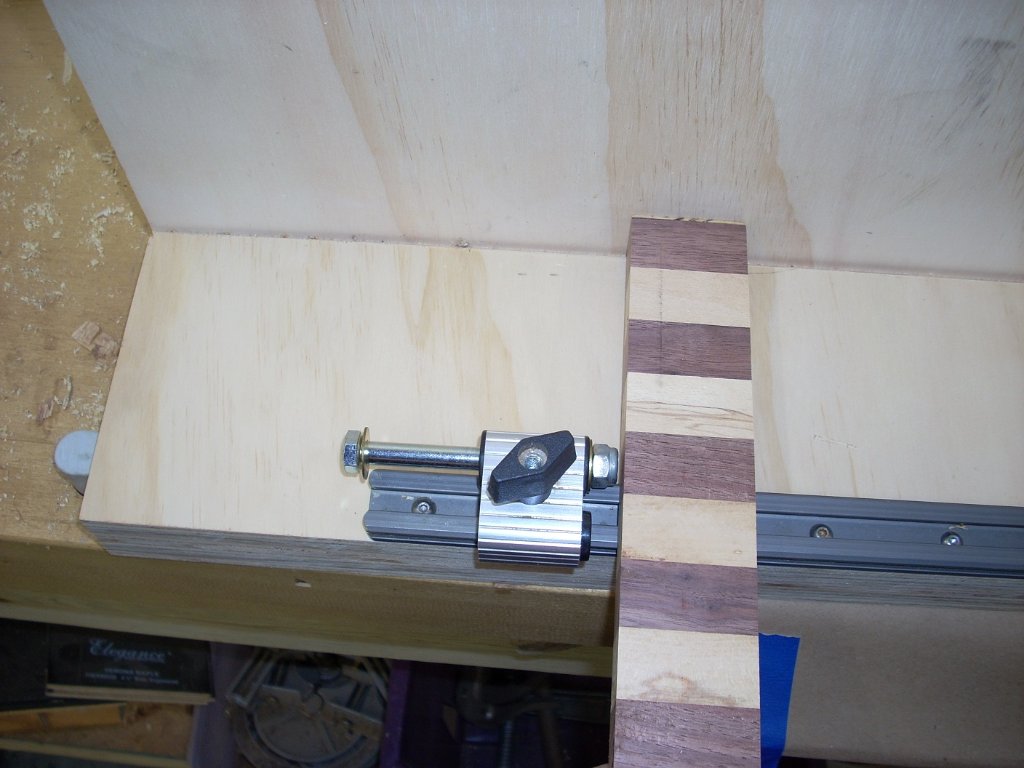
13 next steps.jpg
13 next steps.jpg (130.83 KiB) Viewed 5247 times

I took two walnut 1" pieces and cut rabbits in them, and fitted them over the rail and cut them to reach the bottom of the sled. They will ride the rail on each side of the aluminum assembly.
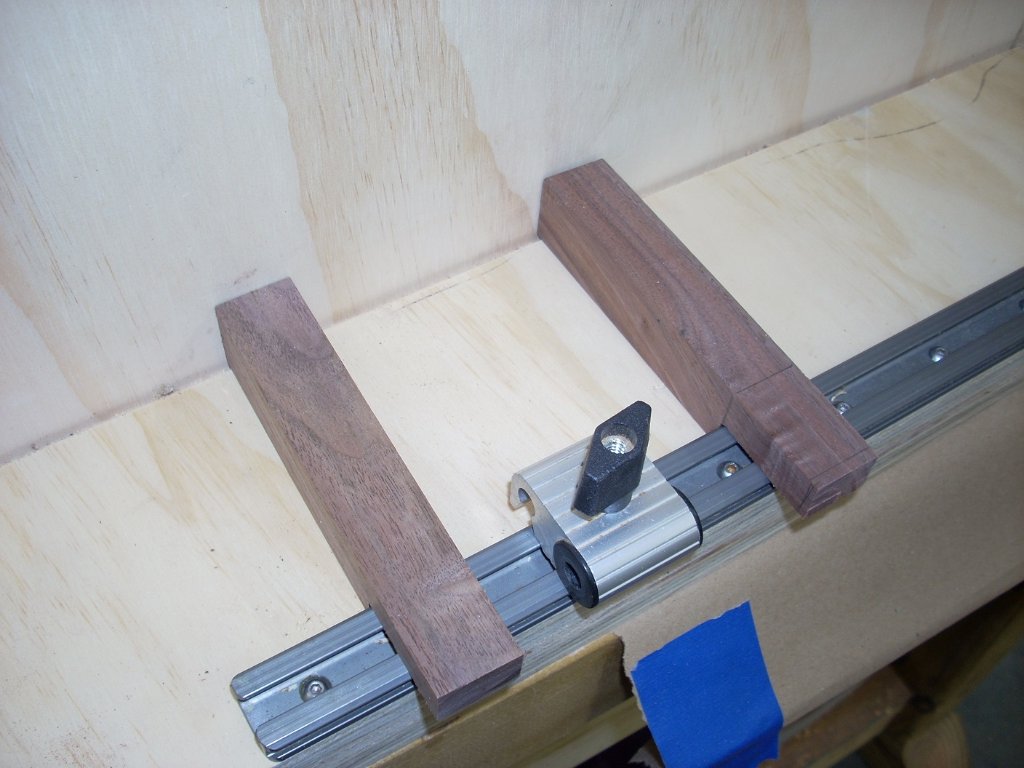
14 rabbits cut.jpg
14 rabbits cut.jpg (137 KiB) Viewed 5247 times


I cut the maple and walnut laminate pieces to width, and laminated them together. They will go between the walnut legs and rest against the back rail when the stop block is in use and put some strength in the stop block, plus look cool as all get out. When the glue dries, I can think about assembly.
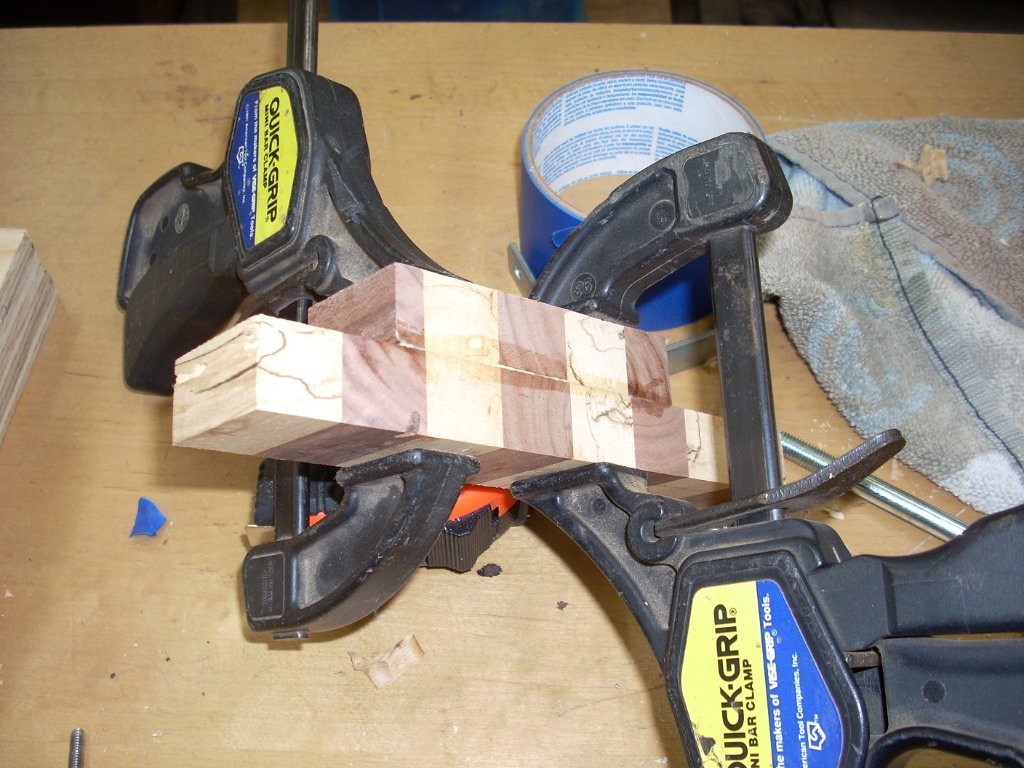
15 laminated and waiting.jpg
15 laminated and waiting.jpg (190.27 KiB) Viewed 5247 times

More to come, but the sled can be used as is.....
You can tell a lot about the character of a man...
by the way he treats those who can do nothing for him.

I don't look back at the things I can no longer do, I just look forward to the things I still can.

User avatar
markiver54
Deputy Marshal
Posts: 11122
Joined: Sun Nov 04, 2018 11:49 am
Location: Biue Ridge Mountains, NC
United States of America

Re: Started a table saw sled

Post by markiver54 » Mon Sep 30, 2019 12:26 pm

Great job Jim!...now that was easy, wasn't it?...๐Ÿ˜
I'm now inspired to finally make mine....soon๐Ÿค”
I'm your Huckleberry

User avatar
BrokenolMarine
Ranch Foreman
Posts: 7471
Joined: Sat Nov 26, 2016 8:28 am
Location: South Central Oklahoma in the mountains
United States of America

Re: Started a table saw sled

Post by BrokenolMarine » Mon Sep 30, 2019 12:27 pm

One thing I forgot. Before installing the back rail, I clamped it into the vise on the work bench, and using a sharp plane, cut a forty five degree bevel on that bottom inside edge. If you go back and look at a couple pics you can see it. It will also explain the yardstick across the front of the back rail while I set up the rail using the square.

The bevel is to prevent sawdust buildup from pushing your material away from the fence and ruining your ninty degeee cut.
You can tell a lot about the character of a man...
by the way he treats those who can do nothing for him.

I don't look back at the things I can no longer do, I just look forward to the things I still can.

User avatar
BrokenolMarine
Ranch Foreman
Posts: 7471
Joined: Sat Nov 26, 2016 8:28 am
Location: South Central Oklahoma in the mountains
United States of America

Re: Started a table saw sled

Post by BrokenolMarine » Mon Sep 30, 2019 12:39 pm

Oh... Another interesting event during this build.
We have had the pair of dewalt drill/screwdrivers for YEARs now. Most often one contained a bit and the other a torx bit or other driver. We always had a spare battery in the charger and they have more than earned what we spent ten times over.

While drilling the holes for the rails, one of the drills suddenly slowed, then died. :? Odd, they usually slow, slow, slow. No matter. I swapped batteries, put the dead one on the charger, and pulled the trigger, expecting a full speed spin of the bit. :)

The drill gave one deep moan... Spurted out one puff of foul black smoke, and went off to hand tool heaven. :o I popped off the battery, and saluted my fallen comrade. I ordered another just like it when I went it for lunch, catching a great sale on prime. ;)

It has been a pain changing between bits and drivers the last few days.
You can tell a lot about the character of a man...
by the way he treats those who can do nothing for him.

I don't look back at the things I can no longer do, I just look forward to the things I still can.

User avatar
markiver54
Deputy Marshal
Posts: 11122
Joined: Sun Nov 04, 2018 11:49 am
Location: Biue Ridge Mountains, NC
United States of America

Re: Started a table saw sled

Post by markiver54 » Mon Sep 30, 2019 1:20 pm

Sorry for your fallen comrade...Murphy's Law I guess.๐Ÿ™„
I'm your Huckleberry

User avatar
GunnyGene
Drover
Posts: 3005
Joined: Mon Sep 03, 2018 6:15 am
Location: Monroe County, MS
United States of America

Re: Started a table saw sled

Post by GunnyGene » Mon Sep 30, 2019 2:18 pm

Nice job. You'll find a lot of uses for it. A TS isn't complete without a sled, and I've had one like your's for about 15 years. If you don't have outfeed support of some kind, I'd suggest you either use roller stands, or a drop down leaf, or roll away simple bench.

I bubba'd a drop down leaf for mine using angle iron topped with 3/4" cabinet plywood & secured to the TS wings. Makes life much easier.

Image
Bellum Omnium Contra Omnes is rapidly becoming a reality (11/2023). Para Bellum.

User avatar
Mags
Administrator
Posts: 8757
Joined: Fri Apr 13, 2018 9:40 pm
Location: Tualatin Valley Oregon
United States of America

Re: Started a table saw sled

Post by Mags » Mon Sep 30, 2019 3:06 pm

.
Thanks for taking us on another of your project journeys. Always interesting.
I had a similar tool failure a few years ago. Its a very slim right angled driver, that is perfect for getting into limited space areas. I was using it everywhere whether I had a tight spot or not. Eventually the motor burned up in a puff of smoke and took the control circuit board with it. I tried to buy a replacement, but found they had been discontinued. I also could not find a similar product its size or smaller. I did find replacement parts, so its good as new, but with new ones being discontinued, this repaired one is semi-retired. I bought other drivers for the bulk of the driver work, saving the semi-retired for the really unique tight spaces.
BrokenolMarine wrote: โ†‘
Mon Sep 30, 2019 12:39 pm
.
... The drill gave one deep moan... Spurted out one puff of foul black smoke, and went off to hand tool heaven. :o I popped off the battery, and saluted my fallen comrade. I ordered another just like it when I went it for lunch, catching a great sale on prime. ;)
UPDATES: OR passes 114, "one of strictest gun control measures in U.S." https://henryrifleforums.com/viewtopic. ... 34#p213234

User avatar
BigAl52
Forum Ambassador
Posts: 15048
Joined: Sun Oct 23, 2016 12:43 pm
Location: Evans,Colorado
United States of America

Re: Started a table saw sled

Post by BigAl52 » Mon Sep 30, 2019 10:19 pm

Man Id a been worn out just putting all those clamps on.
Don't let the old man in


H001T .22LR
H001T .22LR MONUMENT VALLEY
H003T PUMP .22LR
BBS .41 MAG
SS .357
SIDE GATE 38-55

User avatar
BrokenolMarine
Ranch Foreman
Posts: 7471
Joined: Sat Nov 26, 2016 8:28 am
Location: South Central Oklahoma in the mountains
United States of America

Re: Started a table saw sled

Post by BrokenolMarine » Mon Sep 30, 2019 10:29 pm

BigAl52 wrote: โ†‘
Mon Sep 30, 2019 10:19 pm
Man Id a been worn out just putting all those clamps on.
There is a trick to setting the carpenter's clamps. You hold both grips and spin the clamps, they rapidly open or close parallel. You learn from doing how to apply full even pressure. :D
You can tell a lot about the character of a man...
by the way he treats those who can do nothing for him.

I don't look back at the things I can no longer do, I just look forward to the things I still can.

User avatar
markiver54
Deputy Marshal
Posts: 11122
Joined: Sun Nov 04, 2018 11:49 am
Location: Biue Ridge Mountains, NC
United States of America

Re: Started a table saw sled

Post by markiver54 » Mon Sep 30, 2019 10:32 pm

BrokenolMarine wrote: โ†‘
Mon Sep 30, 2019 10:29 pm
BigAl52 wrote: โ†‘
Mon Sep 30, 2019 10:19 pm
Man Id a been worn out just putting all those clamps on.
There is a trick to setting the carpenter's clamps. You hold both grips and spin the clamps, they rapidly open or close parallel. You learn from doing how to apply full even pressure. :D
Tricky as they can be; they are great!
I'm your Huckleberry

User avatar
BrokenolMarine
Ranch Foreman
Posts: 7471
Joined: Sat Nov 26, 2016 8:28 am
Location: South Central Oklahoma in the mountains
United States of America

Re: Started a table saw sled

Post by BrokenolMarine » Tue Oct 01, 2019 9:33 am

Got the Glued Up center pieces out of the clamps and test fitted them after trimming, between the walnut rabbited edge pieces. Test fit, trim, test fit, trim, test fit, trim. Bingo.

16 test fit.jpg
16 test fit.jpg (135.4 KiB) Viewed 4224 times

Once I was sure I had them where I needed the three pieces to be, they got glue applied, placed back in position to assure proper alignment, and clamped. They were allowed to dry for several hours.

17 glue up.jpg
17 glue up.jpg (167.68 KiB) Viewed 4224 times

I used a pull saw to trim everything flush as trying to do so on the table saw just seemed too risky, even holding the piece in a clamp. ;) Yup, I tried to find a safe way to do so. My rule there is if you have to stop and think if it's safe to do it ... just stop.

Once the piece was trimmed flush, there was a bit of fine tuning to be done. The width needed to be adjusted to fit the bolt, I took just over a 1/4" off each side. Then shaved an 1/8" off the inside of each leg to fit around the carrier with the washers installed for smooth operation. Assembled the block and tested and discovered that AS built it work really well except it wouldn't tilt for two reasons. The squared top hit the track and the locking knob hit the body.

- Rounded the top even with the washers.
- cut a half moon clearance into the body with a forstner bit.

Tested the stop block again, and we were golden. I sanded the rough edges and rolled the inside edge of the foot to ease the movement, the applied a coat of danish oil. Done.

18 stop block.jpg
18 stop block.jpg (108.31 KiB) Viewed 4224 times
You can tell a lot about the character of a man...
by the way he treats those who can do nothing for him.

I don't look back at the things I can no longer do, I just look forward to the things I still can.

Post Reply