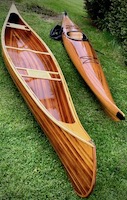
The walnut looks very interesting and should go well with the maple. It is always kind of exciting to get to the finishing stage a see what you get.
Patience is definitely a virtue and pays good dividends.
Great job.
Site seems to be OK. Load issue should be resolved now.
A Project For Miss T
-
BrokenolMarine

- Ranch Foreman
- Posts: 7519
- Joined: Sat Nov 26, 2016 8:28 am
- Location: South Central Oklahoma in the mountains

Re: A Project For Miss T
The good thing about a project like this is that there is no deadline, working from an original design, no one can say you messed up.  I had a concept in mind, and have been moving forward with those ideas as a guide... A guide. I have changed a few things here and there, and rolled with the flow.
After hours invested, I wasn't happy with the "doors" once I got them glued up. Oh, beautiful grain, and all, just didn't feel right... So I started on another pair. Yeah...
I also did some spoke shave work on the side panels... That DID go well.
Pics tomorrow. Promise... Watch this space for updates.
I had a concept in mind, and have been moving forward with those ideas as a guide... A guide. I have changed a few things here and there, and rolled with the flow. After hours invested, I wasn't happy with the "doors" once I got them glued up. Oh, beautiful grain, and all, just didn't feel right... So I started on another pair.
Yeah...I also did some spoke shave work on the side panels... That DID go well.
Pics tomorrow. Promise... Watch this space for updates.
You can tell a lot about the character of a man...
by the way he treats those who can do nothing for him.
I don't look back at the things I can no longer do, I just look forward to the things I still can.
by the way he treats those who can do nothing for him.
I don't look back at the things I can no longer do, I just look forward to the things I still can.
-
BrokenolMarine
- Ranch Foreman
- Posts: 7519
- Joined: Sat Nov 26, 2016 8:28 am
- Location: South Central Oklahoma in the mountains
Re: A Project For Miss T
Pics, as promised.
When I worked on the edge panels yesterday, the goal was to soften the sharp edge of the walnut rails. First step, sharpen the blade of the spokeshave. Once that was done, I clamped each panel in the end vice of the workbench and slowly drew the spokeshave centered on the top of the rail and worked the rail to soften the edge.
They started with crisp sharp edges. Something like this:
After some slow steady work with the spokeshave, first shaving only the outside edges, and eventually a full stroke all the way across, they ended up with a nice profile.
I love working with handtools, as I have said before. Whisper quiet, and no sawdust filling the air. Just a pile around the bench when you are done.
More pics as I process the new doors. I expect to work on those today... another rain filled day in the forecast.
When I worked on the edge panels yesterday, the goal was to soften the sharp edge of the walnut rails. First step, sharpen the blade of the spokeshave. Once that was done, I clamped each panel in the end vice of the workbench and slowly drew the spokeshave centered on the top of the rail and worked the rail to soften the edge.
They started with crisp sharp edges. Something like this:
- squared edges.jpg (141.53 KiB) Viewed 6490 times
After some slow steady work with the spokeshave, first shaving only the outside edges, and eventually a full stroke all the way across, they ended up with a nice profile.
- new shape.jpg (101.78 KiB) Viewed 6490 times
I love working with handtools, as I have said before. Whisper quiet, and no sawdust filling the air. Just a pile around the bench when you are done.
- love the spokeshave.jpg (284.56 KiB) Viewed 6490 times
More pics as I process the new doors. I expect to work on those today... another rain filled day in the forecast.
You can tell a lot about the character of a man...
by the way he treats those who can do nothing for him.
I don't look back at the things I can no longer do, I just look forward to the things I still can.
by the way he treats those who can do nothing for him.
I don't look back at the things I can no longer do, I just look forward to the things I still can.
-
BrokenolMarine
- Ranch Foreman
- Posts: 7519
- Joined: Sat Nov 26, 2016 8:28 am
- Location: South Central Oklahoma in the mountains
Re: A Project For Miss T
Back in the shop this morning, working on the new "doors" for the chest. I went with the spalted maple this time as I had the slab pieces in the shop. I cut a piece from the slab... 11 inches wide then ripped it down the middle, easier to bookmatch. That bookmatch would give me the two doors I needed.
Here is the slab...
After two days of work, both yesterday afternoon and then again this morning...
Cutting and squaring the original 1" plus thick slab,
Then ripping it down the middle into approximately two 5-1/2 inch pieces
Bookmatching those,
Then planning them to matching thicknesses,
Squaring them up,
Deciding on A and B sides
You get this:
We are FAR from done. Still far more finishing, and the B side needs a lot of work. That will be the underside when you open the wing doors on the top of the chest to access the yarn to change it out or replenish an exhausted supply on a large project. We are getting there. Still need to make a bottom panel and do a bit of SANDING... ... on all the components ...
Here is the slab...
- from this.jpg (95.62 KiB) Viewed 6486 times
After two days of work, both yesterday afternoon and then again this morning...
Cutting and squaring the original 1" plus thick slab,
Then ripping it down the middle into approximately two 5-1/2 inch pieces
Bookmatching those,
Then planning them to matching thicknesses,
Squaring them up,
Deciding on A and B sides
You get this:
- to this.jpg (140.19 KiB) Viewed 6486 times
We are FAR from done. Still far more finishing, and the B side needs a lot of work. That will be the underside when you open the wing doors on the top of the chest to access the yarn to change it out or replenish an exhausted supply on a large project. We are getting there. Still need to make a bottom panel and do a bit of SANDING...
... on all the components ... You can tell a lot about the character of a man...
by the way he treats those who can do nothing for him.
I don't look back at the things I can no longer do, I just look forward to the things I still can.
by the way he treats those who can do nothing for him.
I don't look back at the things I can no longer do, I just look forward to the things I still can.
Re: A Project For Miss T
Had to hang a storm door for a friend's mother Saturday. Spent most of the time cutting out the dry rot from the frame and fabbing replacement parts to glue and screw in. Got to use some power tools in my shop that I have not used in a few years due to the old job. Felt good!
You are doing a great job on this, really like the wood.
You are doing a great job on this, really like the wood.
-
BrokenolMarine
- Ranch Foreman
- Posts: 7519
- Joined: Sat Nov 26, 2016 8:28 am
- Location: South Central Oklahoma in the mountains
Re: A Project For Miss T
I have tools that will sit idle for extended periods. Then they come in really handy.
You can tell a lot about the character of a man...
by the way he treats those who can do nothing for him.
I don't look back at the things I can no longer do, I just look forward to the things I still can.
by the way he treats those who can do nothing for him.
I don't look back at the things I can no longer do, I just look forward to the things I still can.
-
BrokenolMarine
- Ranch Foreman
- Posts: 7519
- Joined: Sat Nov 26, 2016 8:28 am
- Location: South Central Oklahoma in the mountains
Re: A Project For Miss T
Out this morning to work on Miss T's project again. Last night I put the wing doors under the clamps for glue up.
I let them set up overnight and this morning I pulled them out of the clamps and gave them a look see. "I" thought they looked pretty good.
They will need more work. I have to:
Square the ends, "AFTER" I decide on the width and length.
They will need final sanding to knock out the planer marks, and I need to decide on the outer edge shape.
Do I want a straight edge, or a scalloped edge for style?
Next up, I took the top cross bar that the wing door hinges will attach to, to task. I needed to drill the holes thru which the yarn will feed.
Miss Tina decided that EIGHT was overkill, and four to six would be plenty. Since spacing would be key and ADDING holes later would be a problem...
I took the safe path and went with ... six.
I measured the center, and worked three each direction, marked them with a punch and drilled almost all the way thru with a forstner bit. The tip of the bit JUST tweaking thru.
Then I flipped 'er over and finished the trip. That way I had clean, crisp holes without tear out.
Once all six holes were done, I got a 1/4 inch roundover bit, and fired up a small router. I haven't used one in about two years, but for some things... there is no substitute. I needed the edges rounded top and bottom so the yarn won't drag. I will polish the rounded edges with strips of 400 grit sandpaper, just to be safe, but it would "probably" be fine as is. Probably isn't good enough when the project is for the boss.
MORE sanding needed on other components as well, but we are getting close to the end. Still need to make the bottom and the legs. (I need to decide what I WANT for the legs.) Sheesh.

- 01 new wing doors glue up.jpg (124.04 KiB) Viewed 6459 times
I let them set up overnight and this morning I pulled them out of the clamps and gave them a look see. "I" thought they looked pretty good.
- 02 wing door one.jpg (95.24 KiB) Viewed 6459 times
- 03 wing door two.jpg (91.45 KiB) Viewed 6459 times
They will need more work. I have to:
Square the ends, "AFTER" I decide on the width and length.
They will need final sanding to knock out the planer marks, and I need to decide on the outer edge shape.
Do I want a straight edge, or a scalloped edge for style?
Next up, I took the top cross bar that the wing door hinges will attach to, to task. I needed to drill the holes thru which the yarn will feed.
Miss Tina decided that EIGHT was overkill, and four to six would be plenty. Since spacing would be key and ADDING holes later would be a problem...
I took the safe path and went with ... six.
I measured the center, and worked three each direction, marked them with a punch and drilled almost all the way thru with a forstner bit. The tip of the bit JUST tweaking thru.
Then I flipped 'er over and finished the trip. That way I had clean, crisp holes without tear out.
- 04 yarn holes top cross bar.jpg (165.11 KiB) Viewed 6459 times
Once all six holes were done, I got a 1/4 inch roundover bit, and fired up a small router. I haven't used one in about two years, but for some things... there is no substitute. I needed the edges rounded top and bottom so the yarn won't drag. I will polish the rounded edges with strips of 400 grit sandpaper, just to be safe, but it would "probably" be fine as is. Probably isn't good enough when the project is for the boss.
MORE sanding needed on other components as well, but we are getting close to the end. Still need to make the bottom and the legs. (I need to decide what I WANT for the legs.) Sheesh.
- Attachments
-
- 05 routed.jpg (122.82 KiB) Viewed 6459 times
You can tell a lot about the character of a man...
by the way he treats those who can do nothing for him.
I don't look back at the things I can no longer do, I just look forward to the things I still can.
by the way he treats those who can do nothing for him.
I don't look back at the things I can no longer do, I just look forward to the things I still can.
-
markiver54

- Deputy Marshal
- Posts: 11156
- Joined: Sun Nov 04, 2018 11:49 am
- Location: Biue Ridge Mountains, NC
Re: A Project For Miss T
REAL nice job on those holes Jim! Don't for see any snagging there!
I'm your Huckleberry
-
Dahliathemeh

- Cattle Driver
- Posts: 700
- Joined: Fri Jan 26, 2018 11:31 pm
- Location: Chicago
- Contact:
Re: A Project For Miss T
Your shop must smell so good with all the fresh cut, shaved, drilled wood
I never take myself seriously....
-
BrokenolMarine
- Ranch Foreman
- Posts: 7519
- Joined: Sat Nov 26, 2016 8:28 am
- Location: South Central Oklahoma in the mountains
Re: A Project For Miss T
I love the smell of walnut in the morning... Afternoon, ah, who am I kidding, and evening.
Only thing better is cutting fresh cedar.
(I DO have to wear my respirator when cutting walnut, getting a lot of that sawdust up my nose will give me a terrible headache. )
Only thing better is cutting fresh cedar.
(I DO have to wear my respirator when cutting walnut, getting a lot of that sawdust up my nose will give me a terrible headache.
)You can tell a lot about the character of a man...
by the way he treats those who can do nothing for him.
I don't look back at the things I can no longer do, I just look forward to the things I still can.
by the way he treats those who can do nothing for him.
I don't look back at the things I can no longer do, I just look forward to the things I still can.
-
markiver54
- Deputy Marshal
- Posts: 11156
- Joined: Sun Nov 04, 2018 11:49 am
- Location: Biue Ridge Mountains, NC
Re: A Project For Miss T
Better than sanding dust I would think though Jim.Cedar does smell great though!
I'm your Huckleberry
-
BrokenolMarine
- Ranch Foreman
- Posts: 7519
- Joined: Sat Nov 26, 2016 8:28 am
- Location: South Central Oklahoma in the mountains
Re: A Project For Miss T
Yeah, sanding dust... I have a LOT of sanding coming due.
One great way to minimize the dust is to use card scrapers.
One great way to minimize the dust is to use card scrapers.
You can tell a lot about the character of a man...
by the way he treats those who can do nothing for him.
I don't look back at the things I can no longer do, I just look forward to the things I still can.
by the way he treats those who can do nothing for him.
I don't look back at the things I can no longer do, I just look forward to the things I still can.
-
markiver54
- Deputy Marshal
- Posts: 11156
- Joined: Sun Nov 04, 2018 11:49 am
- Location: Biue Ridge Mountains, NC
Re: A Project For Miss T
Ya got that right Jim, wasn't even aware of the card scraping technique until recently. Can't avoid sanding at some point though I would think. Regardless, that cedar does smell good.
I'm your Huckleberry
-
BrokenolMarine
- Ranch Foreman
- Posts: 7519
- Joined: Sat Nov 26, 2016 8:28 am
- Location: South Central Oklahoma in the mountains
Re: A Project For Miss T
Some time in the shop today, spent sanding on the top rail. Mainly focused on the holes for the yarn. I cut strips from 220 grit sandpaper and hand sanded the holes to make them glass smooth. No catching on the yarn. Gotta keep the boss happy.
Then, sharpened the card for scraping, and got busy on the two wing doors for the chest. Saves a lot of time, and LOT of sandpaper, but works on the old broken shoulders and the arthritis in the hands. (MUCH less than regular sanding though.)
After about an hour, the joint on both doors was flat and even and the imperfections were starting to disappear. My shoulder had clocked out for the day. Both doors are looking pretty sharp, so I have an idea what I'll be working with. They are wider and longer than they need to be. Once I assemble the chest, I'll decide exactly the shape I need and cut it from the prepped panels.
More work tomorrow. Scaping on the doors and ....
Building the bottom of the chest and the feet. I will used turned legs. I've decided on that part. Unless I change my mind... I'm flexible. Like the layout for this project.
Gotta keep the boss happy.- 06 sanding the hole.jpg (100.15 KiB) Viewed 5822 times
Then, sharpened the card for scraping, and got busy on the two wing doors for the chest. Saves a lot of time, and LOT of sandpaper, but works on the old broken shoulders and the arthritis in the hands. (MUCH less than regular sanding though.)
- 07 card scraper work.jpg (155.37 KiB) Viewed 5822 times
After about an hour, the joint on both doors was flat and even and the imperfections were starting to disappear. My shoulder had clocked out for the day.
Both doors are looking pretty sharp, so I have an idea what I'll be working with. They are wider and longer than they need to be. Once I assemble the chest, I'll decide exactly the shape I need and cut it from the prepped panels.- 08 one wing door scraped.jpg (127.56 KiB) Viewed 5822 times
- 09 the second door scraped.jpg (143.62 KiB) Viewed 5822 times
More work tomorrow. Scaping on the doors and ....
Building the bottom of the chest and the feet. I will used turned legs.
I've decided on that part. Unless I change my mind... I'm flexible. Like the layout for this project. You can tell a lot about the character of a man...
by the way he treats those who can do nothing for him.
I don't look back at the things I can no longer do, I just look forward to the things I still can.
by the way he treats those who can do nothing for him.
I don't look back at the things I can no longer do, I just look forward to the things I still can.
-
BrokenolMarine
- Ranch Foreman
- Posts: 7519
- Joined: Sat Nov 26, 2016 8:28 am
- Location: South Central Oklahoma in the mountains
Re: A Project For Miss T
The Best Part of working in woodwork, is when the stain or oil finish is applied and the grain pops... and the best way to avoid disappointment is to wipe it with denatured alcohol or mineral spirits to remove the dust. At the same time, the wiping action darkens the wood grain and will highlight glue spots or any sanding errors giving you a chance to correct those before applying stains or finish. I did that last night and then left the pieces until this morning, then got ready to be Wow'd.
The stain chosen wasn't by chance. I had saved scraps from the project and tested both the walnut and the maple with Cherry, Natural, Medium Walnut, and Golden Oak Watco Oils. Miss T liked the Golden Oak the best... unfortunately, I only had a small amount of that stain left. Lowes and Home Depot only carry the Medium and Dark Walnut and the Natural. NO Golden Oak. Woodcraft and Amazon carry Golden Oak, but Woodcraft is 90 minutes away, but with the drive would cost double the price of Lowes. I ended up testing a 50/50 blend of Medium Walnut and Natural Watco Danish Oil and it was perfect as far as the Ms. was concerned.
Here is the End Panel Process.
Panel Comparison stained and not.
The Stained Panel
Then both ends stained.
The side panel comparison
Side panel close up
Both Sides and the top rail stained.
You will note some of the areas NOT stained, ends mostly. These are areas that will be glued later. The Danish Oil will prevent good glue up, so I didn't stain those areas. I learned this the hard way in previous projects. I will let these panels cure, then put the basket together. Still to come will be cutting then staining the wing doors after they are test fitted. I need to make the bottom panel, attach the turned legs and make and attach the feet. Getting there.
I did that last night and then left the pieces until this morning, then got ready to be Wow'd.The stain chosen wasn't by chance. I had saved scraps from the project and tested both the walnut and the maple with Cherry, Natural, Medium Walnut, and Golden Oak Watco Oils. Miss T liked the Golden Oak the best... unfortunately, I only had a small amount of that stain left. Lowes and Home Depot only carry the Medium and Dark Walnut and the Natural. NO Golden Oak. Woodcraft and Amazon carry Golden Oak, but Woodcraft is 90 minutes away, but with the drive would cost double the price of Lowes. I ended up testing a 50/50 blend of Medium Walnut and Natural Watco Danish Oil and it was perfect as far as the Ms. was concerned.
Here is the End Panel Process.
Panel Comparison stained and not.
- 01 end stained compare.jpg (172.45 KiB) Viewed 5798 times
The Stained Panel
- 02 end.jpg (135.43 KiB) Viewed 5798 times
Then both ends stained.
- 03 both ends.jpg (186.71 KiB) Viewed 5798 times
The side panel comparison
- 04 side stain compare.jpg (145.26 KiB) Viewed 5798 times
Side panel close up
- 05 side.jpg (120.44 KiB) Viewed 5798 times
Both Sides and the top rail stained.
- 06 both side and top rail.jpg (174.75 KiB) Viewed 5798 times
You will note some of the areas NOT stained, ends mostly. These are areas that will be glued later. The Danish Oil will prevent good glue up, so I didn't stain those areas. I learned this the hard way in previous projects.
I will let these panels cure, then put the basket together. Still to come will be cutting then staining the wing doors after they are test fitted. I need to make the bottom panel, attach the turned legs and make and attach the feet. Getting there.You can tell a lot about the character of a man...
by the way he treats those who can do nothing for him.
I don't look back at the things I can no longer do, I just look forward to the things I still can.
by the way he treats those who can do nothing for him.
I don't look back at the things I can no longer do, I just look forward to the things I still can.
-
markiver54
- Deputy Marshal
- Posts: 11156
- Joined: Sun Nov 04, 2018 11:49 am
- Location: Biue Ridge Mountains, NC
Re: A Project For Miss T
Looking really nice Jim. That grain really did pop and I love the contrasting side rails!!
I'm your Huckleberry
-
BrokenolMarine
- Ranch Foreman
- Posts: 7519
- Joined: Sat Nov 26, 2016 8:28 am
- Location: South Central Oklahoma in the mountains
Re: A Project For Miss T
Wow... it's been a while. I know I have been away from the sewing chest... but the dogs have demanded a lot of time. We have been working on a play area for the dang pups, and training, training, training. Anyone with new pups in the house knows how that goes. Miss T ordered new fencing, electric netting actually. The goal was to keep the dogs in and other dogs out. Then we wanted to be able to give the access to the back yard and the side porch, but it's four feet high. Another ramp was needed. That took some design. At first she (The Boss) wanted a straight ramp. Turned out to be too steep, as I predicted. I had designed a two stage ramp with a turn... but (The boss) deemed it too complicated. Took the straight ramp apart and used the pieces as part of the new ramp. Perfect. In the pic below you can see the results of four day's work. First Miss T leveled the area with the blade on the tractor, then we "really" leveled the area where the two small "decks" would be with the level and patio stones. I cut some thin 2x4 dividers to alternate with deck boards to reduce the chance of the dogs sliding on the wet or iced ramps in inclement weather and we got the angled sections done. The dogs love the ramp.
The dog ramp and fence up, the boathouse repairs done and a day of rest here and there, I was able to get into the shop today, and ... the upper assembly was glued up. I clamped the components together to test the fit, marked them carefully, then drilled small 5/32 holes in the end panels. We then clamped them back together, and drilled matching holes in the side panels and the top rail. Disassembled once more, glued the side panels and the top rail and using small nails as guides, reassembled and clamped, and removed the nails before they got glued into place. I will leave it to set overnight, then use a forstner bit to countersink and set a screw in each of the holes and then put a plug cut from scrap spalted maple in the holes.
Once that is done, I'll install the internal braces for the end panels, measure and cut the wing doors from the prepared spalted maple panels, then begin working on the bottom braces, the legs, and the feet. We are close to the end. You can see what the finished product will look like. Sorta.
Anyone with new pups in the house knows how that goes. Miss T ordered new fencing, electric netting actually. The goal was to keep the dogs in and other dogs out. Then we wanted to be able to give the access to the back yard and the side porch, but it's four feet high. Another ramp was needed. That took some design. At first she (The Boss) wanted a straight ramp. Turned out to be too steep, as I predicted. I had designed a two stage ramp with a turn... but (The boss) deemed it too complicated. Took the straight ramp apart and used the pieces as part of the new ramp. Perfect. In the pic below you can see the results of four day's work. First Miss T leveled the area with the blade on the tractor, then we "really" leveled the area where the two small "decks" would be with the level and patio stones. I cut some thin 2x4 dividers to alternate with deck boards to reduce the chance of the dogs sliding on the wet or iced ramps in inclement weather and we got the angled sections done. The dogs love the ramp. - dog ramp.jpg (158.6 KiB) Viewed 5741 times
The dog ramp and fence up, the boathouse repairs done and a day of rest here and there, I was able to get into the shop today, and ... the upper assembly was glued up. I clamped the components together to test the fit, marked them carefully, then drilled small 5/32 holes in the end panels. We then clamped them back together, and drilled matching holes in the side panels and the top rail. Disassembled once more, glued the side panels and the top rail and using small nails as guides, reassembled and clamped, and removed the nails before they got glued into place. I will leave it to set overnight, then use a forstner bit to countersink and set a screw in each of the holes and then put a plug cut from scrap spalted maple in the holes.
- 03 assembly 3.jpg (127.32 KiB) Viewed 5741 times
- 02 assembly 2.jpg (174.04 KiB) Viewed 5741 times
- 01 assembly 1.jpg (190.5 KiB) Viewed 5741 times
Once that is done, I'll install the internal braces for the end panels, measure and cut the wing doors from the prepared spalted maple panels, then begin working on the bottom braces, the legs, and the feet. We are close to the end. You can see what the finished product will look like. Sorta.
You can tell a lot about the character of a man...
by the way he treats those who can do nothing for him.
I don't look back at the things I can no longer do, I just look forward to the things I still can.
by the way he treats those who can do nothing for him.
I don't look back at the things I can no longer do, I just look forward to the things I still can.
-
markiver54
- Deputy Marshal
- Posts: 11156
- Joined: Sun Nov 04, 2018 11:49 am
- Location: Biue Ridge Mountains, NC
Re: A Project For Miss T
Those dogs better love you both!..spoiling them already! . Nice work, looks great!
As for the sewing box; looking great Jim! Bound to be an heirloom. The Spalted Maple is beautiful!
 . Nice work, looks great!
As for the sewing box; looking great Jim! Bound to be an heirloom. The Spalted Maple is beautiful!
I'm your Huckleberry
Re: A Project For Miss T
Boy there would be lots of room for ammo in that box.
Don't let the old man in
H001T .22LR
H001T .22LR MONUMENT VALLEY
H003T PUMP .22LR
BBS .41 MAG
SS .357
SIDE GATE 38-55
H001T .22LR
H001T .22LR MONUMENT VALLEY
H003T PUMP .22LR
BBS .41 MAG
SS .357
SIDE GATE 38-55