Site seems to be OK. Load issue should be resolved now.

Walnut and White Oak Box

Sit back and talk with friends. Same rules as before. Rule #1-Relax with friends on the front or back porch.
Rule #2-No Politics, religion or anything above a G level.
User avatar
BrokenolMarine
Ranch Foreman
Posts: 7493
Joined: Sat Nov 26, 2016 8:28 am
Location: South Central Oklahoma in the mountains
United States of America

Walnut and White Oak Box

Post by BrokenolMarine » Wed Oct 04, 2017 4:59 pm

Starting a NEW PROJECT....

It will be a walnut and White Oak box. The sides and bulk of the box will be Black Walnut... the insert in the top will be Highly Figured white Oak, left over from the Tumbler Project. I have already bookmatched the pieces and have been repairing a hole using the glue and sawdust trick, then using Card Scrapers to work the repairs level.

Here are the repairs around the Figured area... and the knot. Note they are very Proud right now. (sticking well above the surface.) I could use the sander to level them, but that would / could damage the surrounding surfaces. A card scraper is much easier to control, and MUCH cheaper than sandpaper. :lol:
4.jpg
4.jpg (307.07 KiB) Viewed 1732 times
Working with the card scraper I took all the repairs down flush, then carefully inspected, trimmed a couple areas with the exacto-knife and retreated, then smoothed again with the scraper. It literally shaves away the glue layer by layer until we are flush.
5.jpg
5.jpg (282.38 KiB) Viewed 1732 times
When using the scrapers, you can pull toward you, or push away. Looking at the lap of my apron, want to guess if I prefer the push or pull method for best control in MY case?
6.jpg
6.jpg (278.97 KiB) Viewed 1732 times
I am JUST getting warmed up here, but I do have the walnut started as well. I am hoping this will be a very striking box with the blond highly figured white oak top and the Black walnut sides. We'll See. 8-)
You can tell a lot about the character of a man...
by the way he treats those who can do nothing for him.

I don't look back at the things I can no longer do, I just look forward to the things I still can.

User avatar
PT7
Drover
Posts: 4889
Joined: Mon Mar 21, 2016 8:32 am
Location: The Show-Me State
United States of America

Re: Walnut and White Oak Box

Post by PT7 » Wed Oct 04, 2017 10:43 pm

Good stuff, yeah! :) Another fun project to watch....Onward, Marine!

~Пока~

User avatar
BrokenolMarine
Ranch Foreman
Posts: 7493
Joined: Sat Nov 26, 2016 8:28 am
Location: South Central Oklahoma in the mountains
United States of America

Re: Walnut and White Oak Box

Post by BrokenolMarine » Wed Oct 04, 2017 11:02 pm

I'm hoping this will be a good one. I hope to put together four or five boxes by the holidays, and a couple knives and sheaths. I usually donate most of my work, but I may offer a few of these pieces at the fall craft show to resupply, and pay for a couple pieces of equipment for the shop. :roll: (There is a Kreg timber mill sled I have been drooling over for the bandsaw... :roll: ... I could finally process the two dozen black walnut logs I have had drying for two years. :P )
You can tell a lot about the character of a man...
by the way he treats those who can do nothing for him.

I don't look back at the things I can no longer do, I just look forward to the things I still can.

User avatar
clovishound
Drover
Posts: 2527
Joined: Wed Apr 13, 2016 4:18 pm
Location: Summerville SC
United States of America

Re: Walnut and White Oak Box

Post by clovishound » Thu Oct 05, 2017 1:57 am

I love scrapers. They are amazing, yet simple devices. I've made several of my own from old worn out saw plates. Once you learn how to sharpen a scraper, you can do amazing things with them.
There is, I think, humor here which does not translate well from English to sanity. - Sanya

User avatar
BrokenolMarine
Ranch Foreman
Posts: 7493
Joined: Sat Nov 26, 2016 8:28 am
Location: South Central Oklahoma in the mountains
United States of America

Re: Walnut and White Oak Box

Post by BrokenolMarine » Thu Oct 05, 2017 7:58 am

Exactly right, CH, but until you finally learn... :roll: ... developing a good hook on the edge can be a frustrating process. :twisted:
I still find it hit and miss for me... but I don't give up, the rewards are too great. :)
You can tell a lot about the character of a man...
by the way he treats those who can do nothing for him.

I don't look back at the things I can no longer do, I just look forward to the things I still can.

User avatar
clovishound
Drover
Posts: 2527
Joined: Wed Apr 13, 2016 4:18 pm
Location: Summerville SC
United States of America

Re: Walnut and White Oak Box

Post by clovishound » Thu Oct 05, 2017 12:39 pm

The big problem I had in the beginning was taking enough material off in the first step. I was using a block to keep things square to the abrasive and very carefully taking a little at a time off, thinking that a 90 degree was extremely important. What I found in the end was that getting down to the point that you have taken out the rounded part. Once I started using a more aggressive abrasive, and spent a little more time taking the edge down, I started having a lot more success with my edges. Some folks use a flat file, which is very aggressive and works extremely well. You can move to finer grits after that, if you want a smoother surface. These days I start with an aggressive grit and don't bother using a block guide. I just run it free hand until I feel a burr the full length of the scraper on both sides. Then I move to finer grit, if desired, and carefully take the burr off the flat side to get a true square edge to turn my own burr.
There is, I think, humor here which does not translate well from English to sanity. - Sanya

User avatar
BrokenolMarine
Ranch Foreman
Posts: 7493
Joined: Sat Nov 26, 2016 8:28 am
Location: South Central Oklahoma in the mountains
United States of America

Re: Walnut and White Oak Box

Post by BrokenolMarine » Thu Oct 05, 2017 3:31 pm

I use a flat aggressive file, with the card in a vice, freehand. Then knock down the edges with the medium diamond stone. My problem comes during burnishing... lol. I can't seem to consistently get the pressure just right to form the initial burr, that you roll to form your hook. Eventually... I'll get it, and it will become second nature. Like my draw, or tactical reloads. 8-)
You can tell a lot about the character of a man...
by the way he treats those who can do nothing for him.

I don't look back at the things I can no longer do, I just look forward to the things I still can.

User avatar
BrokenolMarine
Ranch Foreman
Posts: 7493
Joined: Sat Nov 26, 2016 8:28 am
Location: South Central Oklahoma in the mountains
United States of America

Re: Walnut and White Oak Box

Post by BrokenolMarine » Fri Oct 06, 2017 5:21 pm

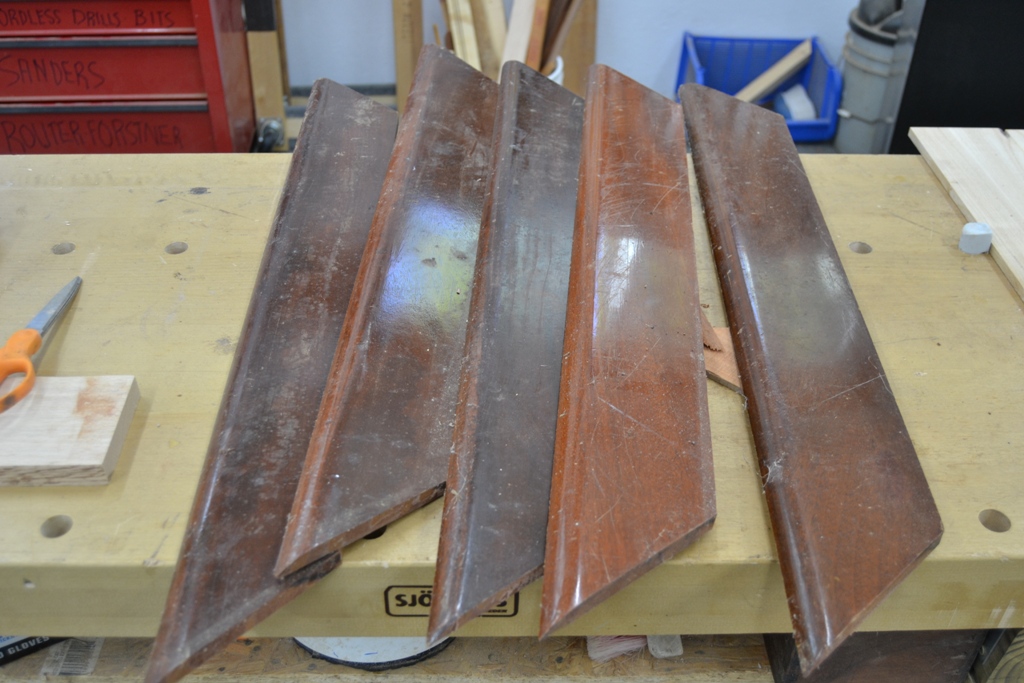
Now that the Tumbler project is behind me, I can concentrate on the box. :) I got in two sessions today, and really made a bit of progress. First, I went out to the woodshed and brought back some Mahogany that used to be table trim at a Florida Golf Course, a gift from dad. I had pre-processed this somewhat, removing it from the MDF felt covered centers and throwing away the centers. :P
1.jpg
1.jpg (304.21 KiB) Viewed 1695 times
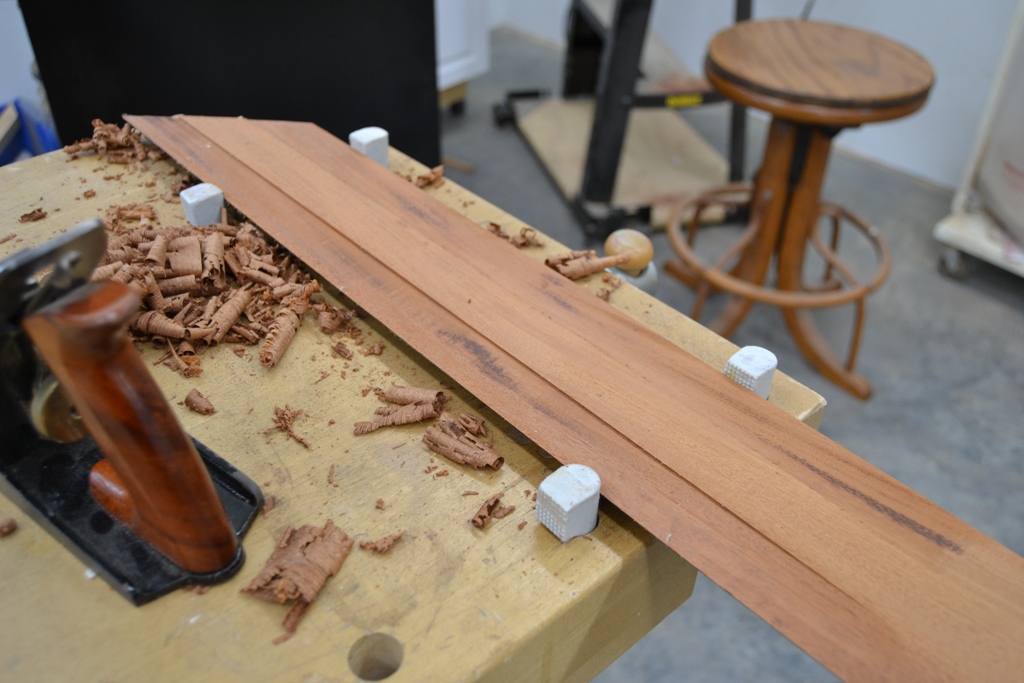
I had bookmatched these on the tablesaw, and there were some flaws on the bottom side, so I needed to address those.
3.jpg
3.jpg (278.68 KiB) Viewed 1695 times
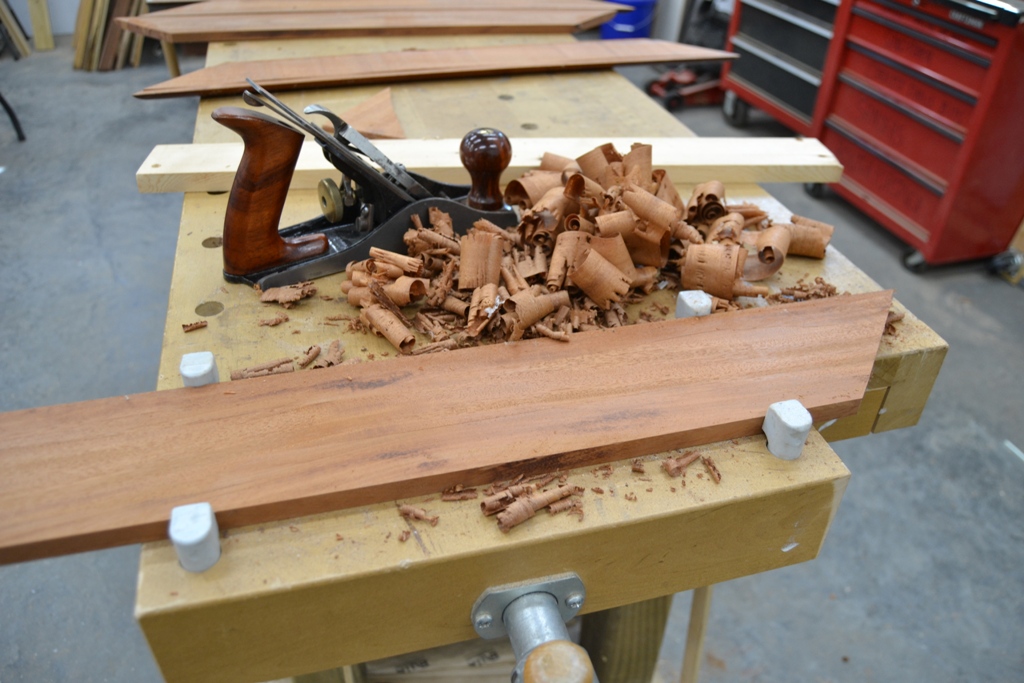
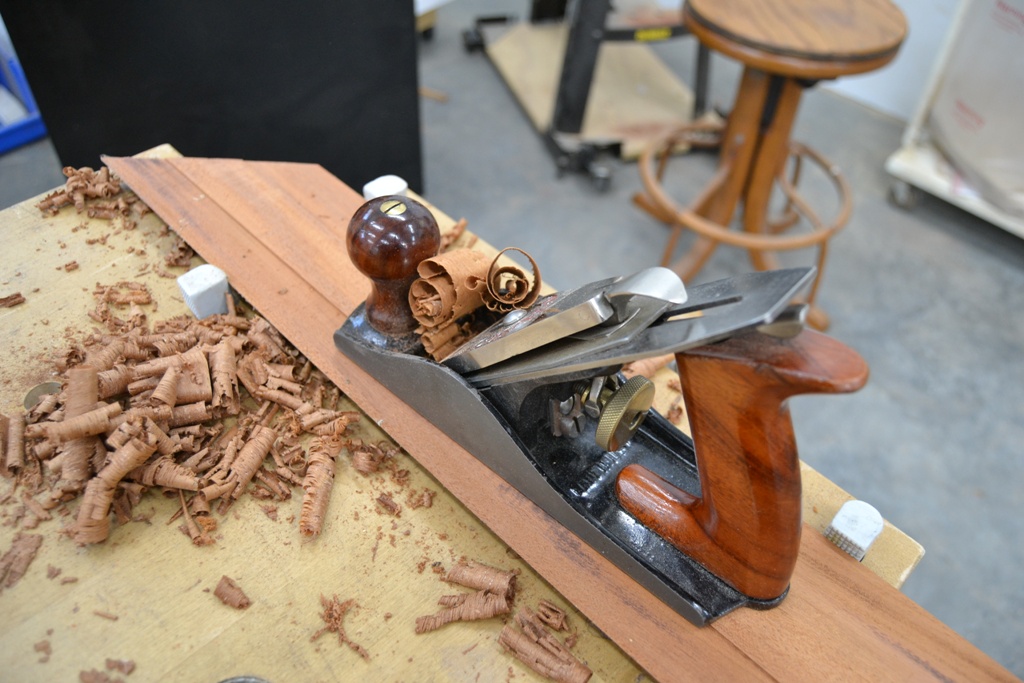
I clamped each of the sections to the benchtop and worked them with one of my planes. The plane did a great job of taking care of the issues, but it was a job... ;) Not that I minded. Beats the noise of the power planer, and lots less dust. Just the whisk of the plane and the shavings...
4.jpg
4.jpg (266.87 KiB) Viewed 1695 times
5.jpg
5.jpg (300.45 KiB) Viewed 1695 times
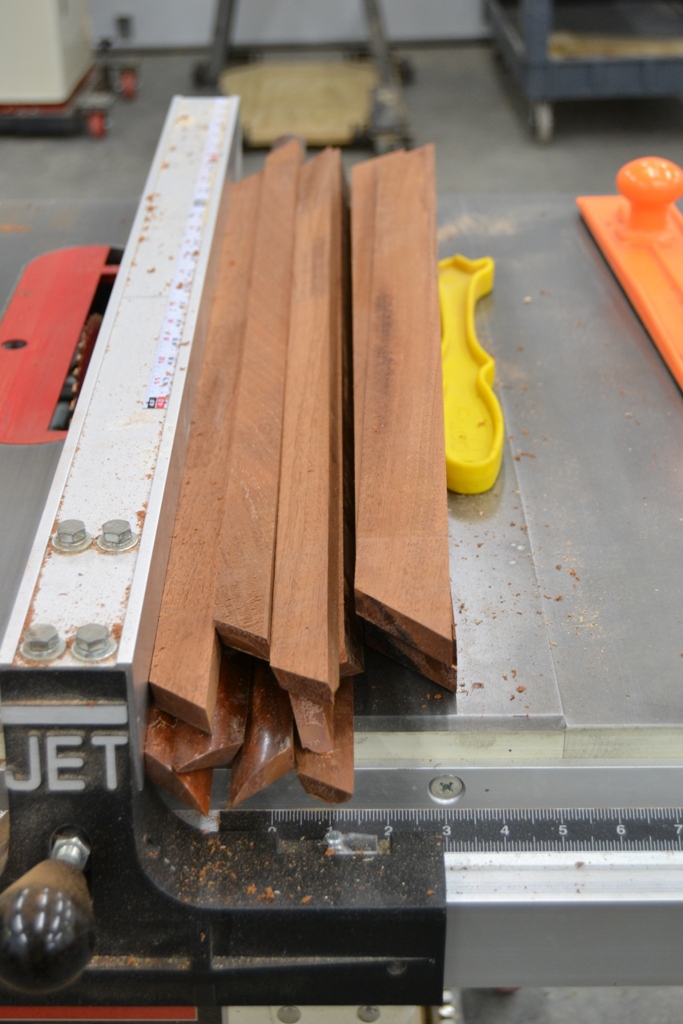
Next came a few setups on the table saw for the mahogany. Each piece was run over the first time to cut the bottom trim for the box. Then a new setup, and another pass to cut a piece to make the frame for the top. Once that was done, I had stacks of mahogany that I'll set aside until I am ready to address it again.
6.jpg
6.jpg (284.54 KiB) Viewed 1695 times
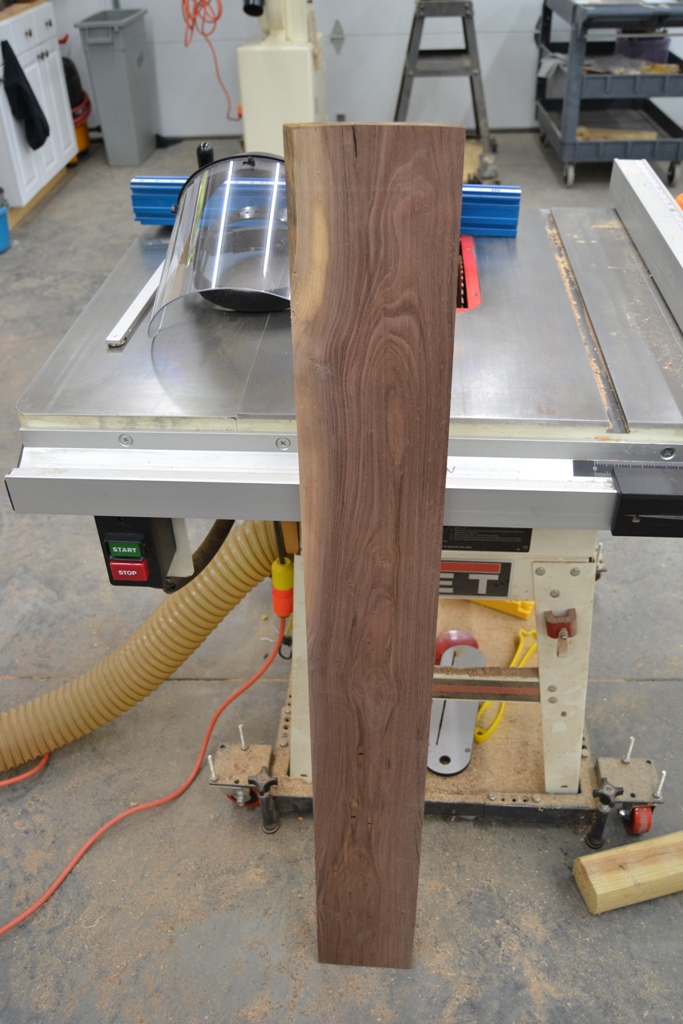
Next I turned to the walnut board for the sides. This I had prepped earlier in the process, planing and truing the edges, but now came time to cut it into two pieces so I could later cut it into the four sides.
2.jpg
2.jpg (313.9 KiB) Viewed 1695 times
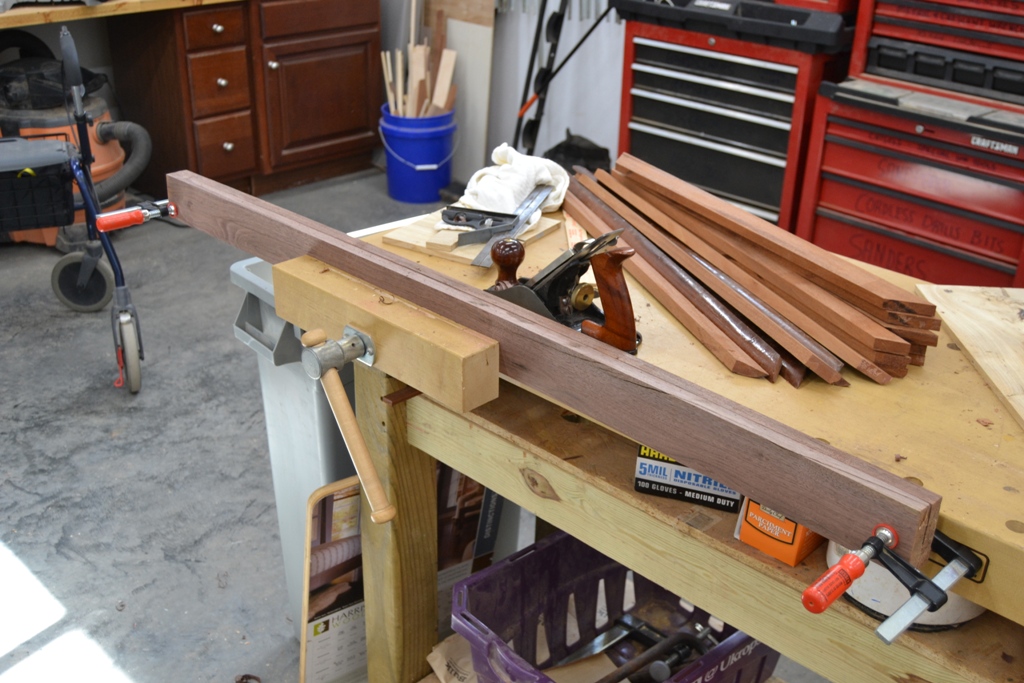
I made two passes, cutting two equal pieces. Still some flaws since this started as walnut with BARK on the edges. :roll: I matched the two pieces together and clamped them tight so they couldn't move, then clamped them in the long bench vise... more plane work to true the edges. If I start the actual build with a quality base, the results turn out much better. Lessons learned the hard way. :oops:
7.jpg
7.jpg (343.19 KiB) Viewed 1695 times
After planing both sides, I ended up with a nice collection of both mahogany and walnut shavings for the wife. She uses them in her wicker gift baskets as fill in the bottoms, then puts her wrapped soaps and lotions on top. Makes a nice display. :)
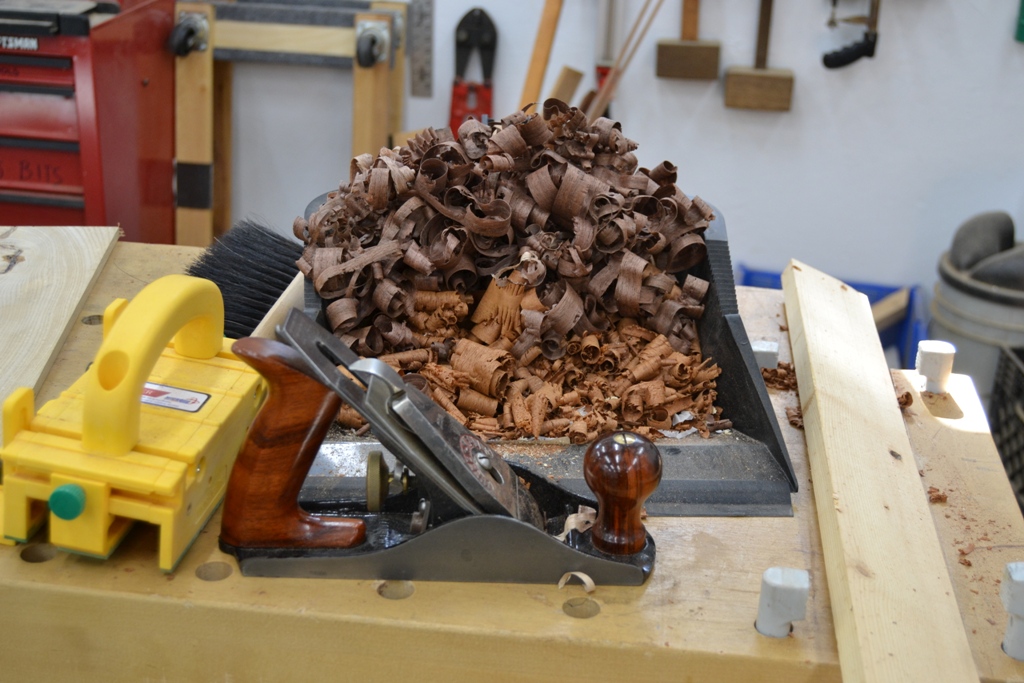
8.jpg
8.jpg (323.3 KiB) Viewed 1695 times
The walnut turned out nice and smooth in the end.....
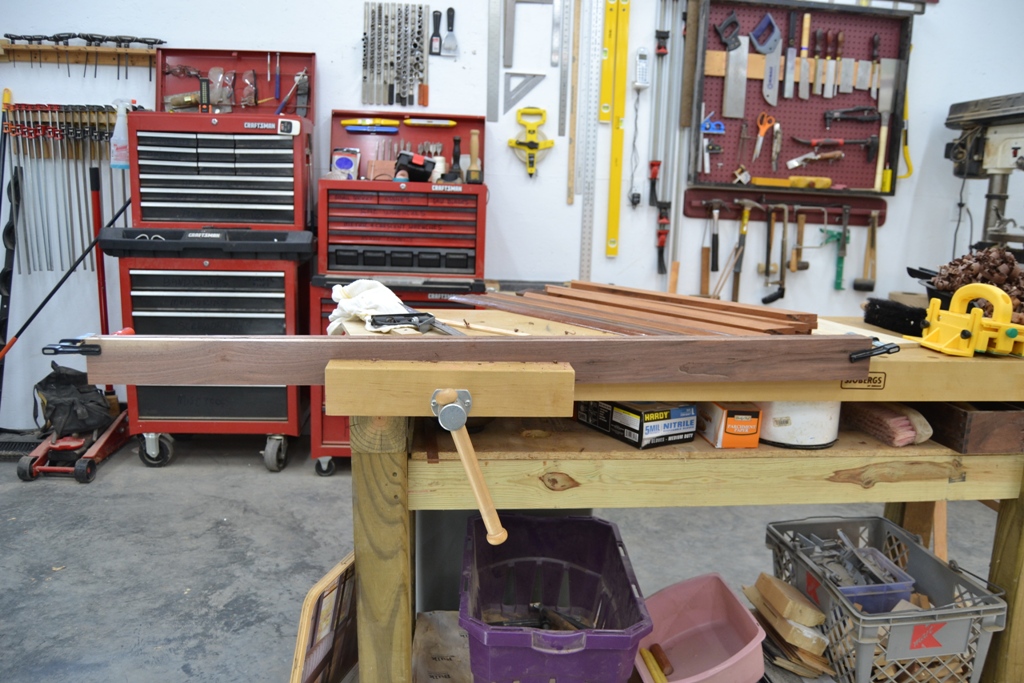
9.jpg
9.jpg (364.88 KiB) Viewed 1695 times
This is where I stopped for the day.
You can tell a lot about the character of a man...
by the way he treats those who can do nothing for him.

I don't look back at the things I can no longer do, I just look forward to the things I still can.

User avatar
PT7
Drover
Posts: 4889
Joined: Mon Mar 21, 2016 8:32 am
Location: The Show-Me State
United States of America

Re: Walnut and White Oak Box

Post by PT7 » Fri Oct 06, 2017 8:44 pm

That reclaimed mahogany is really some nice-looking wood. Over the years whenever driving through residential streets, I thought it was a shame how often I saw good wood put out on trash-collection days. My Dad was an ardent wood cutter and shaper of wood. He loved wood and everything carpentry. He intensely disliked seeing wood thrown away. He was always stopping and helping the trash collectors and relieving their pickup loads along his neighborhood streets! :lol: One of our last projects together was building over-the-head wood storage shelves in my garage out of those "collections." All of that wood served a good purpose.

Great work on finally using the former mahogany table trim, Marine!

And your "shavings stack" looks really cool. Wonderful and colorful use for your wife's gift baskets. :)

~Пока~

User avatar
BrokenolMarine
Ranch Foreman
Posts: 7493
Joined: Sat Nov 26, 2016 8:28 am
Location: South Central Oklahoma in the mountains
United States of America

Re: Walnut and White Oak Box

Post by BrokenolMarine » Fri Oct 06, 2017 9:20 pm

Thanks PT,

I have used several pieces of the mahogany already as trim...
I try and use it for special boxes.

For example, in this first box, I finger jointed spalted maple and mahogany and came up with this little box.
sweet.jpg
sweet.jpg (387.86 KiB) Viewed 1686 times
This next example involves a spalted maple box with the burled maple top, and the mahogany used as trim for the top and bottom. I used a plow plane and antique forming planes to shape the details on the top trim. It was a learning experience. :)
THE box is done.jpg
THE box is done.jpg (282.86 KiB) Viewed 1686 times
You can tell a lot about the character of a man...
by the way he treats those who can do nothing for him.

I don't look back at the things I can no longer do, I just look forward to the things I still can.

User avatar
BrokenolMarine
Ranch Foreman
Posts: 7493
Joined: Sat Nov 26, 2016 8:28 am
Location: South Central Oklahoma in the mountains
United States of America

Re: Walnut and White Oak Box

Post by BrokenolMarine » Thu Oct 12, 2017 7:54 am

I know ya'll think I abandoned this project, but that's not the case. In fact, I planned to work on it first thing yesterday. :roll:
Tina came in and said a window was broken in the coop, and it was still raining, and supposed to rain thru the weekend. Stop the presses. I finally got out in the shop for a couple hours late yesterday evening and cut some dadoes. I'm planning to get back out this morning and get busy...

I should have a report up this evening. :)
You can tell a lot about the character of a man...
by the way he treats those who can do nothing for him.

I don't look back at the things I can no longer do, I just look forward to the things I still can.

User avatar
BrokenolMarine
Ranch Foreman
Posts: 7493
Joined: Sat Nov 26, 2016 8:28 am
Location: South Central Oklahoma in the mountains
United States of America

Box Work.. Molding Planes

Post by BrokenolMarine » Thu Oct 12, 2017 2:33 pm

:P

Got out in the shop twice today, working with the mahogany. I had cut the dadoes yesterday, narrow ones in the top for the inlay of the panel, (on the right) and wider ones in the bottom mahogany for the sides and bottom to nest in. (on your left)
1.jpg
1.jpg (300.59 KiB) Viewed 1442 times
Here is a peek at the top panel cut to size and with the holes filled and worked over with a card file. It's nearly ready for finish, just a bit of final sanding with 220 and 400 grit paper when it's been fitted to the frame and ready.
2.jpg
2.jpg (297.35 KiB) Viewed 1442 times
This morning and afternoon, I worked on the layout plans. First step in using molding planes is to decide which one. I have about a dozen old planes, and after deciding, I had to sharpen the antique irons. The safest way to do that, is to just flatten and true the back of the iron. Get that flat and true and you end up with a sharp edge.
3.jpg
3.jpg (317.5 KiB) Viewed 1442 times
Once the plane is ready, you make multiple passes, engaging the plane more and more on each pass. With this plane, you turn the beading edge just enough to engage on the first few passes, then dig it in more as the beading edge digs in. You "can" reverse direction and come from the other edge making a double beaded edge, however I choose NOT to do so on this top panel, preferring instead to roll the edge smoothly and blend.
4.jpg
4.jpg (266.07 KiB) Viewed 1442 times
5.jpg
5.jpg (252.04 KiB) Viewed 1442 times
6.jpg
6.jpg (249.8 KiB) Viewed 1442 times
I have also sharpened another plane for use on the bottom framing pieces. That is for a later post... I am done for the day. Well, unless I get excited and rush out after dinner and work in the shop for another couple hours. Hey, it's been known to happen. :P
You can tell a lot about the character of a man...
by the way he treats those who can do nothing for him.

I don't look back at the things I can no longer do, I just look forward to the things I still can.

User avatar
BrokenolMarine
Ranch Foreman
Posts: 7493
Joined: Sat Nov 26, 2016 8:28 am
Location: South Central Oklahoma in the mountains
United States of America

working on the box top

Post by BrokenolMarine » Fri Oct 13, 2017 1:44 pm

Got out this morning and worked on the box top, as well as the bottom trim.
First up, used the second molding plane I had sharpened to shape the bottom trim, rolling the edge over to leave a graceful shape. You start by breaking the sharp corner with a light pressure, making increasing passes then rolling the plane more and more toward the lower edge until you have completed the profile. You'll finished off the molding with some sanding on Mahogany, as it has a tendency to pock.
1.jpg
1.jpg (292 KiB) Viewed 1432 times
2.jpg
2.jpg (269.2 KiB) Viewed 1432 times
Take another peek at the beaded profile cut by the other molding plane, quite a difference. :lol:
3.jpg
3.jpg (251.59 KiB) Viewed 1432 times
After that work, I took a break and went inside for a late breakfast, and to rest the old bones.
Back at it afterwards, I carefully measured and cut the frame for the top. Trim, and test fit, trim and test fit, finally adding some pressure. You only turn the crank handle to apply enough pressure to test fit.
Using the band clamp the first time revealed slight gaps caused by the two long sides and required a minute trim of both, the last pressure test was a perfect fit.
4.jpg
4.jpg (294.32 KiB) Viewed 1432 times
At that point you take apart the pieces, apply the glue and make sure each part is properly covered, apply the glue and then reapply the pressure to the band clamp, only this time, you turn the red screw crank as well, cranking until you get squeeze out. This will sit overnight to assure a good bond, and I can work on the sides and bottom. All will require sanding anyway. :lol:
Attachments
5.jpg
5.jpg (313.62 KiB) Viewed 1432 times
You can tell a lot about the character of a man...
by the way he treats those who can do nothing for him.

I don't look back at the things I can no longer do, I just look forward to the things I still can.

User avatar
BrokenolMarine
Ranch Foreman
Posts: 7493
Joined: Sat Nov 26, 2016 8:28 am
Location: South Central Oklahoma in the mountains
United States of America

More work on the top

Post by BrokenolMarine » Sun Oct 15, 2017 2:49 pm

Back out to the shop and got back to work on the top. The underside was rather rough, after removing the shellac finish that was on the wood from it's time as a table top trim. Chemical strippers would have done a fine job, but ... I used a block plane, and stripped it in a couple passes. Time to smooth 'er out. :)
1.jpg
1.jpg (240.35 KiB) Viewed 1428 times
The old card scraper to the rescue. It will get quite a workout on this project, as will all my various planes. After a few minutes with the card scraper you can see the difference. Long way from complete, but....
2.jpg
2.jpg (232.36 KiB) Viewed 1428 times
You can see the nice shavings the scraper cuts in this view... faster and cleaner than sandpaper and leaves a pretty good finish behind for the time involved.
3.jpg
3.jpg (308.84 KiB) Viewed 1428 times
A long view shows I have been hard at work, the floor testifies to that. :lol:
4.jpg
4.jpg (306.68 KiB) Viewed 1428 times
5.jpg
5.jpg (287.97 KiB) Viewed 1428 times
Next up was fine adjustments to the beading, with a very sharp chisel. Fine work takes a fine hand and careful use... NO rushing here. Also, take a look about two inches to the left of the chisel blade. You see the hole in the oak insert? It goes all the way through... :? I took the time to gather dust and pack it, soak it in CT Hot Stuff Glue and spray it with accelerator to speed the curing process... and then sand and repack... until the hole was, fixed.
6.jpg
6.jpg (251.92 KiB) Viewed 1428 times
After that work was complete, I worked on the top of the top for a good while, bringing all four edges down to the level of the insert, and smoothing as much as I could. I'll save the 400 grit sanding until the entire box is complete and ready for final sanding. The repaired hole that went all the way through? It's at three o'clock in the picture below, slightly below and to the right of the scraper blade. :)
7.jpg
7.jpg (230.76 KiB) Viewed 1428 times
Next task in the shop is building the sides... Walnut.. whoo hoo. :lol:
You can tell a lot about the character of a man...
by the way he treats those who can do nothing for him.

I don't look back at the things I can no longer do, I just look forward to the things I still can.

User avatar
BrokenolMarine
Ranch Foreman
Posts: 7493
Joined: Sat Nov 26, 2016 8:28 am
Location: South Central Oklahoma in the mountains
United States of America

Coming Along

Post by BrokenolMarine » Tue Oct 17, 2017 11:53 am

Working on the Walnut Sides.... and it gives me a chance to pull in more of the various tools. :D
I measured out and cut the four sides, then a groove in the bottom of all four for the bottom panel. Both the side panels and the bottom will sit in the trim, unless I decide to just toss that. ;)

After I cut the groove with three passes on the table saw, I used a Veritas Shoulder Plane to flatten the bottom of the notch. My memory is terrible these days, but I think that type of notch is called a rabbit. :? The shoulder plane is a joy to use, especially after sharpening the iron. :P Every tool with an edge works better with the edge is sharp. :roll:
1.jpg
1.jpg (297.01 KiB) Viewed 1419 times
After checking the cuts, making sure I was ready, I applied the glue and attached the band clamps... two due to the width. I let the piece set up over night.
2.jpg
2.jpg (336.2 KiB) Viewed 1419 times
This morning, I removed the clamps and put them away. Time for cleanup. I used several tools to remove excess glue squeezeout, and used my plane to true up the top edges. Then on to the scraper on the edges and the sides. There was ONE defect in the top edge I wanted to address, it was a long deep crack.
3.jpg
3.jpg (216.28 KiB) Viewed 1419 times
This calls once again for Hot Stuff CT to the rescue.
4.jpg
4.jpg (275.08 KiB) Viewed 1419 times
Apply a layer of CT
5.jpg
5.jpg (211.41 KiB) Viewed 1419 times
and then a spritz of the accelerator... and
6.jpg
6.jpg (185.38 KiB) Viewed 1419 times
I run the scraper over the area a couple times and check my progress, and then repeat the two steps until the area is flush and smooth. You can sometimes use fine sawdust mixed in to fill larger gaps. Not needed here, as the glue is clear and the black walnut makes the hole appear filled when the repair is completed.

Placing the top of the "box" gives me a peek at the contrast... I think it will look pretty good when finished. I am thinking this will be a Man's Box, with a removable tray for rings and such that slides from side to side. Under the tray will be storage. we'll see how it goes.
7.jpg
7.jpg (243.62 KiB) Viewed 1419 times
You can tell a lot about the character of a man...
by the way he treats those who can do nothing for him.

I don't look back at the things I can no longer do, I just look forward to the things I still can.

User avatar
BrokenolMarine
Ranch Foreman
Posts: 7493
Joined: Sat Nov 26, 2016 8:28 am
Location: South Central Oklahoma in the mountains
United States of America

Trim Work

Post by BrokenolMarine » Wed Oct 18, 2017 1:32 pm

I decided to start on the bottom trim today, and I had been looking at it in comparison to the rest of the box, and had a feeling it would be too wide. I put it against the box and took a look and.. :cry: ... yup, I felt aesthetically, it was not in balance with the rest of the box.
2.jpg
2.jpg (260.59 KiB) Viewed 1404 times
So, I took a few measurements and decided where I wanted to end up, set up the tablesaw and ripped down the length, trimming off the rolled edge.
I then re-rolled the edge with the same molding plane.
3.jpg
3.jpg (280.31 KiB) Viewed 1404 times
4.jpg
4.jpg (273.87 KiB) Viewed 1404 times
5.jpg
5.jpg (283.91 KiB) Viewed 1404 times
As I was rolling the edge, I felt the plane start to drag and the iron started to dig, time to resharpen the iron. A few passes on the medium diamond stone, the 1000 grit and 4000 grit water stone, and the leather strop, and we were back in business.
6.jpg
6.jpg (223.68 KiB) Viewed 1404 times
A good morning's work produced four new pieces of bottom trim
7.jpg
7.jpg (238.54 KiB) Viewed 1404 times
And a quick check showed they would be more in balance with the rest of the project.
8.jpg
8.jpg (276.12 KiB) Viewed 1404 times
The next trip to the shop will have me cutting them to fit, and adding the interior panel for the bottom. We are moving closer to the point where I begin to start the real finish sanding and apply the finishes.
:D
You can tell a lot about the character of a man...
by the way he treats those who can do nothing for him.

I don't look back at the things I can no longer do, I just look forward to the things I still can.

User avatar
BrokenolMarine
Ranch Foreman
Posts: 7493
Joined: Sat Nov 26, 2016 8:28 am
Location: South Central Oklahoma in the mountains
United States of America

Re: Walnut and White Oak Box

Post by BrokenolMarine » Sat Oct 21, 2017 4:17 pm

Out in the shop on Thursday, I cut and fitted the bottom Mahogany Trim... and it looked pretty good.
1.jpg
1.jpg (274.51 KiB) Viewed 1394 times
I took Miss T to the airport yesterday, for her 0530 boarding. Got up at 2am and left by 300 so we could have her there NO later than 0430. :roll: Didn't want to take any chances of her missing the flight. We were actually out the door by about 20 of 300 and she was there just after 400. NO traffic to speak of.

After I had my coffee and breakfast I was able to drag myself out to the shop and get some sanding done... on the entire box.

This morning? I figured it was about time to add the hinge, getting close to time for the finishes... so may as well. I could pull out one of the routers, but... :roll: Noisey, messy, and one slip and with all those RPMs they do a lot of damage in a fraction of a second. :o

More importantly, I had promised myself I would do as MUCH as I can with handtools and I enjoy the challenges. Out came the chisels and stones, just a touch up, they were sharp. Fitted the hinge and made my marks, got started.
2.jpg
2.jpg (291.79 KiB) Viewed 1394 times
3.jpg
3.jpg (220.55 KiB) Viewed 1394 times
4.jpg
4.jpg (258.58 KiB) Viewed 1394 times
It was a slow process, but I actually had a pretty good time and was happy with the results. I'll put the initial finish on all the parts, then do the glue up. I'll attach the hinge last.
You can tell a lot about the character of a man...
by the way he treats those who can do nothing for him.

I don't look back at the things I can no longer do, I just look forward to the things I still can.

User avatar
BrokenolMarine
Ranch Foreman
Posts: 7493
Joined: Sat Nov 26, 2016 8:28 am
Location: South Central Oklahoma in the mountains
United States of America

Applied some finish...

Post by BrokenolMarine » Sun Oct 22, 2017 1:57 pm

Always my favorite time of a project... when the finish is applied and you get to see the real grain for the first time. The grain in the white oak insert in the top really came alive when I applied the Red Oak Watco Oil... it jumped out at me and make me grin like an idiot. Luckily I was alone in the shop. :lol:

Before I ever apply finish, I always take offcuts, and apply two or three of the prospective finishes to a sample of each wood involved. This morning, I applied Golden Oak, Natural, and Dark Walnut to the Offcuts from the White Oak, the Walnut, and the Mahogany. I ended up choosing Dark Walnut for the Walnut and the Golden Oak for the other two. I am pretty happy with the results.
1.jpg
1.jpg (263.14 KiB) Viewed 1388 times
2.jpg
2.jpg (296.54 KiB) Viewed 1388 times
3.jpg
3.jpg (223.22 KiB) Viewed 1388 times
I may apply one more coat to each and then assemble the pieces, or assemble the project and then apply another coat of Golden Oak to the entire project. Applying the Oak over the walnut will just give it a warmer appearance without darkening the walnut. Once the oil dries for a few days, I can wax it to give 'er a nice soft sheen.
You can tell a lot about the character of a man...
by the way he treats those who can do nothing for him.

I don't look back at the things I can no longer do, I just look forward to the things I still can.

User avatar
BrokenolMarine
Ranch Foreman
Posts: 7493
Joined: Sat Nov 26, 2016 8:28 am
Location: South Central Oklahoma in the mountains
United States of America

Assembly has begun...

Post by BrokenolMarine » Mon Oct 23, 2017 5:49 pm

I started assembly this afternoon. The first step was fitting the trim around the bottom of the box. To get the trim to match up, I used the shoulder plane to trim the inside shoulder to mate the trim. I inverted the box frame and inserted the bottom, the bottom is free floating and the trim holds it in place.
1.jpg
1.jpg (305.93 KiB) Viewed 1381 times

After fitting each piece of trim, I coated the inside edges of the trim with glue, spread it evenly and then shot a few pins with the pneumatic pinner to hold it in place until the glue dried, then moved to the next piece. I would trim and try, trim and try until the shoulder plane did it's work. Once all the bottom trim was in place, I coated the entire project with an additional coat of the Golden Oak Watco Oil as planned. This included the top, which has yet to be attached with the hinge. I will do this on Wednesday, after waxing both components with the first coat of wax and buffing them out.

Here is what she'll look like when she is done. (Pretty much.... ) :roll:
2.jpg
2.jpg (276.04 KiB) Viewed 1381 times
You can tell a lot about the character of a man...
by the way he treats those who can do nothing for him.

I don't look back at the things I can no longer do, I just look forward to the things I still can.

User avatar
JEBar
Town Marshal / Deputy Admin
Posts: 20439
Joined: Sun Mar 20, 2016 10:58 pm
Location: central NC
United States of America

Re: Walnut and White Oak Box

Post by JEBar » Mon Oct 23, 2017 7:20 pm

nicely done, nicely done indeed

Post Reply