Site seems to be OK. Load issue should be resolved now.

New Project: Ticket Tumbler for Charity

Sit back and talk with friends. Same rules as before. Rule #1-Relax with friends on the front or back porch.
Rule #2-No Politics, religion or anything above a G level.
User avatar
BrokenolMarine
Ranch Foreman
Posts: 7494
Joined: Sat Nov 26, 2016 8:28 am
Location: South Central Oklahoma in the mountains
United States of America

New Project: Ticket Tumbler for Charity

Post by BrokenolMarine » Tue Aug 29, 2017 2:15 pm

As I mentioned, the old tumbler was something Miss Tina threw together at the last minute years ago when they decided to have a raffle... at the last minute. :lol:
5.jpg
5.jpg (307 KiB) Viewed 1916 times
Hey, it did the job for years, until the raffle got so big that the tickets filled the cage and there wasn't room for another ticket in the dang thing and NOTHING tumbled. Last year they ended up dumping tickets in a giant rubber made bin, and "trying" to mix them by hand. :roll: That didn't work and about 90% of the winning tickets came from the same general batch of numbers. :twisted: :evil: :x The crowd wasn't happy.

Miss Tina told the owner of the Company that has put on the Tournament for nearly ten years, "Jim will be happy to make a new tumbler before next year rolls around." :? Ah.. what? Sure, I'd be happy to do it babe, but ASK me before you volunteer me. We brought the old tumbler home. Not that I needed a reference, but because Miss Tina thought I did. :lol:

I drew up some sketches back in June, but other projects got my attention and I shoved the plans in the shelves and didn't look at them again for a while. I pulled them down this morning and got started. Eh, I got distracted here and there, little housekeeping tasks, that popped up. Clean the filter on the big dustcatcher and the filter on the vacuum... but I got a lot done.

First I had to look over the plans... and remember what I had decided.
2.jpg
2.jpg (199.81 KiB) Viewed 1916 times
Then I gather my drawing tools, and after cutting a pair of proper sized panels, carefully drew out the end panels for the tumbler basket. I started with the 18" circle and then broke it into 16 3.5" slices. Careful measurements will make a lot of difference all thru the project.
7.jpg
7.jpg (275.46 KiB) Viewed 1916 times
4.jpg
4.jpg (227.82 KiB) Viewed 1916 times
Careful work on the table saw and the disc sander resulted in the completed end panels. Now I need to decide on the wood I'll use to make the panels for the basket, and cut them to length. They have to have angled sides at 11.5 degrees to fit neatly together without a gap. I also need two windows, so I need a couple panels with plexiglass inserts. Folks LIKE to see the tickets are tumbling and mixing.
8.jpg
8.jpg (276.79 KiB) Viewed 1916 times
I'll stop by Home Depot tomorrow on the way home from a lunch meeting and pick up some wood, either ply panels or a couple cedar or oak boards.
This will be built to last, so I want it to be WELL built. :D It's for the charity so I want them to be proud of it.
You can tell a lot about the character of a man...
by the way he treats those who can do nothing for him.

I don't look back at the things I can no longer do, I just look forward to the things I still can.

User avatar
Sir Henry
Administrator / Owner
Posts: 14721
Joined: Sun Mar 20, 2016 10:58 pm
Location: Price County Wisconsin
United States of America

Re: New Project: Ticket Tumbler for Charity

Post by Sir Henry » Wed Aug 30, 2017 12:55 pm

Great project. But you need a Henry coffee cup in the pictures. :D
Hi, my name is Gene and I'm a Henryholic from Wisconsin.

Range Reporter: Henry Repeater

User avatar
BrokenolMarine
Ranch Foreman
Posts: 7494
Joined: Sat Nov 26, 2016 8:28 am
Location: South Central Oklahoma in the mountains
United States of America

Re: New Project: Ticket Tumbler for Charity

Post by BrokenolMarine » Wed Aug 30, 2017 3:00 pm

I'll have to get a big henry mug!
You can tell a lot about the character of a man...
by the way he treats those who can do nothing for him.

I don't look back at the things I can no longer do, I just look forward to the things I still can.

User avatar
ditchparrot
Cowhand
Posts: 317
Joined: Fri May 27, 2016 10:32 pm
Location: Humboldt, AZ
United States of America

Re: New Project: Ticket Tumbler for Charity

Post by ditchparrot » Wed Aug 30, 2017 10:28 pm

Both my older and younger brothers (and to a lesser extent, my wife) have the same type of design-and-build skills that you possess. For some reason, I got skipped entirely in regard to those.

I'm quite envious!
Henry Big Boy Rifle .357
Henry Classic .22
Henry Lever-Action .410
Henry Big Boy Revolver .357

User avatar
BrokenolMarine
Ranch Foreman
Posts: 7494
Joined: Sat Nov 26, 2016 8:28 am
Location: South Central Oklahoma in the mountains
United States of America

Re: New Project: Ticket Tumbler for Charity

Post by BrokenolMarine » Wed Aug 30, 2017 10:43 pm

Another key point to keep in mind for the interior of the drum is a tight fit, all rounded edges, and no gaps. :) You don't want your supporters to look in the spinning drum and see even one raffle ticket pinched in between the side of the drum and the edge, an edge board and a "stirring paddle," or hung up on the center axle by a splinter. :( if they do, their first thought will be:
"I know that's my ticket." :evil: With MY crappy luck in raffles, I know that would be my first thought. ;) Of course, in my case, with my luck, it WOULD be my darn ticket. :twisted: :evil: :cry:

So, I will be very careful on this build. 8-)
Last edited by BrokenolMarine on Fri Sep 01, 2017 11:35 am, edited 1 time in total.
You can tell a lot about the character of a man...
by the way he treats those who can do nothing for him.

I don't look back at the things I can no longer do, I just look forward to the things I still can.

User avatar
BrokenolMarine
Ranch Foreman
Posts: 7494
Joined: Sat Nov 26, 2016 8:28 am
Location: South Central Oklahoma in the mountains
United States of America

Re: New Project: Ticket Tumbler for Charity

Post by BrokenolMarine » Thu Aug 31, 2017 7:30 pm

Got some work in today, concentrated on more work on the basket for the tumbler. The first step was smoothing the edges of the sides. As you can see in the picture, the edges were left fuzzy by the sanding. I took a sanding block with some 220 grit paper and knocked off the fuzz on both sides of each of the 16 3.5" sides, careful not to change the flat edge. No rush.
1.jpg
1.jpg (188.95 KiB) Viewed 1884 times
The next problem was to decide HOW to keep the basket from turning freely on the dowel. There are a number of ways to do it, and each works, but I didn't have a pocket jig to set pocket screws, didn't want to trust the entire project to gluing both sides to the dowel. So, I cut a pocket on the inside of one side, and set a small nail in the dowel. (Reminiscent of the shear pin in the small outboard motor that kept the prop spinning when I was a kid.)
2.jpg
2.jpg (168.43 KiB) Viewed 1884 times
3.jpg
3.jpg (167.04 KiB) Viewed 1884 times
Another nail set tight against the outside of the panel holds it tight against the pocket keeping the "makeshift shear pin" :roll: seated. The outside nail will be covered by the "bearing" later.

I began cutting the panels for the drum, and adding paddles to some of them panels, that will cause the tumbling raffle tickets to "mix." I figure paddles on about a third of the panels will be plenty. :) Funny, as hard as I tried, the "3.5" sides aren't consistent, and each panel had to be fine tuned. This gave me a headache and I broke for lunch.. and a migraine tab. :x I did manage to cut the Plexiglass windows as well.
4.jpg
4.jpg (277.06 KiB) Viewed 1884 times
5.jpg
5.jpg (268.92 KiB) Viewed 1884 times
After lunch I was back at it, and began to install the panels I had cut, as well as making a few additional panels. I still had a bit of a headache and the detail work brought it back, so I quit for the day. Here are the sheets that the panels are coming from... 1/4" stock with decent grain. I am taking my time and doing the best I can. I have until late April... so if this doesn't work out, it can be used as kindling, and I'll start over with HARDWOOD, more expensive, but better results. After all, it's for Charity.
6.jpg
6.jpg (304.42 KiB) Viewed 1884 times
Here we are so far, there are other panels standing by for tomorrow and the Plexiglass will be installed LAST to avoid chipping or scratching. Cutting plexi has a HIGH pucker factor for me. :? :shock:
7.jpg
7.jpg (298.92 KiB) Viewed 1884 times
More tomorrow.
You can tell a lot about the character of a man...
by the way he treats those who can do nothing for him.

I don't look back at the things I can no longer do, I just look forward to the things I still can.

User avatar
BrokenolMarine
Ranch Foreman
Posts: 7494
Joined: Sat Nov 26, 2016 8:28 am
Location: South Central Oklahoma in the mountains
United States of America

Re: New Project: Ticket Tumbler for Charity

Post by BrokenolMarine » Thu Aug 31, 2017 11:40 pm

Btw, I forgot to mention... :roll: ... for the fit to be right and the gap to close, the angle on the edge of the panels has to be 11.25 degrees. :D Luckily I learned proper set up. :D
You can tell a lot about the character of a man...
by the way he treats those who can do nothing for him.

I don't look back at the things I can no longer do, I just look forward to the things I still can.

User avatar
PT7
Drover
Posts: 4889
Joined: Mon Mar 21, 2016 8:32 am
Location: The Show-Me State
United States of America

Re: New Project: Ticket Tumbler for Charity

Post by PT7 » Fri Sep 01, 2017 8:15 am

Thumbs up on being careful with this build, Marine. I never would have considered the possibility of a hung up raffle ticket as you did. A very good sense caution in place! The folk should be quite happy with the tumbler.

BrokenolMarine wrote:Another key point to keep in mind for the interior of the drum is a tight fit, all rounded edges, and no gaps. :) You don't want your supporters to look in the spinning drum and see even one raffle ticket pinched in between the side of the drum and the edge, an edge board and a "stirring paddle," or hung up on the center axle by a splinter. :( if they do, their first thought will be:
"I know that's my ticket." So, I will be very carefull on this build. 8-)

~Пока~

User avatar
BrokenolMarine
Ranch Foreman
Posts: 7494
Joined: Sat Nov 26, 2016 8:28 am
Location: South Central Oklahoma in the mountains
United States of America

Re: New Project: Ticket Tumbler for Charity

Post by BrokenolMarine » Fri Sep 01, 2017 11:39 am

I should have been more careful on my spelling. :oops:

I went back out to the shop this morning, and after careful consideration of the progress so far... :roll: I was not happy with the progress. Watch for tonight's report for the actions I ended up taking. They did NOT involve fire. ;)
You can tell a lot about the character of a man...
by the way he treats those who can do nothing for him.

I don't look back at the things I can no longer do, I just look forward to the things I still can.

User avatar
BrokenolMarine
Ranch Foreman
Posts: 7494
Joined: Sat Nov 26, 2016 8:28 am
Location: South Central Oklahoma in the mountains
United States of America

Restart, Retry, A New Beginning....

Post by BrokenolMarine » Sat Sep 02, 2017 3:09 pm

Restart, Retry, A New Beginning....

As I said yesterday, I went into the shop and looked at the progress to that point with a critical eye, :x and was NOT happy. I saw that the 1/4 inch ply was too thin. The glue up from the night before where the two panels were touching, had failed to join due to the flexing of the panels. Not good. This early in the project to have a failure? Not.. :evil: I took the leather mallet and knocked off the three panels and ... I also was not happy with the 16 sides. They were inconsistent. Not off by much, but off. Back to the drawing board, literally.

I pulled out the necessary items and reduced the size from 18 to 16 inches and redrew the sides, carefully measuring each and every panel, so that they were exactly 3-1/8... exactly. :) But first, I had to be able to find center... not easy with the 7/8 hole in the center. :roll: Plug... that's what I needed, a temporary plug.
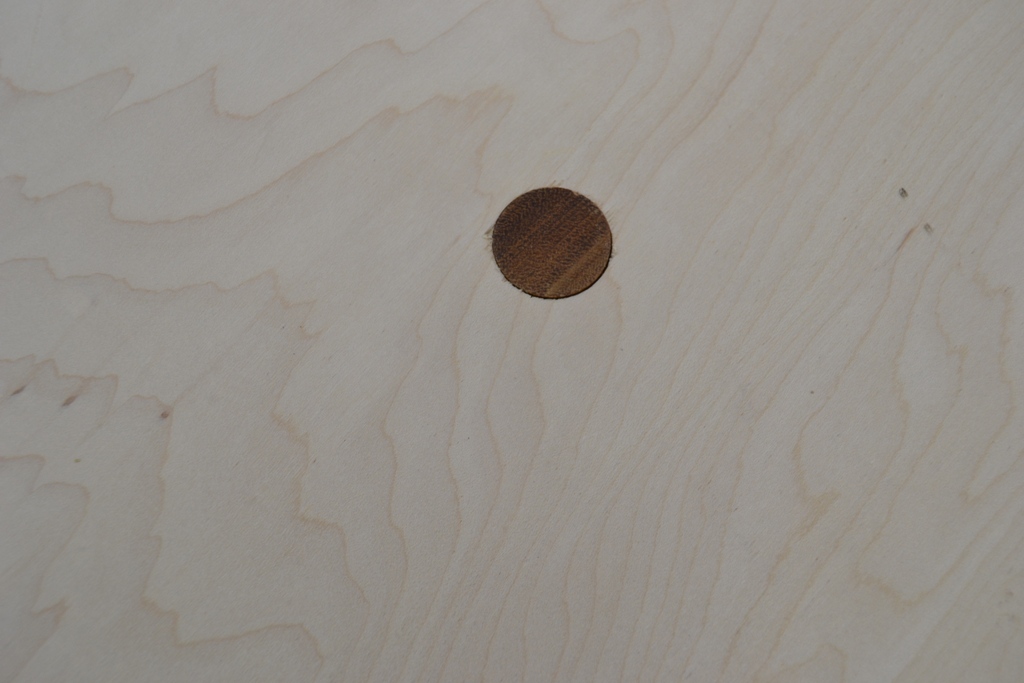
1.jpg
1.jpg (227.97 KiB) Viewed 1863 times
Once the plug was in place, I needed a way to draw on the plug. Blue painters tape to the rescue once again. Temporary and easy to remove. Get started.
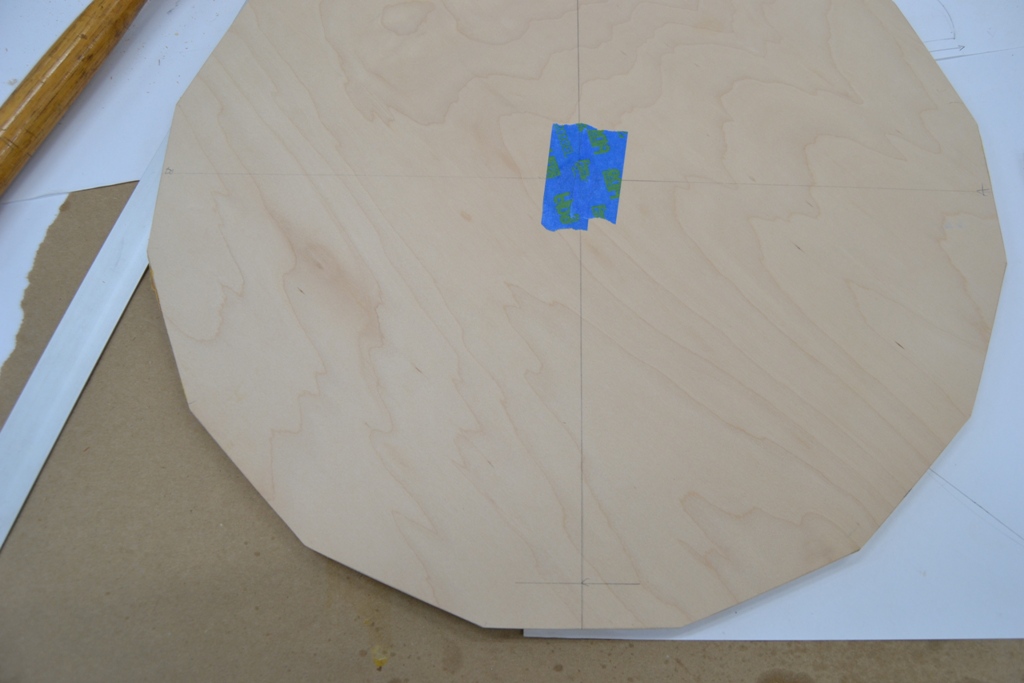
2.jpg
2.jpg (207.95 KiB) Viewed 1863 times
Taking my time, measuring each and every mark and stroke, I got the 16 sides carefully drawn. They were all exactly the same length and the ends were exactly 8 inches from center. This should work. :)
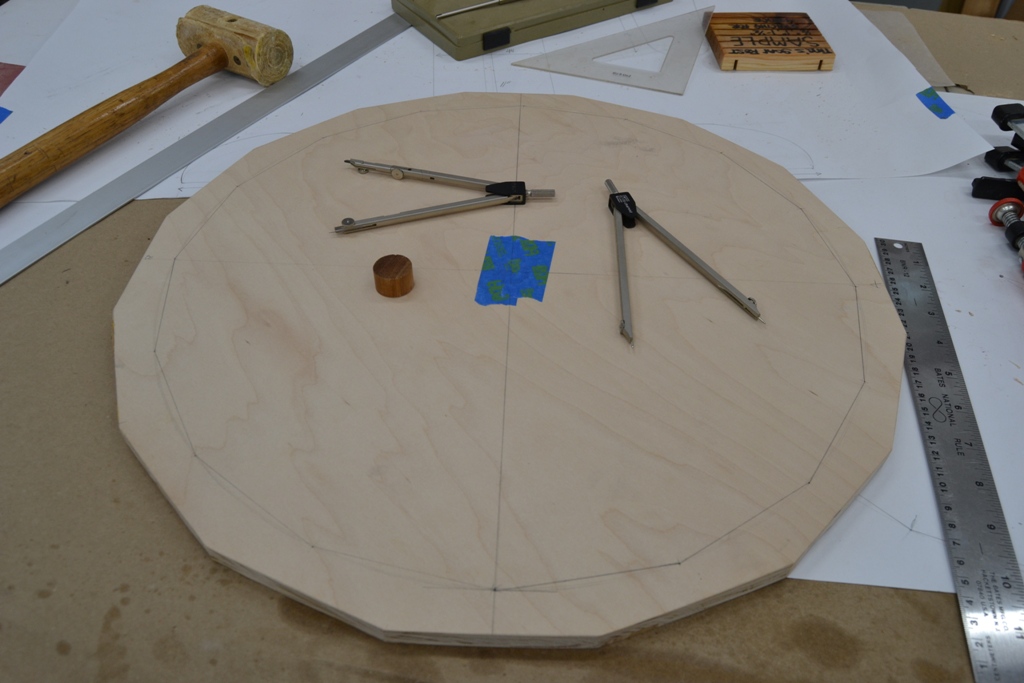
3.jpg
3.jpg (233.45 KiB) Viewed 1863 times
I repeated the process and once both ends were marked I moved to the table saw and made the cuts. I fitted the two panels together, expecting a perfect match. :twisted: I was NOT happy once more. Looks like I needed to purchase the angle cutting jig for the saw, and that isn't happening. Perhaps the 16 sides might be the problem. Back to the drawing board. I redrew the panel one last time with EIGHT sides... and cut them with a plug in place so they were cut simultaneously. Score! ;) Close enough... Ah.. That'll do Donkey.
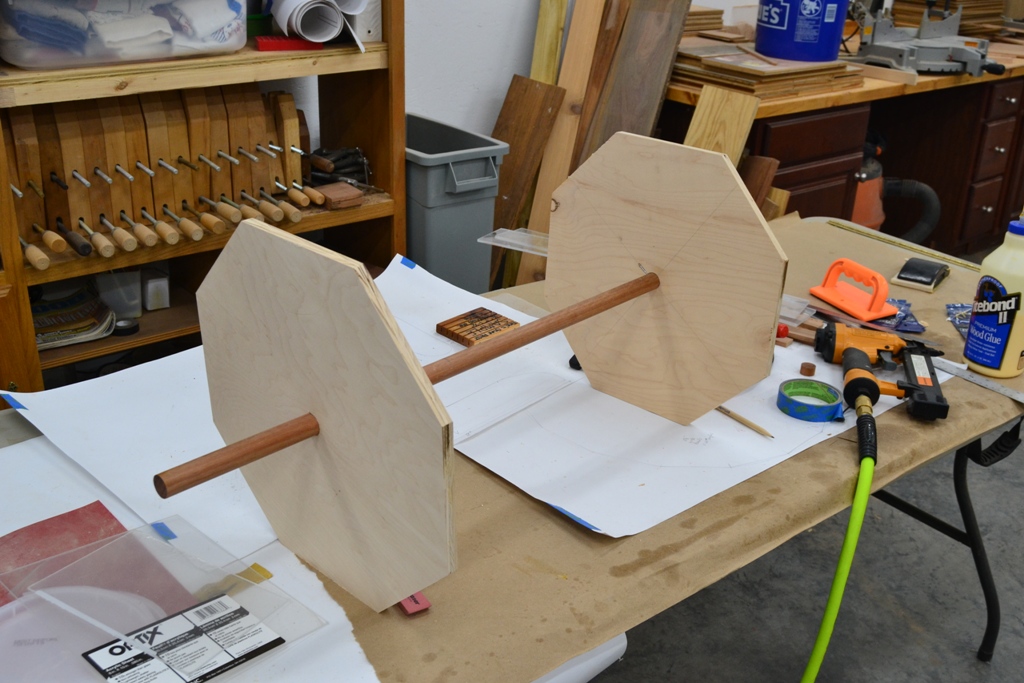
4.jpg
4.jpg (315.22 KiB) Viewed 1863 times


Good thing that worked out. :D I was ready to burn all the remains from this mess and scrap whole project. I would just throw together this and that and make another wire one. (NOT). :twisted:

Now for the panels for the drum... What to do for those. I was NOT using plywood, too flimsy unless I go with the 3/4 sheets and they are about $50 for the cabinet grade. I could pick up three or four cedar boards... look better than the ply and actually be cheaper... but I have wood in the boathouse. :roll: ;) Wonder what's out there? Drive out to the boathouse in the Ranger and poke around. Nope, too thick. Nope, Cherry, too expensive. NO way, black walnut, too pretty for THIS job... :P Oh, wait, here are a couple boards that will go well with the maple sides.
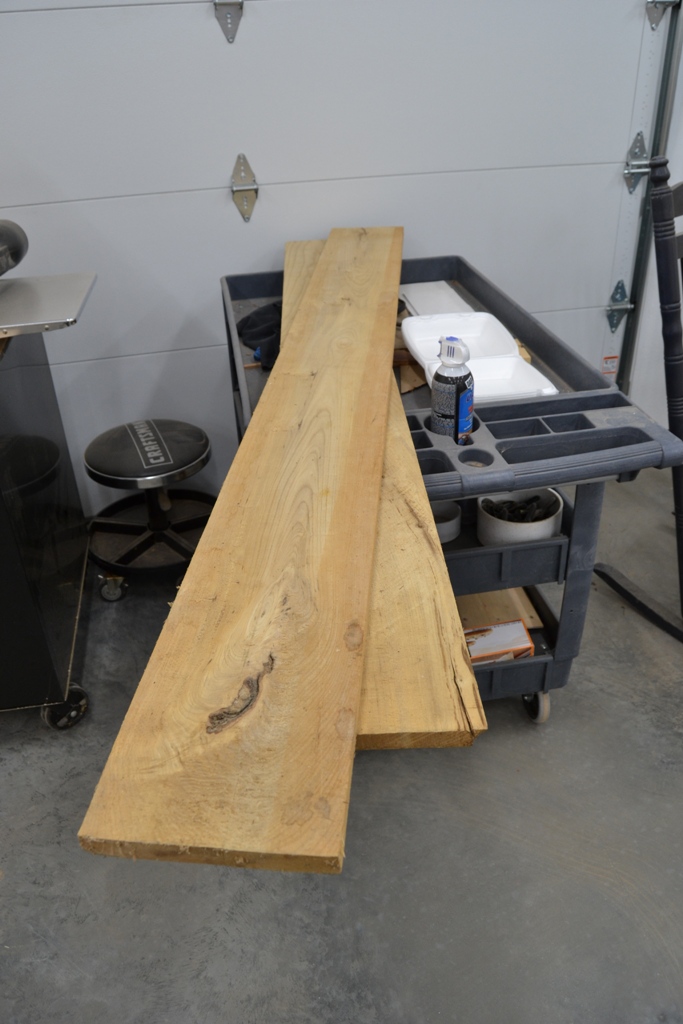
5.jpg
5.jpg (248.17 KiB) Viewed 1863 times
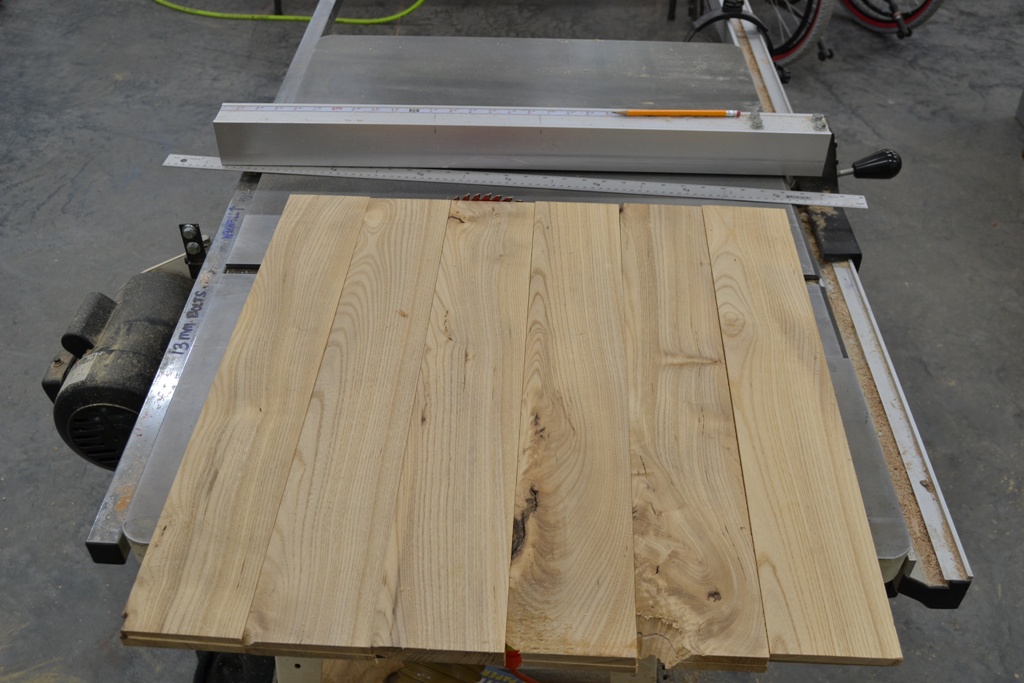
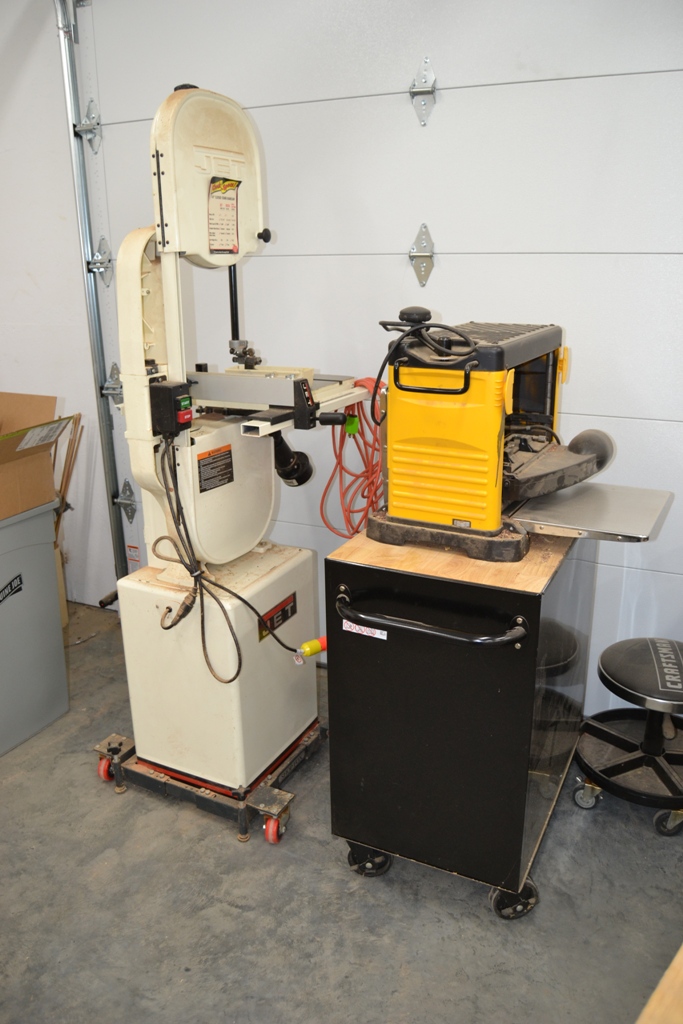
I think this is ASH, but it could be White Oak. Regardless, it will require a lot of work to make it ... um... work. Trips thru the planer, and then book matching thru the band saw. I had to change the blades on both... NOT cheap. But they needed it anyway.
6.jpg
6.jpg (281.34 KiB) Viewed 1863 times
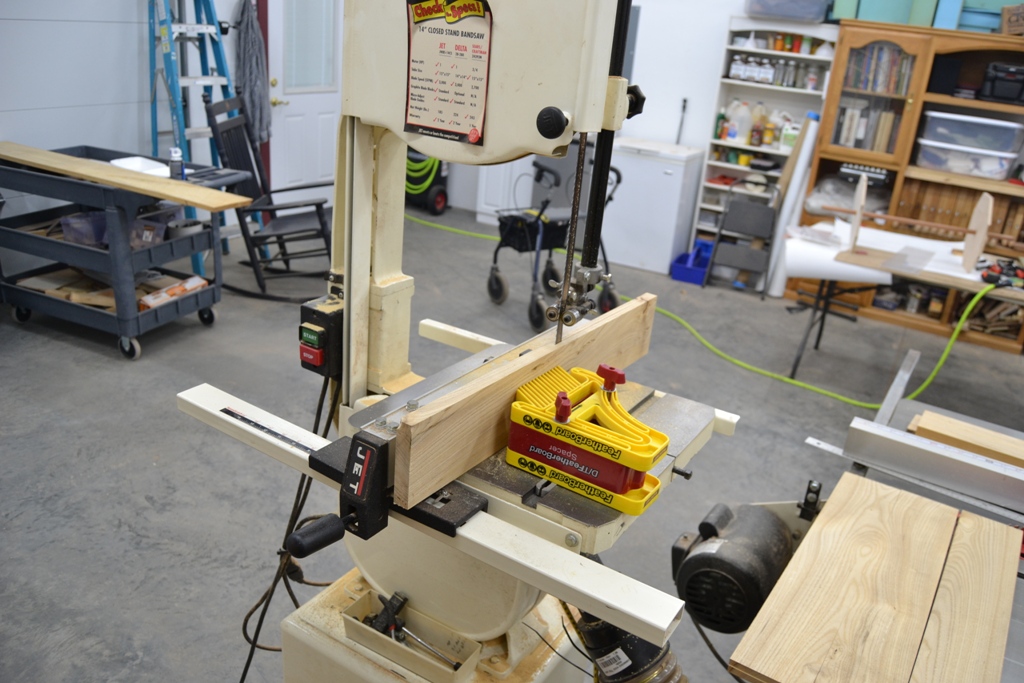
To insure the planed boards didn't wander, I set up featherboards to keep them tight against the fence on the band saw, and got started. I also cut the 8" wide board in half, and will join the book matches pieces to make an attractive panel on the drum for the tumbler. Bookmatching a 4" piece is MUCH easier than trying to accurately bookmatch an 8" piece.
7.jpg
7.jpg (328.26 KiB) Viewed 1863 times
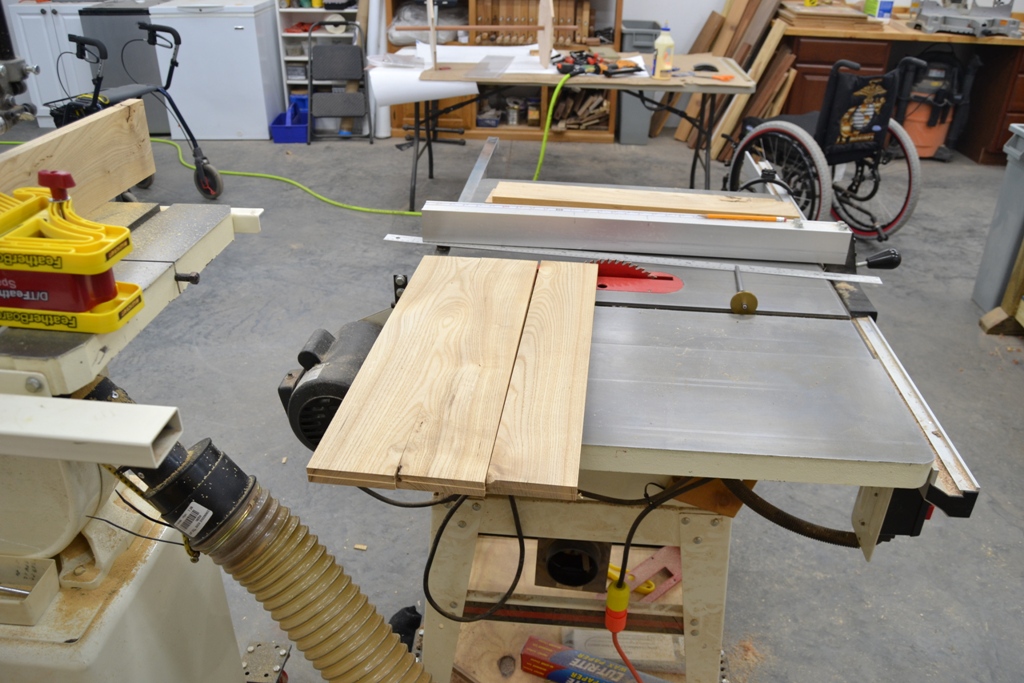
The passes went well, I went slowly and let the band saw do it's work.
8.jpg
8.jpg (337.95 KiB) Viewed 1863 times
9.jpg
9.jpg (242.02 KiB) Viewed 1863 times
Tomorrow, the book matched pairs will go back thru the planer to remove the scratches from the band saw and we can start to assemble the drum again. This time I hope we get a much better result. Sheesh, how many times does an anal old Marine have to put this thing together? (Answer? As many as it takes to get 'er right. :lol: )

Whatever, I got nuthin but time. If I wasn't in the shop, I would be sitting in the house. It's raining, still. Three days straight. Can't shoot... may as well work in the shop.

Watch this space... might be something interesting... eventually. 8-)
You can tell a lot about the character of a man...
by the way he treats those who can do nothing for him.

I don't look back at the things I can no longer do, I just look forward to the things I still can.

User avatar
BrokenolMarine
Ranch Foreman
Posts: 7494
Joined: Sat Nov 26, 2016 8:28 am
Location: South Central Oklahoma in the mountains
United States of America

One Last Task for Saturday Night...

Post by BrokenolMarine » Sat Sep 02, 2017 7:32 pm

8-)

I had one last task I wanted to complete tonight, and that was to make spacers/end caps for the sides of the basket. They keep the basket from rubbing on the stand when you are turning it. Hmmm, :roll: I'll need a circle jig for the band saw. My old one was really old and got fragile and had also been used so much the holes were getting worn. You can buy them, but why?

So this:
1.jpg
1.jpg (245.71 KiB) Viewed 1490 times
is what a home made circle jig looks like.

I'll attach it to the deck on the band saw...
2.jpg
2.jpg (282.29 KiB) Viewed 1490 times
and use it to cut out these:
3.jpg
3.jpg (220.73 KiB) Viewed 1490 times
Which after drilling the 7/8 inch hole in the center:
and sanding them to their walnut beauty for an accent ...
Will go here:
4.jpg
4.jpg (265.75 KiB) Viewed 1490 times
The glue on the jig needs to dry overnight. I am going to use the jig tomorrow and then I'll try to show how it works.
and the results. :P

What? Why haven't I moved forward with the panels? I ordered new blades for the planer and I expect them on Monday/Tuesday. I am doing fill work to wait for the new blades. After all the work on book matching... I don't want to use the older blades I swapped in yesterday to make the final passes on the panels for the tumbler basket and take a chance of ruining a panel or three. :? That's work I don't want to have to do again. :)

When I pull that second set of blades out and install the new ones, I will use spare time, waiting for glue to dry or whatever, to try and sharpen the two sets of old blades and see how they turn out. That way, if I do well, I won't have to buy another set. ;)
You can tell a lot about the character of a man...
by the way he treats those who can do nothing for him.

I don't look back at the things I can no longer do, I just look forward to the things I still can.

User avatar
BrokenolMarine
Ranch Foreman
Posts: 7494
Joined: Sat Nov 26, 2016 8:28 am
Location: South Central Oklahoma in the mountains
United States of America

Circle Jig in Use...

Post by BrokenolMarine » Sun Sep 03, 2017 3:04 pm

This morning the glue had dried on the home made circle jig. Time to put 'er to use.
Tuned up the 1/4" blade on the band saw and got ready to use the jig, first I had to measure back from the blade and mark the new jig. That done, I measured to the center of the item to be cut.
1.jpg
1.jpg (232.5 KiB) Viewed 1484 times
This measurement is important, because you transfer this measurement to the circle jig. You'll note that I have already drilled thru the two end cap/spacer blanks, the holes are the same size as a small copper brad I'll use as the pivot. Since I plan to cut out the center for the axle this isn't a problem. If you weren't planning on a center hole in the piece, you could put a small, easily filled shallow pivot hole in the back side.

I marked and drilled a matching hole, in the same location on the circle jig and placed the blank on the jig, then placed the jig in the slot on the table.
2.jpg
2.jpg (258.68 KiB) Viewed 1484 times
3.jpg
3.jpg (262.3 KiB) Viewed 1484 times
At this point, you turn everything on... the saw, the dust collection systems, and get ready to cut. The first cut is made in the blank, only to the centerline, sliding the blank until the blade is lined up with the brad. Then you stop, turn off the saw, and clamp the jig to the table. It won't move again until the cut is complete.
4.jpg
4.jpg (292.17 KiB) Viewed 1484 times
Now, turn the saw back on and spin the blank on the brad, cutting out your circle.
5.jpg
5.jpg (299.04 KiB) Viewed 1484 times
6.jpg
6.jpg (315.03 KiB) Viewed 1484 times
Repeat as needed and you'll end up with your nice neat circular project pieces. I pushed the brad thru the holes in both pieces, and buffed the edges lightly across the disk sander, to start.
7.jpg
7.jpg (231.58 KiB) Viewed 1484 times
My next step was to take the circular parts to the drill press and very carefully make the center hole for the axle.
8.jpg
8.jpg (284.28 KiB) Viewed 1484 times
9.jpg
9.jpg (234.97 KiB) Viewed 1484 times
Then each was sanded with both 220 grit and 400 grit, polishing the pieces on my t-shirt. I shaped the edges by rolling the pieces as I sanded. I wish you guys could feel how smooth they came out. Like glass.
10.jpg
10.jpg (235.04 KiB) Viewed 1484 times
They are now installed and this step is complete.
11.jpg
11.jpg (295.89 KiB) Viewed 1484 times
You can tell a lot about the character of a man...
by the way he treats those who can do nothing for him.

I don't look back at the things I can no longer do, I just look forward to the things I still can.

User avatar
BrokenolMarine
Ranch Foreman
Posts: 7494
Joined: Sat Nov 26, 2016 8:28 am
Location: South Central Oklahoma in the mountains
United States of America

Re: New Project: Ticket Tumbler for Charity

Post by BrokenolMarine » Sun Sep 03, 2017 3:22 pm

:twisted: :x

Nothing is ever easy. I noticed as I cut the last circle that the blade on the band saw was "acting" funny. :roll: This isn't funny. ;) It can be a serious thing if a band saw blade let's go, and pops off the wheels. :o The closed case band saw I have is very safe, but it scares the crap out of me when that happens. :twisted:

An inspection following the last cut revealed that the "tire" on the upper "wheel" was wearing on the edge, and this was causing an uneven "ride" for the blade. You can't make true accurate cuts with blades that don't track true. I have replaced the tires (the rubber sleeve around the metal wheels that turn to drive the band type blade... ) on the saw a few years ago, but time causes the rubber to deteriorate, and they were about due.

I came inside and ordered new tires... urethane this time. :| Again, if it's not one thing, it's another. But it has been a long dry spell where everything has been going smoothly, so I can't complain. It may be that the stagnant time where I wasn't IN the shop working wasn't good for the equipment. :roll: The funds I have had to spend in the last month to maintain my woodworking gear... is still less than a few of my friends will spend on a "party weekend." :) It's my therapy, I'm not complaining. 8-)
You can tell a lot about the character of a man...
by the way he treats those who can do nothing for him.

I don't look back at the things I can no longer do, I just look forward to the things I still can.

User avatar
BrokenolMarine
Ranch Foreman
Posts: 7494
Joined: Sat Nov 26, 2016 8:28 am
Location: South Central Oklahoma in the mountains
United States of America

Re: New Project: Ticket Tumbler for Charity

Post by BrokenolMarine » Mon Sep 04, 2017 3:04 pm

Today's task, since we are still waiting for the planer blades, was to build the pedestal for the base. Pulled out the drawings and sat down to draw out the necessary pieces. Always nice to have the artwork to work from. :D Speaking of Art Work, I filled in some time last night, by getting the banners from our Charity Work days hung up. The first of the two is from the 4th Annual Charity tourney that Miss T ran for about six years for our friend's company, YakAttack kayak fishing gear. The tourney is in it's 10th year now and as I said in an earlier post, this past May, raised 18k bucks to be split between two deserving military charities. The second banner is from the Charity Chapter we ran for a number of years... it hurt to have to pass it on, but .. doctor's orders. ;)
1.jpg
1.jpg (284.77 KiB) Viewed 1471 times
2.jpg
2.jpg (251.73 KiB) Viewed 1471 times
Oops, off track... Back to our program. 8-)

Working from the drawings....
3.jpg
3.jpg (282.37 KiB) Viewed 1471 times
I cut the Oak 1x4 into lengths and then drew and measured until I was ready to go to the various tools in the shop to shape the parts and pieces. Taking time to get the prep right, makes things work out. Looking in the background, you may have noticed the clamps are off the end caps. They turned out nice. :)
4.jpg
4.jpg (180.55 KiB) Viewed 1471 times
Ran all the pieces across the band saw for rough cutting, it's still not doing well. I have ordered the tires, and after further research last night, a new tensioner spring and a more ergonomic tension controller handle. I'll expect they will be here within the week. :) I used the band saw to rough cut, then the sander to bring the oak pieces up to the line.
5.jpg
5.jpg (291.22 KiB) Viewed 1471 times
A quick trip to the drill press for the 7/8 hole for the axle, then next up was our old friend the stacked dado set to cut the dadoes for the lap joint for the pedestals. Careful... cut half the depth so I didn't tear or burn the wood, and then made a second pass on each piece.
6.jpg
6.jpg (294.91 KiB) Viewed 1471 times
7.jpg
7.jpg (300.36 KiB) Viewed 1471 times
After a little sanding and some chisel work to make sure each joint fit correctly, not much was needed... :D ... they were glued up and clamped. I'll leave them to dry overnight. These will eventually be mounted on a base, but there is still some shaping, rolling the edges for one... and some sanding to do.
8.jpg
8.jpg (281.59 KiB) Viewed 1471 times
Like other things, they will then be set aside and picked up later for more work... as they come due again later in the process. Having plenty of time allows me to look ahead and hopefully enhance the project to make it a lot nicer than a quickie job would have been.
You can tell a lot about the character of a man...
by the way he treats those who can do nothing for him.

I don't look back at the things I can no longer do, I just look forward to the things I still can.

User avatar
RanchRoper
Forum Ambassador
Posts: 12964
Joined: Mon Mar 21, 2016 12:14 am
Location: Land of Shining Mountains, Alberta
Canada

Re: New Project: Ticket Tumbler for Charity

Post by RanchRoper » Mon Sep 04, 2017 8:27 pm

What a nice workshop and setup you have. I keep looking for Elves in the background or some indication you are at the North Pole....

Kibler Colonial Flintlock .50

Ohkínohkomit - Shoot skillfully

User avatar
BrokenolMarine
Ranch Foreman
Posts: 7494
Joined: Sat Nov 26, 2016 8:28 am
Location: South Central Oklahoma in the mountains
United States of America

Re: New Project: Ticket Tumbler for Charity

Post by BrokenolMarine » Mon Sep 04, 2017 8:29 pm

RanchRoper wrote:What a nice workshop and setup you have. I keep looking for Elves in the background or some indication you are at the North Pole....
:roll:

:?

Shhhhhh!
You can tell a lot about the character of a man...
by the way he treats those who can do nothing for him.

I don't look back at the things I can no longer do, I just look forward to the things I still can.

User avatar
BrokenolMarine
Ranch Foreman
Posts: 7494
Joined: Sat Nov 26, 2016 8:28 am
Location: South Central Oklahoma in the mountains
United States of America

At it again this morning...

Post by BrokenolMarine » Tue Sep 05, 2017 10:41 am

... Sanding the pedestal stands.
Took the clamps off and prepared for the test fitting.
1.jpg
1.jpg (277.12 KiB) Viewed 1456 times
What happened to that picture...? It's all blurred... 8-)

Anyway, I took the clamps off and due to the careful clamping and positioning on the drill press, the pedestal bases were a VERY tight fit on the "axle" so I wrapped a piece of 120 grit paper around my finger and sanded the inside of the hole a couple turns at a time until they were loose enough to spin freely, but not loose enough to rattle. They will loosen up anyway when they get some use. Later, I may come back and inset a poly insert when they get worn. Put them in place and everything looked good.
2.jpg
2.jpg (294.23 KiB) Viewed 1456 times
Next, checked the fit of the handle blank....
3.jpg
3.jpg (235.58 KiB) Viewed 1456 times
4.jpg
4.jpg (246.36 KiB) Viewed 1456 times
Took the pedestals off, and started hand rolling the edges by buffing them with strips of 120 sandpaper. I didn't want to drastically change the shape, just take the sharp edges off. Once that was done, I sanded the entire pedestal, then reassembled them and checked fit again. NOTE that when the project is actually assembled, the pedestals will be assembled with the pedestal turned with the horizontal leg to the outside to hide vertical joint as shown in this view.
5.jpg
5.jpg (253.83 KiB) Viewed 1456 times
Everything looks good. BTW, here is a look at the book matched panels we'll make the tumbler drum from.. hopefully the blades for the planer come tomorrow.
6.jpg
6.jpg (323.6 KiB) Viewed 1456 times
Note that the dull blades caught a knot and knocked a chunk out of the slab that two pairs came from. If they are needed, I'll have to get creative to make them work. I think with the two windows and the door, I might be able to work around them... plus the trimming to make the panels fit anyway. We'll see. That part will be ... um... :roll: ... interesting.
You can tell a lot about the character of a man...
by the way he treats those who can do nothing for him.

I don't look back at the things I can no longer do, I just look forward to the things I still can.

User avatar
PT7
Drover
Posts: 4889
Joined: Mon Mar 21, 2016 8:32 am
Location: The Show-Me State
United States of America

Re: New Project: Ticket Tumbler for Charity

Post by PT7 » Tue Sep 05, 2017 11:20 am

Your excellent work is way beyond my woodworking skills and experience, Marine. My wood decks, railings, steps still stand --- but none have the precision cuts and fit anywhere near the high quality of your projects.

If I were to have to get a "tumbler" to shake up charity tickets, I'd need to go this way rather than making a wood one. :lol:
large steel pail.jpg
large steel pail.jpg (23.44 KiB) Viewed 1452 times
Looking forward to your finished project! It's been very fun to watch the build so far.

~Пока~

User avatar
BrokenolMarine
Ranch Foreman
Posts: 7494
Joined: Sat Nov 26, 2016 8:28 am
Location: South Central Oklahoma in the mountains
United States of America

more prep work

Post by BrokenolMarine » Tue Sep 05, 2017 2:25 pm

Back out in the shop for more prep work, and I started by prepping the edges of the book matched panels, since the new blades for the planer are due in tomorrow. :) I'll be like an old bull dog waiting on the porch for UPS.. I might even bark, chase the dang truck, and try and bite Pat's ankle. :o (We have had the same UPS driver for more than a decade.. he knows I'm weird. 8-) )

The book matched pairs have one clean edge where I cut the board in half, and one rough edge from the bark.
1.jpg
1.jpg (292.64 KiB) Viewed 1448 times
THAT edge needs to be cleaned up so once we are planed, they are ready to be used. Clamped them in the workbench and planed them with the hand plane, edge to edge, so they are clean and square.
2.jpg
2.jpg (280.91 KiB) Viewed 1448 times
One pair at a time, the process was repeated, until all the pairs had two clean edges and would be ready to go tomorrow after they had been thru the planer and both the faces were smooth, and the thicknesses matched. :lol:
3.jpg
3.jpg (292.2 KiB) Viewed 1448 times
Next up, I worked with the handle blank, shaping and sanding until it achieved the shape I desired. Quite a change from the start.... In the first picture, you see the handle blank on the very top of the pile.
handle blank on the top of the pile.jpg
handle blank on the top of the pile.jpg (282.37 KiB) Viewed 1448 times
After a good bit of sanding and shaping, it just needs a knob of some sort for the girls to grab to turn it, and we will be good to go after it's received it's finish and is attached to the axle during final assembly. (I'll put a spacer of some sort between it and the pedestal, and an end cap on the axle on the outside... something cool, of course.
4.jpg
4.jpg (3.58 MiB) Viewed 1447 times
You can tell a lot about the character of a man...
by the way he treats those who can do nothing for him.

I don't look back at the things I can no longer do, I just look forward to the things I still can.

User avatar
BrokenolMarine
Ranch Foreman
Posts: 7494
Joined: Sat Nov 26, 2016 8:28 am
Location: South Central Oklahoma in the mountains
United States of America

Re: New Project: Ticket Tumbler for Charity

Post by BrokenolMarine » Wed Sep 06, 2017 7:03 pm

I was sitting on the porch reading a book on my kindle drinking coffee, and watching the thunderstorm when UPS pulled in. Pat always pulls in front of the boathouses, and backs up to the woodshop/carport before he stops to bring out the packages. I met him at the truck with a big golf umbrella. He's a nice guy... been our driver for years, and goes out of his way to accomodate.

The tires for the band saw came, as well as the blades for the planer. I got the blades installed this afternoon. Have other parts inbound for the bandsaw, so I'm not pressed on that. I'll probably plane the panels for the tumbler tomorrow morning, and we can move forward on that project! ;) I am looking forward to it.
You can tell a lot about the character of a man...
by the way he treats those who can do nothing for him.

I don't look back at the things I can no longer do, I just look forward to the things I still can.

Post Reply