Sounds like a great place to be! Good for you too Mags!BrokenolMarine wrote:I took a lot of gruff for where i live from my friends back when i was working. No one wanted to visit. They said the directions should read, drive to the edge of the country, turn right. It was just an hour... But it was in the boonies. I still like it. I can work in my shop at 2am and no one cares. Lol.
Site seems to be experiencing intermittent load issues. If site doesn't present the login screen, try clicking on 'login'
Cabinet for gun safe interior
- markiver54
- Deputy Marshal
- Posts: 11123
- Joined: Sun Nov 04, 2018 11:49 am
- Location: Biue Ridge Mountains, NC

Re: Cabinet for gun safe interior
I'm your Huckleberry
- JEBar
- Town Marshal / Deputy Admin
- Posts: 20422
- Joined: Sun Mar 20, 2016 10:58 pm
- Location: central NC

Re: Cabinet for gun safe interior
I'm thoroughly enjoying following your latest project .... many thanks for taking us along
- BrokenolMarine
- Ranch Foreman
- Posts: 7471
- Joined: Sat Nov 26, 2016 8:28 am
- Location: South Central Oklahoma in the mountains

Re: Cabinet for gun safe interior
Yesterday's last session was spent smoothing and cutting the drawer panels to near final size. First I had to go back and watch a YouTube video on how to prepare (Sharpen) a Card Scraper.
Meh, it's been a while since I used one, but they do a great job and save a lot of sandpaper. Basically it's a piece of metal with a hook rolled on the edge and you scrape it across the wood to remove imperfections. In many cases the finish it leaves behind doesn't require sanding.
After scraping eight panels, I had a nice little pile of very fine shavings, and eight panels ready to trim to the final size.
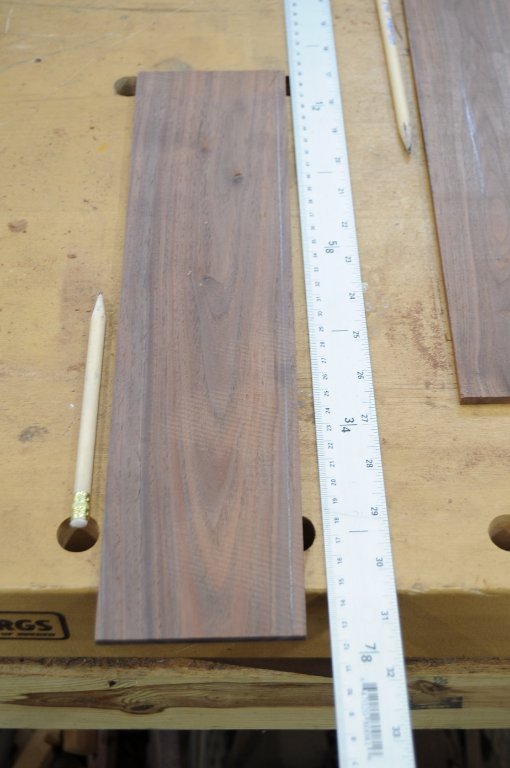
I had predetermined the height I wanted to work with, and then I decided on the length I needed. I left the panels long, so I had to square one end with a pass over the table saw, and I looked at each panel and determined the best location to square off an end, looking at cracks, knots, and most important, the most pleasing grain pattern that will be presented in a 14-1/2" length. The eight panels ranged from 17" to 18-1/2 so I had room to choose from.
Once I squared an end, I marked the panels at 14-3/8 and made the second cut. All the panels are now smooth on the face side, and squared at 3-1/2 and 14-3/8. The narrow pieces you see cut in the back are for the cabinet trim, and will be scraped and trimmed to fit when the time comes.
The next step is to mount the faces to the drawers after trimming them to exact height which will vary slightly with each drawer and opening. I was not worried about perfection in my construction, but each should be close to 3". They will be glued and pinned, and the pulls attached by thru screws. They won't be going anywhere.
Once I squared an end, I marked the panels at 14-3/8 and made the second cut. All the panels are now smooth on the face side, and squared at 3-1/2 and 14-3/8. The narrow pieces you see cut in the back are for the cabinet trim, and will be scraped and trimmed to fit when the time comes.
The next step is to mount the faces to the drawers after trimming them to exact height which will vary slightly with each drawer and opening. I was not worried about perfection in my construction, but each should be close to 3". They will be glued and pinned, and the pulls attached by thru screws. They won't be going anywhere.
You can tell a lot about the character of a man...
by the way he treats those who can do nothing for him.
I don't look back at the things I can no longer do, I just look forward to the things I still can.
by the way he treats those who can do nothing for him.
I don't look back at the things I can no longer do, I just look forward to the things I still can.
- markiver54
- Deputy Marshal
- Posts: 11123
- Joined: Sun Nov 04, 2018 11:49 am
- Location: Biue Ridge Mountains, NC

Re: Cabinet for gun safe interior
Certainly coming along nicely Marine!
Wasn't till recently I learned about card scrapers. Have yet to try the technique. Anything that shortens or eliminates sanding is good!!
I'm your Huckleberry
- BrokenolMarine
- Ranch Foreman
- Posts: 7471
- Joined: Sat Nov 26, 2016 8:28 am
- Location: South Central Oklahoma in the mountains

Re: Cabinet for gun safe interior
After coffee this morning, and washing a load of shop clothing and adding it to the dryer, I headed out to work on the drawer fronts. THIS is a critical step. The PUCKER factor is high.
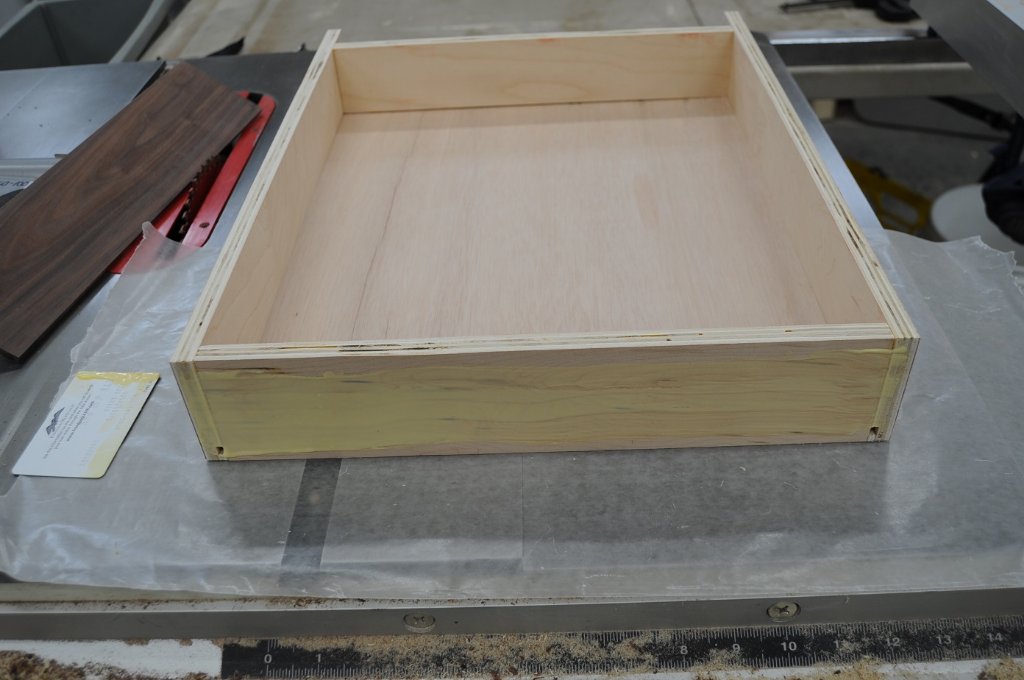
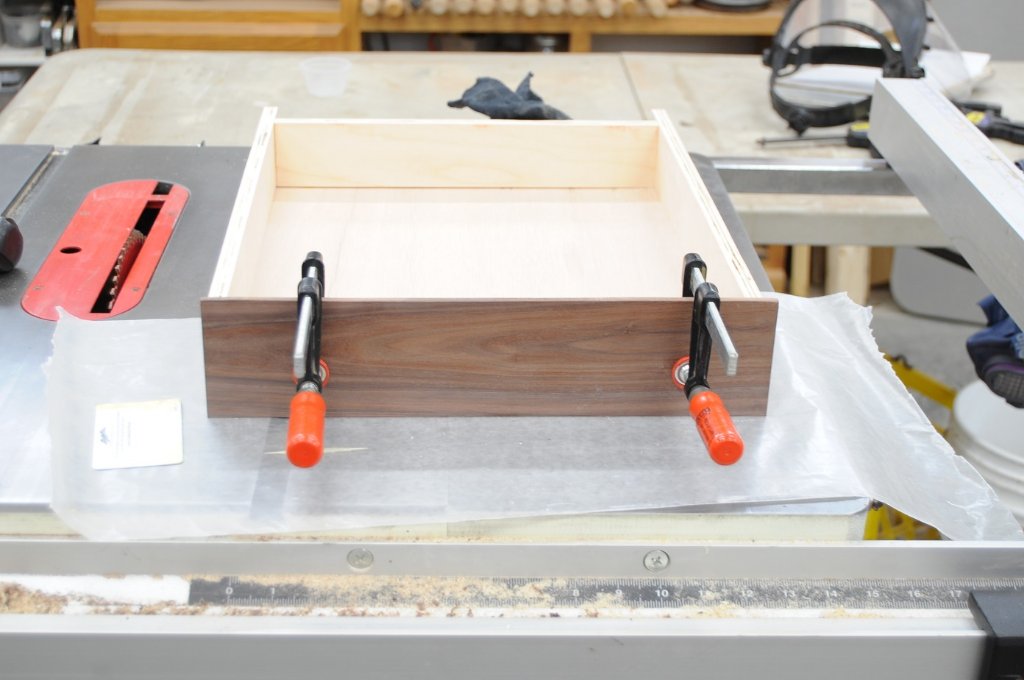
The first step is to clamp the drawer front to the first drawer and check the alignment. A couple of the drawers have flexed slightly. But with weight in them, they will be flat again. My old weight set comes in handy... I keep the plates in the shop and they always come in handy. ANY drawer that has flexed gets a five or ten pound plate to hold to keep it playing fair.
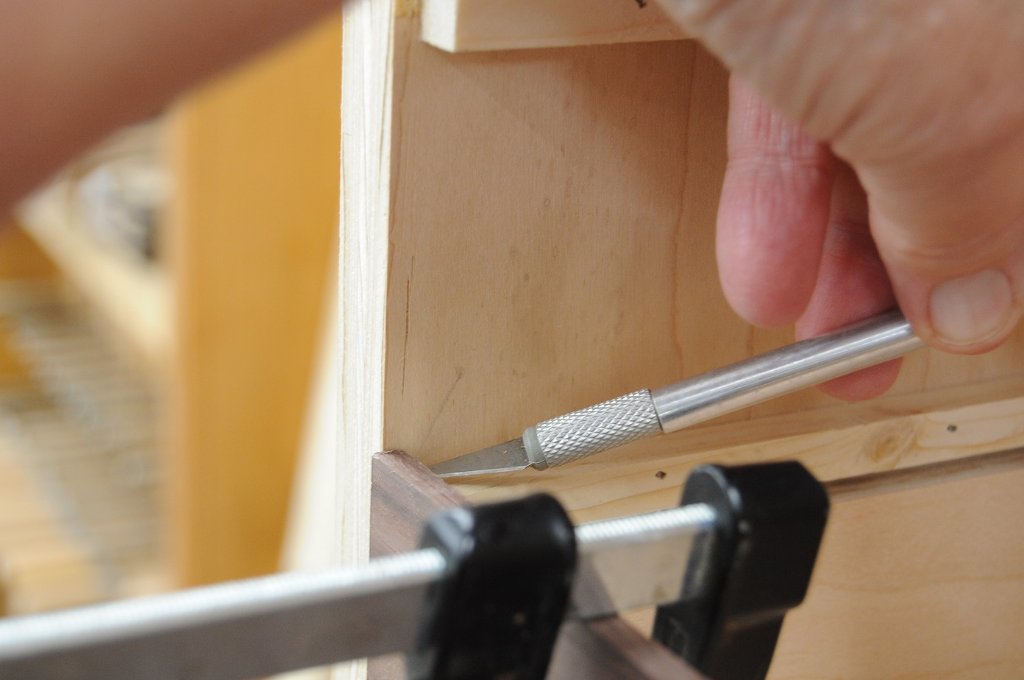
Once I am satisfied, I reach inside and mark the height of the drawer front with an exacto knife. Careful here, once I make this cut, it's make or break. This is the pucker factor I was talking about. I don't want to make a new front. (Luckily, I made two extra, but they aren't near as nice as these.) I also have another slab cut to size, but who wants to go through all THAT work...
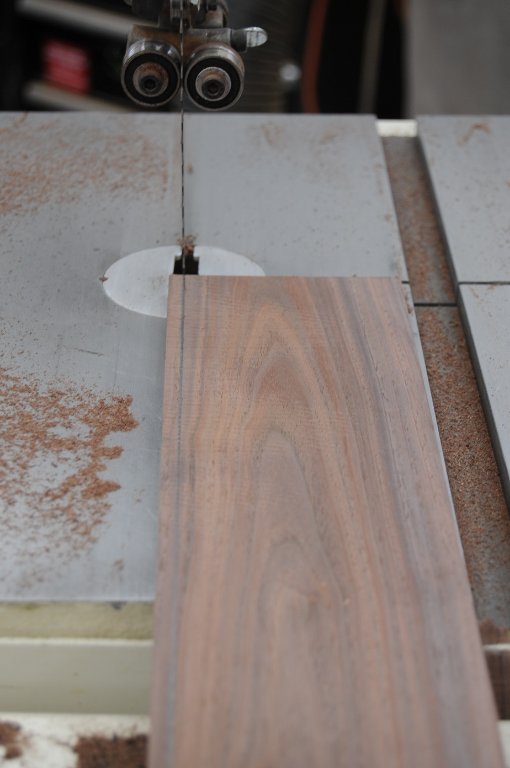
Once the drawer is marked, I unclamp the drawer front and turn it over and mark the two points with a pencil line in preparation for cutting on the band saw.
After careful checking and crossing my fingers and toes one last time... I make the cut.
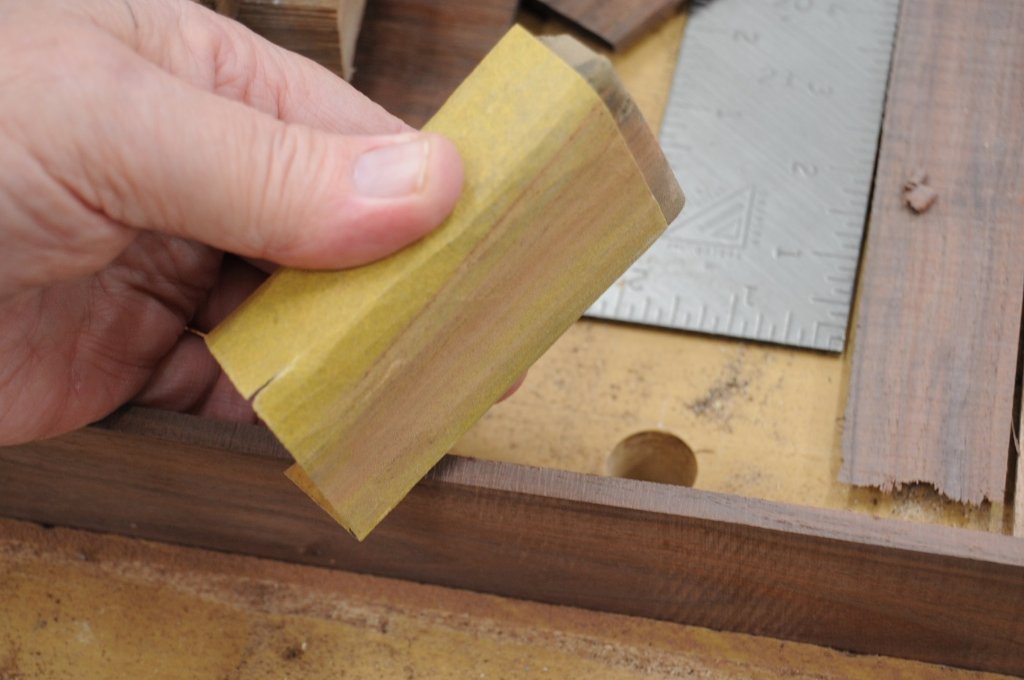
Then I hand sand the roughened edge with a sanding block wrapped in sandpaper. NO fine sanding, just knocking off the rough edges. If this was a presentation piece, or would be out in public, this would get a LOT more attention, bet on it.
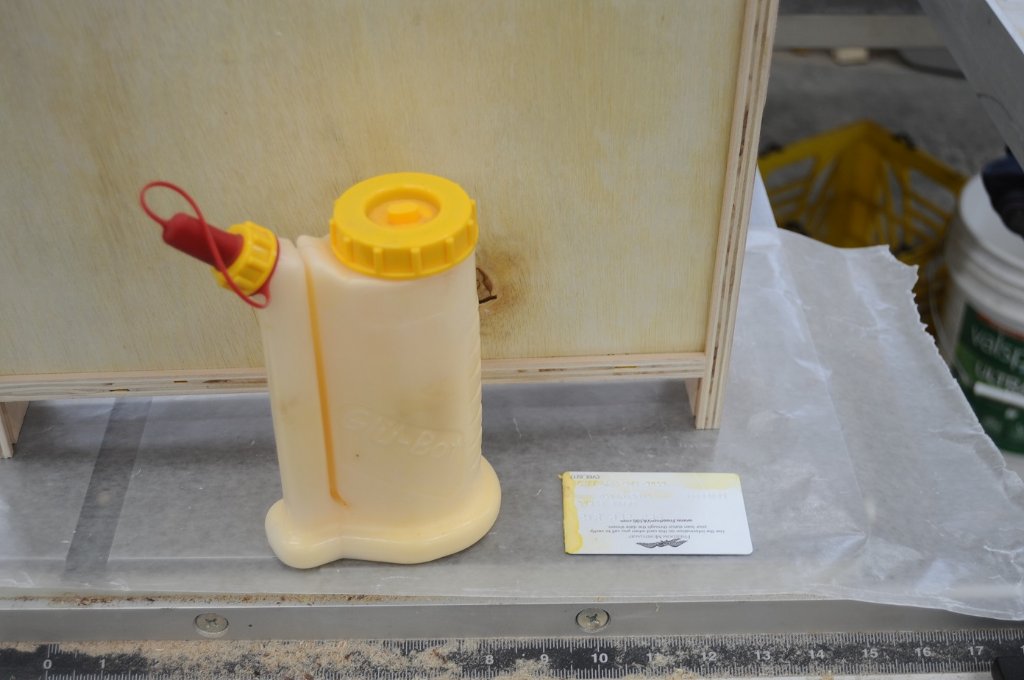
Now I test fit the piece and run it back in the cabinet to make sure it fits like it should and doesn't need to be trimmed again. Once I am satisfied, I prep it to be glued. Glue up is made easier by my squeeze bottle and those annoying fake credit cards most folks toss. I use them to spread the glue during projects like this, then toss them instead of having to clean a spreader.
When I spread the glue, I keep it away from the edges, since I am going to shoot four brads in the corner and six pins from the pinner in the center. In addition, the drawer pulls use thru screws. The face won't be going anywhere.
Once I clamp the face to the drawer and before I shoot the brads, I check the fit ONE last time. I make any minute last minute adjustments, then crossing fingers and toes again, let 'er rip. The drawer is done and time to repeat the process until all eight are done.
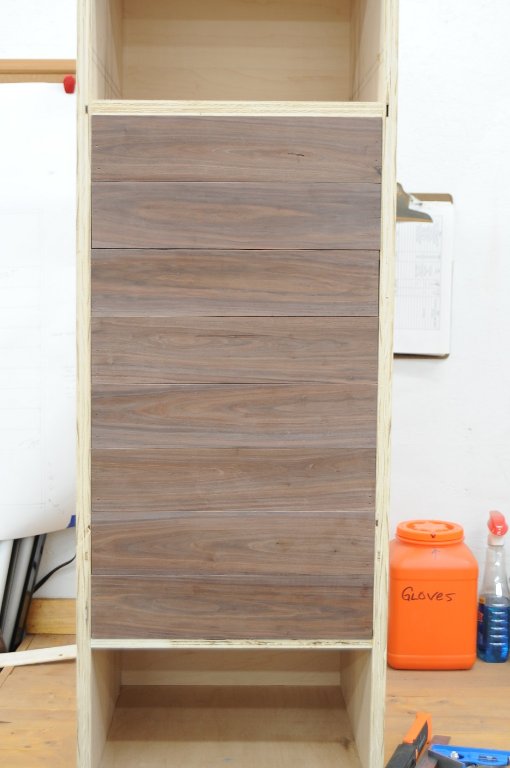
The very last drawer was the hardest since I worked from the bottom up. I had to remove drawer seven, and hold the drawer face for eight in place and mark the bottom to determine the cutoff. I also measured the distance between the rail and the top with a square. Both measurements matched. Hurrah.
The drawers are done except for the pulls. After some additional sanding, I'll drill for the pulls, but won't put them on until the very last step. Still have the trim to do, and sanding the outside of the cabinet.
Here are the finished drawer faces... far from perfect.. but I'm happy.
The first step is to clamp the drawer front to the first drawer and check the alignment. A couple of the drawers have flexed slightly. But with weight in them, they will be flat again. My old weight set comes in handy... I keep the plates in the shop and they always come in handy. ANY drawer that has flexed gets a five or ten pound plate to hold to keep it playing fair.
Once I am satisfied, I reach inside and mark the height of the drawer front with an exacto knife. Careful here, once I make this cut, it's make or break. This is the pucker factor I was talking about. I don't want to make a new front. (Luckily, I made two extra, but they aren't near as nice as these.) I also have another slab cut to size, but who wants to go through all THAT work...
The drawers are done except for the pulls. After some additional sanding, I'll drill for the pulls, but won't put them on until the very last step. Still have the trim to do, and sanding the outside of the cabinet.
Here are the finished drawer faces... far from perfect.. but I'm happy.
You can tell a lot about the character of a man...
by the way he treats those who can do nothing for him.
I don't look back at the things I can no longer do, I just look forward to the things I still can.
by the way he treats those who can do nothing for him.
I don't look back at the things I can no longer do, I just look forward to the things I still can.
Re: Cabinet for gun safe interior
.
Looks really, really good to me.
BrokenolMarine wrote:...Here are the finished drawer faces... far from perfect.. but I'm happy.
UPDATES: OR passes 114, "one of strictest gun control measures in U.S." https://henryrifleforums.com/viewtopic. ... 34#p213234
- BrokenolMarine
- Ranch Foreman
- Posts: 7471
- Joined: Sat Nov 26, 2016 8:28 am
- Location: South Central Oklahoma in the mountains

Re: Cabinet for gun safe interior
I got the trim for the cabinet edges scraped, cut to width, and glued and pinned. Once the glue sets, I can start final fitting, trimming, rolling the edges of the trim, and the final sanding. I'll need to drill the holes for the eight drawer pulls. Once all that is done...
Watco Oil and wax for the exterior, only. Then install the pulls.
Fini.
Watco Oil and wax for the exterior, only. Then install the pulls.
Fini.
You can tell a lot about the character of a man...
by the way he treats those who can do nothing for him.
I don't look back at the things I can no longer do, I just look forward to the things I still can.
by the way he treats those who can do nothing for him.
I don't look back at the things I can no longer do, I just look forward to the things I still can.
- BrokenolMarine
- Ranch Foreman
- Posts: 7471
- Joined: Sat Nov 26, 2016 8:28 am
- Location: South Central Oklahoma in the mountains

Re: Cabinet for gun safe interior
Yeah, yeah, more pics to follow. 
You can tell a lot about the character of a man...
by the way he treats those who can do nothing for him.
I don't look back at the things I can no longer do, I just look forward to the things I still can.
by the way he treats those who can do nothing for him.
I don't look back at the things I can no longer do, I just look forward to the things I still can.
- BrokenolMarine
- Ranch Foreman
- Posts: 7471
- Joined: Sat Nov 26, 2016 8:28 am
- Location: South Central Oklahoma in the mountains

Re: Cabinet for gun safe interior
The Pics...
In preparing to put the trim on the cabinet, the first step was to take the roughness out of the two main panels that would "become" the trim strips. Back to the card scraper for the task. If you look closely, you can see the hatchmark lines crossing the walnut caused by the travel of the band saw blades teeth. After about an hour with a break or two for coffee... and resting my arms... I was ready to cut. Looking at the bottom edge of one of the pieces here you can see those distinct hash marks I was referring to earlier. I didn't worry about that edge, which will be trimmed off, as the underside has a gash in it and won't be suitable for use. I set up the table saw and dust collector, set the fence at 3/4" and cut. The two pieces produced enough to cover all but the bottom edge and the 1/2" shelf piece. I found one additional thin piece that could handle that without having to be smoothed, just ripped.
I took my time, fitting each piece before the glue up, carefully pinning each piece after glue was applied, and testing the fit when joints were necessary.
There were slight overhangs intentionally, easier to trim a tad, than to be short. Cleanup was a familiar process. So was the tool I started with. One of the few tools I have to remember my Stepfather, who taught me much of what I learned early on about carpentry. A simple box plane, older than I am...but sharp and effective. I used the box plane to bring the edges even on the sides and top, then switched to an even older "Molding Plane" to roll the edges. This is part of a collection of ten I got from a major retailer, who's president still contacts customers in person. These planes were used before routers to ... make shaped edges for "Moldings" This one is razor sharp and does an excellent job. Final dressing of the edge is done with thin strips of 220 grit sandpaper used as you would a buffing cloth when polishing your shoes. I am happy so far.
In preparing to put the trim on the cabinet, the first step was to take the roughness out of the two main panels that would "become" the trim strips. Back to the card scraper for the task. If you look closely, you can see the hatchmark lines crossing the walnut caused by the travel of the band saw blades teeth. After about an hour with a break or two for coffee... and resting my arms... I was ready to cut. Looking at the bottom edge of one of the pieces here you can see those distinct hash marks I was referring to earlier. I didn't worry about that edge, which will be trimmed off, as the underside has a gash in it and won't be suitable for use. I set up the table saw and dust collector, set the fence at 3/4" and cut. The two pieces produced enough to cover all but the bottom edge and the 1/2" shelf piece. I found one additional thin piece that could handle that without having to be smoothed, just ripped.
I took my time, fitting each piece before the glue up, carefully pinning each piece after glue was applied, and testing the fit when joints were necessary.
There were slight overhangs intentionally, easier to trim a tad, than to be short. Cleanup was a familiar process. So was the tool I started with. One of the few tools I have to remember my Stepfather, who taught me much of what I learned early on about carpentry. A simple box plane, older than I am...but sharp and effective. I used the box plane to bring the edges even on the sides and top, then switched to an even older "Molding Plane" to roll the edges. This is part of a collection of ten I got from a major retailer, who's president still contacts customers in person. These planes were used before routers to ... make shaped edges for "Moldings" This one is razor sharp and does an excellent job. Final dressing of the edge is done with thin strips of 220 grit sandpaper used as you would a buffing cloth when polishing your shoes. I am happy so far.
You can tell a lot about the character of a man...
by the way he treats those who can do nothing for him.
I don't look back at the things I can no longer do, I just look forward to the things I still can.
by the way he treats those who can do nothing for him.
I don't look back at the things I can no longer do, I just look forward to the things I still can.
- markiver54
- Deputy Marshal
- Posts: 11123
- Joined: Sun Nov 04, 2018 11:49 am
- Location: Biue Ridge Mountains, NC

Re: Cabinet for gun safe interior
Looking VERY good Marine! I too have an old moulding plane amongst other old wooden planes that were my father-in-laws' fathers. Very old.
I'm your Huckleberry
- BrokenolMarine
- Ranch Foreman
- Posts: 7471
- Joined: Sat Nov 26, 2016 8:28 am
- Location: South Central Oklahoma in the mountains

Re: Cabinet for gun safe interior
I had to watch a couple videos to learn to use them, but they work surprisingly well. They don't scream like a banchee, don't spray dust and shavings into the air, won't get away from you and ruin your work, and I like the "whisp" sound they make with each pass.markiver54 wrote:Looking VERY good Marine! I too have an old moulding plane amongst other old wooden planes that were my father-in-laws' fathers. Very old.
You can tell a lot about the character of a man...
by the way he treats those who can do nothing for him.
I don't look back at the things I can no longer do, I just look forward to the things I still can.
by the way he treats those who can do nothing for him.
I don't look back at the things I can no longer do, I just look forward to the things I still can.
Re: Cabinet for gun safe interior
Wow, just beautiful work! The detail and tools involved is mind-boggling, but you've clearly got a bead on what needs to be done, step-by-step.
Thanks again for sharing all of this.
BB Steel .357 | SGC 22LR | LR .308 | CCH 30-30 | BB Brass .45 Colt (Carbine) | Single Shot 20 gauge | Single Shot .223 | Single Shot 357
- BrokenolMarine
- Ranch Foreman
- Posts: 7471
- Joined: Sat Nov 26, 2016 8:28 am
- Location: South Central Oklahoma in the mountains

Re: Cabinet for gun safe interior
Got the drawer fronts measured and marked, center punched, and the screw holes drilled on the drill press. Minor adjustments made as needed then the pulls removed and the drawers set aside to wait for final sanding. Using watco oil in a light oak, I wiped the maple ply sides and top of the cabinet. Time for a break.
You can tell a lot about the character of a man...
by the way he treats those who can do nothing for him.
I don't look back at the things I can no longer do, I just look forward to the things I still can.
by the way he treats those who can do nothing for him.
I don't look back at the things I can no longer do, I just look forward to the things I still can.
- BrokenolMarine
- Ranch Foreman
- Posts: 7471
- Joined: Sat Nov 26, 2016 8:28 am
- Location: South Central Oklahoma in the mountains

Re: Cabinet for gun safe interior
Back out to sand the fronts to 220 grit, wipe them down with denatured alcohol to remove the dust, then wipe them with medium walnut watco oil. After the drawer fronts, I took on the detailed task of wiping down the trim on the cabinet...
Pics to follow after a rest period. I tend to over do my time in the shop when I really get into the projects. Then the pain levels make me pay.
You can tell a lot about the character of a man...
by the way he treats those who can do nothing for him.
I don't look back at the things I can no longer do, I just look forward to the things I still can.
by the way he treats those who can do nothing for him.
I don't look back at the things I can no longer do, I just look forward to the things I still can.
- BrokenolMarine
- Ranch Foreman
- Posts: 7471
- Joined: Sat Nov 26, 2016 8:28 am
- Location: South Central Oklahoma in the mountains

Re: Cabinet for gun safe interior
Ah, next I decide, wax or no wax before adding the pulls and installing the cabinet.
You can tell a lot about the character of a man...
by the way he treats those who can do nothing for him.
I don't look back at the things I can no longer do, I just look forward to the things I still can.
by the way he treats those who can do nothing for him.
I don't look back at the things I can no longer do, I just look forward to the things I still can.
- markiver54
- Deputy Marshal
- Posts: 11123
- Joined: Sun Nov 04, 2018 11:49 am
- Location: Biue Ridge Mountains, NC

Re: Cabinet for gun safe interior
Exciting, almost there Marine...BrokenolMarine wrote:Ah, next I decide, wax or no wax before adding the pulls and installing the cabinet.
I'm your Huckleberry
- BrokenolMarine
- Ranch Foreman
- Posts: 7471
- Joined: Sat Nov 26, 2016 8:28 am
- Location: South Central Oklahoma in the mountains

Re: Cabinet for gun safe interior
Tried to post the pics, but my desktop security software noted a site security issue and won't let me post them right now. I let the management know. I didn't have the problem earlier. Could just be the Windows 10 software I guess.
Still trying to figure that out.
Hope to put them up soon.
You can tell a lot about the character of a man...
by the way he treats those who can do nothing for him.
I don't look back at the things I can no longer do, I just look forward to the things I still can.
by the way he treats those who can do nothing for him.
I don't look back at the things I can no longer do, I just look forward to the things I still can.
- BrokenolMarine
- Ranch Foreman
- Posts: 7471
- Joined: Sat Nov 26, 2016 8:28 am
- Location: South Central Oklahoma in the mountains

Re: Cabinet for gun safe interior
Waxed it. Installed the pulls. She is done.
So, I knocked out the vertical file for the dead space between the cabinet and the safe wall.
Pulling the factory shelf was a pain, had to cut several factory brackets with a dremel.
Pics when W10 lets me.
So, I knocked out the vertical file for the dead space between the cabinet and the safe wall.
Pulling the factory shelf was a pain, had to cut several factory brackets with a dremel.
Pics when W10 lets me.
You can tell a lot about the character of a man...
by the way he treats those who can do nothing for him.
I don't look back at the things I can no longer do, I just look forward to the things I still can.
by the way he treats those who can do nothing for him.
I don't look back at the things I can no longer do, I just look forward to the things I still can.
- markiver54
- Deputy Marshal
- Posts: 11123
- Joined: Sun Nov 04, 2018 11:49 am
- Location: Biue Ridge Mountains, NC

Re: Cabinet for gun safe interior
Will be anxious to see them!BrokenolMarine wrote:Waxed it. Installed the pulls. She is done.![]()
So, I knocked out the vertical file for the dead space between the cabinet and the safe wall.
Pulling the factory shelf was a pain, had to cut several factory brackets with a dremel.
Pics when W10 lets me.
I'm your Huckleberry
- BrokenolMarine
- Ranch Foreman
- Posts: 7471
- Joined: Sat Nov 26, 2016 8:28 am
- Location: South Central Oklahoma in the mountains

Re: Cabinet for gun safe interior
Pics - let's get working.
Where were we? Oh yeah, we were getting ready to install the pulls. After careful measuring up from the bottom and across from each side... we knew where we were going to drill. Pucker factor.. Clamped a backer board in place to prevent breakout inside the drawer. Then you get lined up on the Drill Press and cross fingers and toes... ... and slowly but surely drill, careful to drill all the way thru into the backer.
Then test fit Tina's choice of drawer pull. To make sure the bit doesn't wander when you pull that handle, you use a punch and brass mallet. Repeat the process eight times. Pucker Factor is repeated eight times.
After each fitting of the pulls, the pull and the screws are removed and placed in the bin until after they are sanded and finished.
After one last sanding, wiping down with denatured alcohol, the sides and top got a pass with Watco Danish Oil in Light Oak. It really made the extra work of using the oak plugs worth it, though no one will know but me.
Then the Walnut finish was carefully applied to the drawer fronts and the trim.
Where were we? Oh yeah, we were getting ready to install the pulls. After careful measuring up from the bottom and across from each side... we knew where we were going to drill. Pucker factor.. Clamped a backer board in place to prevent breakout inside the drawer. Then you get lined up on the Drill Press and cross fingers and toes... ... and slowly but surely drill, careful to drill all the way thru into the backer.
Then test fit Tina's choice of drawer pull. To make sure the bit doesn't wander when you pull that handle, you use a punch and brass mallet. Repeat the process eight times. Pucker Factor is repeated eight times.
After each fitting of the pulls, the pull and the screws are removed and placed in the bin until after they are sanded and finished.
After one last sanding, wiping down with denatured alcohol, the sides and top got a pass with Watco Danish Oil in Light Oak. It really made the extra work of using the oak plugs worth it, though no one will know but me.
Then the Walnut finish was carefully applied to the drawer fronts and the trim.
You can tell a lot about the character of a man...
by the way he treats those who can do nothing for him.
I don't look back at the things I can no longer do, I just look forward to the things I still can.
by the way he treats those who can do nothing for him.
I don't look back at the things I can no longer do, I just look forward to the things I still can.