Page 1 of 3
December Western Gunbelt
Posted: Tue Dec 17, 2024 12:32 am
by BrokenolMarine
After the practice on the two pants belts, I am finally starting on the gunbelt. The first step was watching a few (bunch of) youtube videos again. Then I settled in and got busy. This will be a work in progress, as I have an idea what I want but I didn't lay out a plan. This will not be a fancy over the top design, but a basic gunbelt with cartridge loops at the back.
First step, cut out three straps from the same leather so the colors match. A 2-3/4" strap for the main belt. A 1-1/2" strap to make the billets from. Last but not least, a 1" strap to make the belt loops from....
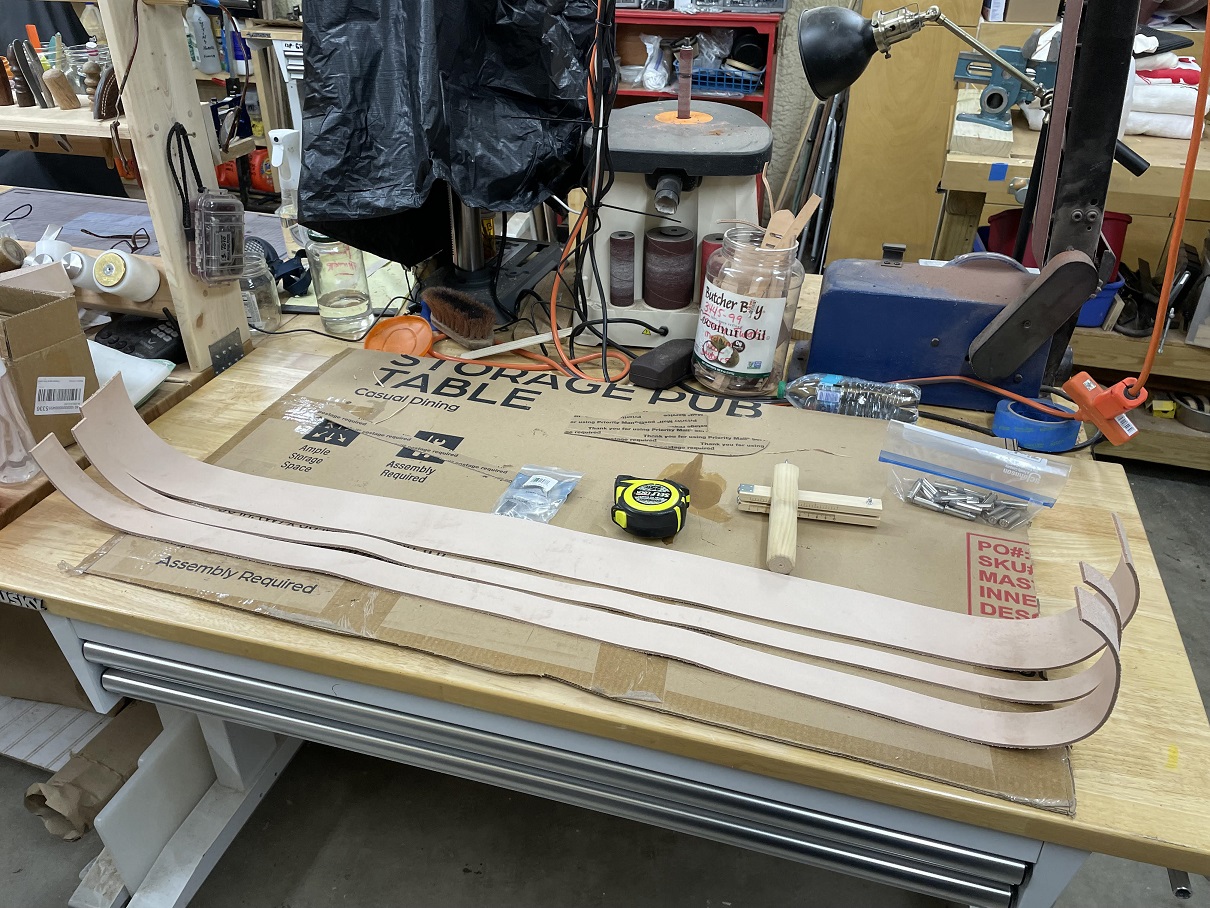
- 01 initial componet strips.jpg (462.89 KiB) Viewed 8732 times
Next up, I squared up one end of the belt strap, then rounded off the other end. The squared end will be the buckle end, the rounded end will be the billet end with the holes for securing the belt. Next, I wrapped the belt around my waist and reached back and marked the center at the spine. This is where the center of the bullet loops will go. Using the 357 mag template, I marked out the 18 bullet loops then punched them with the 1" punch.
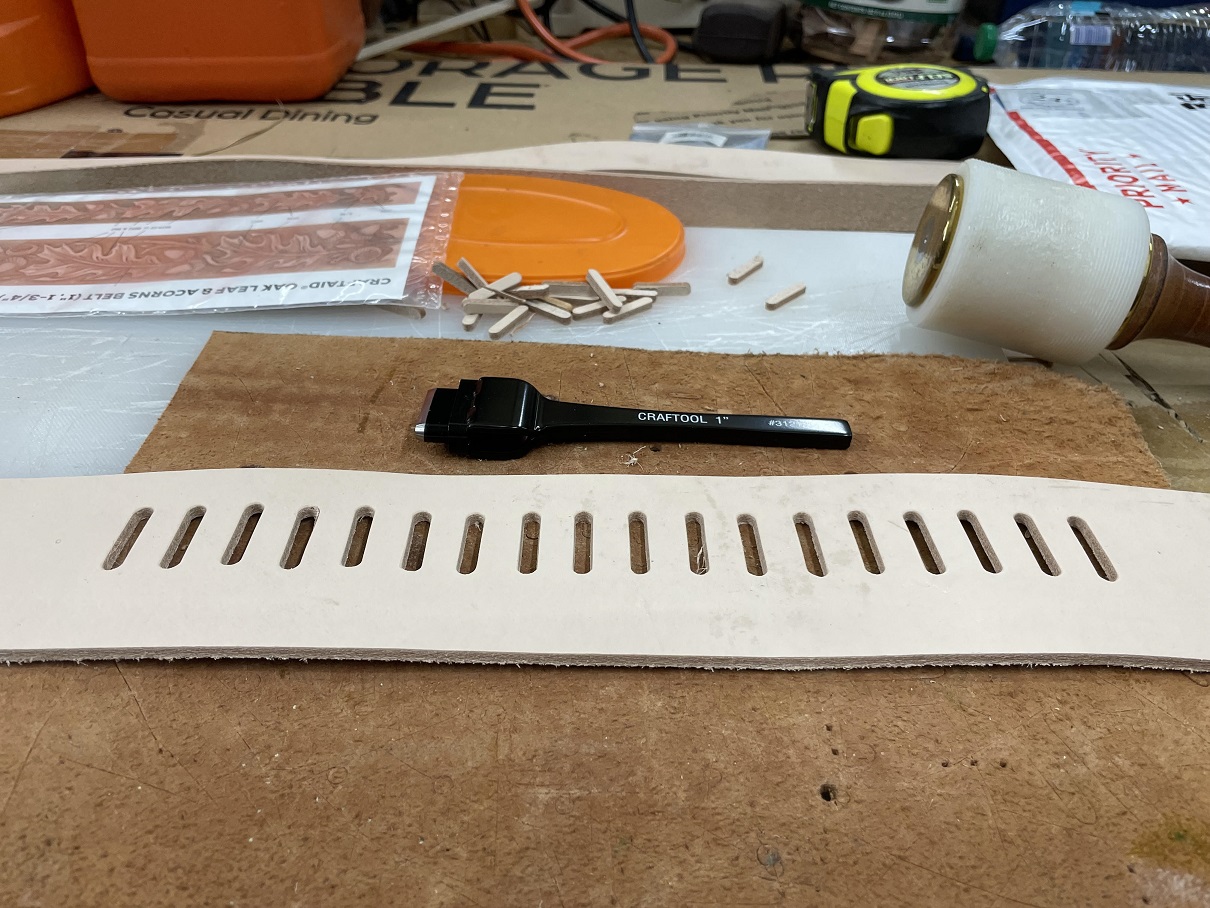
- 02 slots for loops.jpg (369.26 KiB) Viewed 8732 times
On to the strap for those loops. First I used the grooving tool and marked accent marks down both edges of the strap that would become the loops a bit later. Then, using the NEW leather splitter Miss T found me on TEMU, I split the 8 ounce leather to about 4 ounce to make it more flexible.

- 03 new leather striper in use.jpg (511.06 KiB) Viewed 8732 times
After a lunch break, I came back out and worked on forming the billets for the buckle and the billet end for the holes to secure the belt. They were a bit of work because I wanted a wider end that secures them to the belt stepping down to the ends meeting the buckle. Turned out well.
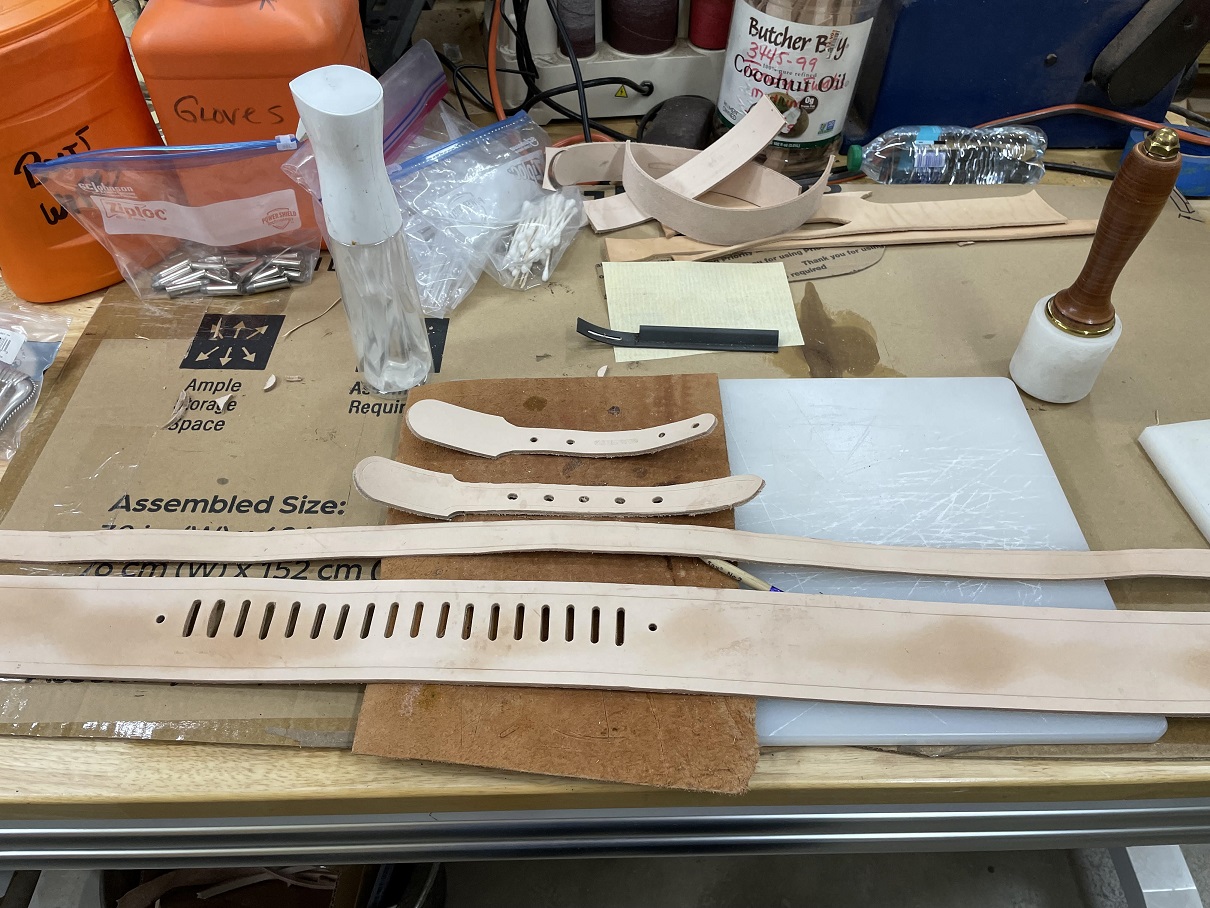
- 04 intial progress including billets.jpg (379.92 KiB) Viewed 8732 times
Done for the day but I'll be back at it tomorrow. Will start tooling where tooling is needed. I'll have to decide how far I'm going to go with that, and then if I'll be doing conchos...

Re: December Western Gunbelt
Posted: Tue Dec 17, 2024 12:01 pm
by daytime dave
That will be COOL!
Re: December Western Gunbelt
Posted: Tue Dec 17, 2024 12:22 pm
by Hatchdog
All right, thanks for taking us along again.

Re: December Western Gunbelt
Posted: Tue Dec 17, 2024 11:42 pm
by BrokenolMarine
As planned, I got out to the shop for a few hours today, and in two sessions I worked on the tooling of the belt and the other components of the assembly. First up was the belt portion and I used scraps to figure out HOW I was going to tool the belt itself. I didn't want to get really fancy on this first attempt. I tried several (a dozen) combinations and then saw my four stamp barbed wire combo. I tried the two straight wire stamps and chose the two barb stamp. After some testing, I stroked a reference line just inside the existing border lines and got busy. I think it looks good, especially for a western belt. First an overall long view:

- 05 barbed wire border.jpg (458.99 KiB) Viewed 8704 times
Note that I stopped the tooling where the bullet loops will be close to the top edge of the gunbelt. I also took a closeup view of the barbed wire tooling.... Each barb section is a stamp. Lot of work, but I think it was worth it.

- 06 barbed tooling close.jpg (399.06 KiB) Viewed 8704 times
The barbed wire pattern would have crowded the strapping that will form the belt loops, I tested it on offcuts. I went with a veiner and I like that pattern. I just cut in borders on the billets. They all turned out pretty well.

- 07 all tooling.jpg (478.36 KiB) Viewed 8704 times
A little closer look at all the day's work?

- 08 all tooling close.jpg (366.87 KiB) Viewed 8704 times
Tomorrow, once things have all dried evenly, I'll check for the need to touch up any of the stamps, then dye all the pieces. I'll need to make the belt loop for the main belt, but that's no issue, it doesn't need special treatment. It goes under the main belt.
Re: December Western Gunbelt
Posted: Wed Dec 18, 2024 9:55 am
by BrokenolMarine
The white splotches you see on the leather in a couple of the pics are the overhead lights reflected in the moisture. There are NO pidgeons in the shop.
Re: December Western Gunbelt
Posted: Wed Dec 18, 2024 10:16 am
by Hatchdog
I suspect if there were any pigeons in the shot Miss Tina would have “dispatched” them immediately. Liking the barbed wire border.
Re: December Western Gunbelt
Posted: Wed Dec 18, 2024 2:32 pm
by BrokenolMarine
Out this morning, found the pieces had dried nicely and looked pretty good. I touched up a couple light strikes, but otherwise, I felt good to go.

- 09 they dried.jpg (474.84 KiB) Viewed 8676 times
The first order of business was to wet form the large belt loop. This one will fit under the buckle end for the other end to tuck in. It won't go all the way across but will be riveted into place on the edges.

- 10 the large loop.jpg (544.87 KiB) Viewed 8676 times
After the loop had a chance to get a basic set, I dyed all the components. I chose a Light Brown dye. I was careful to dye the edges and the backs of those components that won't be lined, (The belt will) and tried to follow the lessons I learned from the various YouTube vids to try and get an even dye job. We'll see. I put the loop back around the forming block after dying to dry.

- 11 dyed it all.jpg (356.63 KiB) Viewed 8676 times
Leaving it all, I moved onto a few small projects to fill the time, and I'll come back out in the afternoon to check, and move on to the next steps.
Re: December Western Gunbelt
Posted: Wed Dec 18, 2024 2:42 pm
by BrokenolMarine
One small project was a key fob for a gift we got in the mail. This little light is extremely bright and recharges in a USB port. My friend sent two alike for Miss T and I and I made this fob for mine. I ordered small belt clips from Tandy, and will make small "holsters" so we can clip them to our sweatpants, jeans, or a pocket. I'll send my friend one as well.


- 12 key fob.jpg (312.34 KiB) Viewed 8676 times
I put the fob on mine so I know which of the two lights is mine since we toss our keys and pocket contents on the same counter.

While the dye dries, I took the original attempt at cutting the slots for the bullet loops, and the first try at the strip that forms then in with me and practiced the technique for assembly. I'll do it for real on the gunbelt, but practice never hurts, right?
You thread the strap up thru the hole, around the bullet, then back down thru the same hole, pulling it snug, then repeat, and repeat, and repeat. It looks like this....

- 13 practice in progress.jpg (414.06 KiB) Viewed 8676 times
From the back, you'll see this...

- 14 rear view.jpg (465.36 KiB) Viewed 8676 times
Once it's all done, it looks like this.
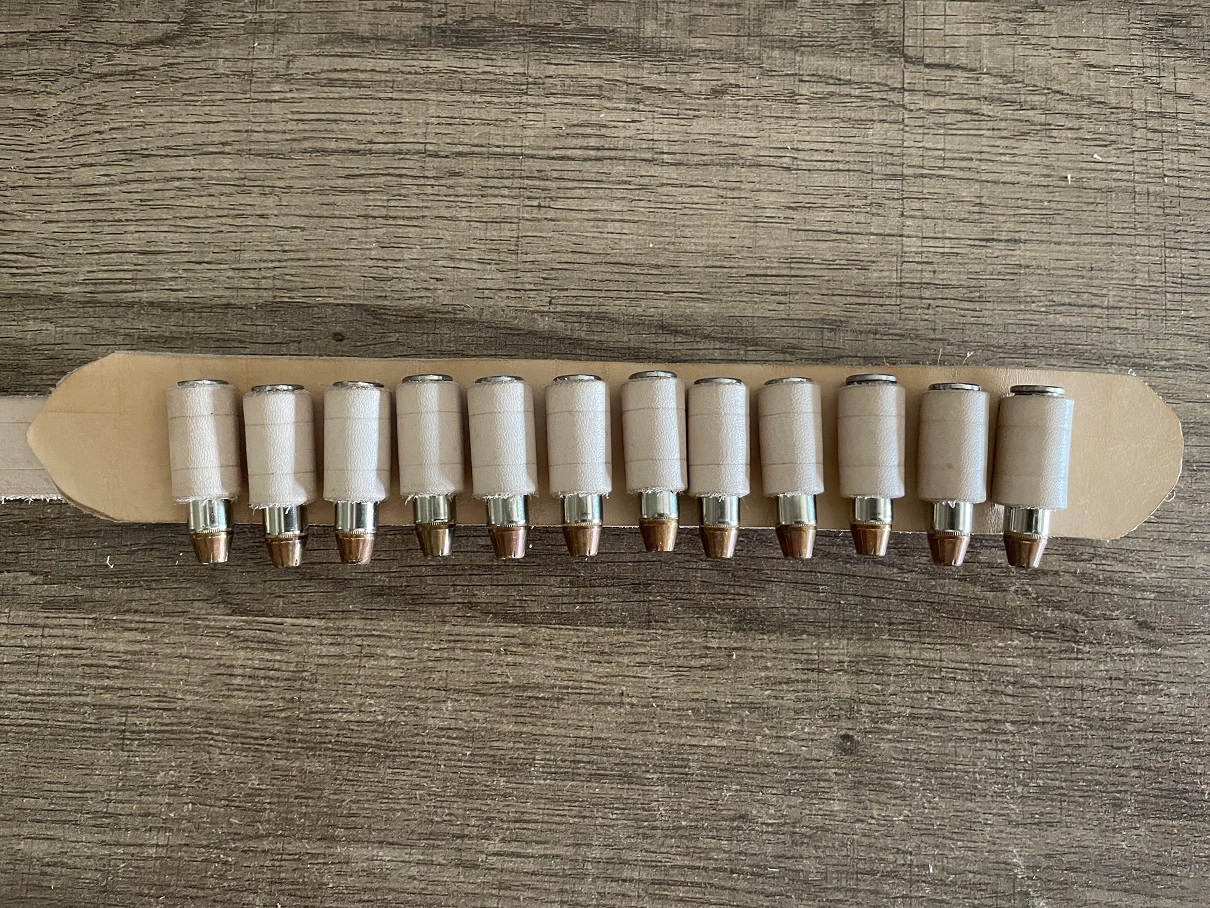
- 15 done.jpg (619.45 KiB) Viewed 8676 times
Of course, when doing it for real, you would secure the first end down as you start, then the very end down after trimming to length when you have completed the run. You can used flat, or domed rivets, or Chicago screws. Not too bad for a first attempt. Making progress, this might actually look okay.

Of course, THIS panel was designed to be riveted or screwed to the wider belt. In the design I'm using now, the slots are cut into the actual belt.
Re: December Western Gunbelt
Posted: Wed Dec 18, 2024 11:52 pm
by Bill.68
You go you BrokenOlMarine!!!! Fantastic work my friend! I love to see folls with determination and skill do their thing, MAKING instead of buying. Its so much more rewarding. You can buy something from someone like DelFatti or Brigade and will have the very best there is to be bought but if youre determined, have some skill and patience, dedicate yourself to making something to the best of your ability youll find that you have something worth so much more than anything you can buy.
Look forward to seeing the results.
Re: December Western Gunbelt
Posted: Thu Dec 19, 2024 12:55 am
by BrokenolMarine
Bill.68 wrote: ↑Wed Dec 18, 2024 11:52 pm
You go you BrokenOlMarine!!!! Fantastic work my friend! I love to see folls with determination and skill do their thing, MAKING instead of buying. Its so much more rewarding. You can buy something from someone like DelFatti or Brigade and will have the very best there is to be bought but if youre determined, have some skill and patience, dedicate yourself to making something to the best of your ability youll find that you have something worth so much more than anything you can buy.
Look forward to seeing the results.
Thank you Sir. I have Galco and Bianchi holsters, and a few other top quality ones as well... The really nice belts I had must have shrunk, they no longer fit for some reason.

I make these things because I love the look and smell of real leather, and because it get's me out in the shop doing things. Miss T and I get a lot of use out of SOME of them. I gift some of them. Others... eh... they get put on display. Moving out of the recliner is worth every penny.

I enjoy the time I spend in the shop and now and then I'll help out a friend when I can.... but again, it's about the journey. I am looking forward to seeing the results as well. If this one works out, the next one will be just a bit fancier. Maybe some bling, maybe some inlay.

Re: December Western Gunbelt
Posted: Thu Dec 19, 2024 10:42 pm
by BrokenolMarine
Back out to the shop this afternoon after Miss T returned from her errands. I beveled the edges of all the pieces, then went to work burnishing them. By burnishing, you seal the raw edges of the leather, preventing dirt, debris, and or moisture from causing the leather to rot or split at the edges, a common cause of failure in cheaper products.
If you take a close look at the picture below, and compare the far right top edge to the left, you can see the difference. The open grain on the left is a magnet for all the negatives. The burnished edge on the right not only looks much better, but is sealed against intrusion.

- 16 burnished all edges.jpg (526.65 KiB) Viewed 7975 times
Worth the effort, especially on a major project. After burnishing all the edges, I applied a coat of Tan Coat, a permeable finish which protects, but will allow oiling and conditioning of the leather at a later date.
We are about to start the first stages of assembly.
Re: December Western Gunbelt
Posted: Fri Dec 20, 2024 1:58 pm
by BrokenolMarine
Out this morning after breakfast. Had to treat my right hand with the heating pad first. Cold and wet this morning and Arthur doesn't like cold and wet.
Time to start putting this thing together. My first step was prepping the strap that I'll use to make the bullet loops with. I had precut and punched the first end already, so that was good to go. I used the skiving tool to trim down the opposite end, and cut it to a bit of a point. We are ready.
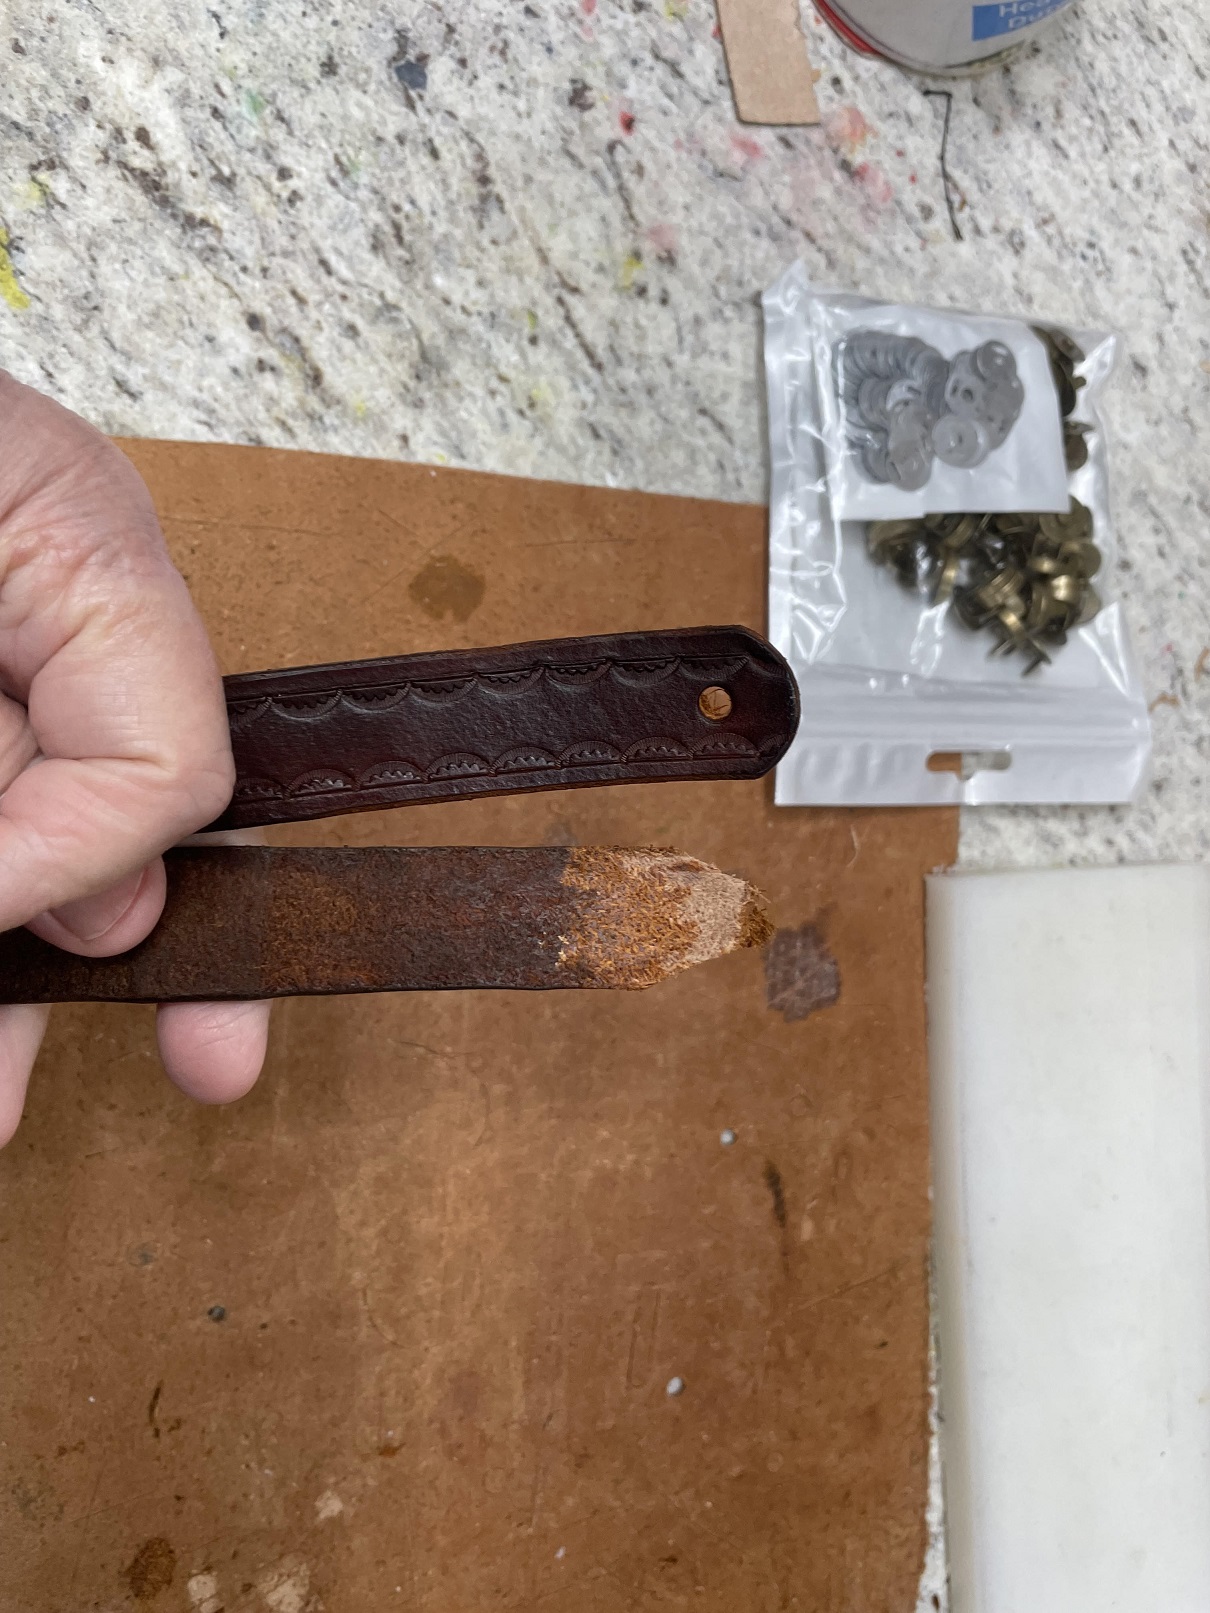
- 17 prepped the loop strap.jpg (522.58 KiB) Viewed 7961 times
As described in a previous post on the practice piece, it's about lacing the strap in and out of the slots cut in the wide belt. The cartridges are placed in the dampened strap to wet form the loops. I'll leave them in there about an hour then pull them out and put them away and allow the loops to shrink as they dry. After finishing, I marked the position of the end of the strap, punched the hole and cut the rounded end on the strap. I even died the fresh cut end. I don't know why, the belt will be lined and no one will see the back side.
I used conchos to secure the ends rather than rivets. I like the look.


- 18 loops turned out nice.jpg (343.34 KiB) Viewed 7961 times
One last task before going in for a break. I installed the large belt loop on the buckle end of the gun belt. Punched the planned holes, marked the position on the belt end and punched those, then riveted 'er in place. Good to go.
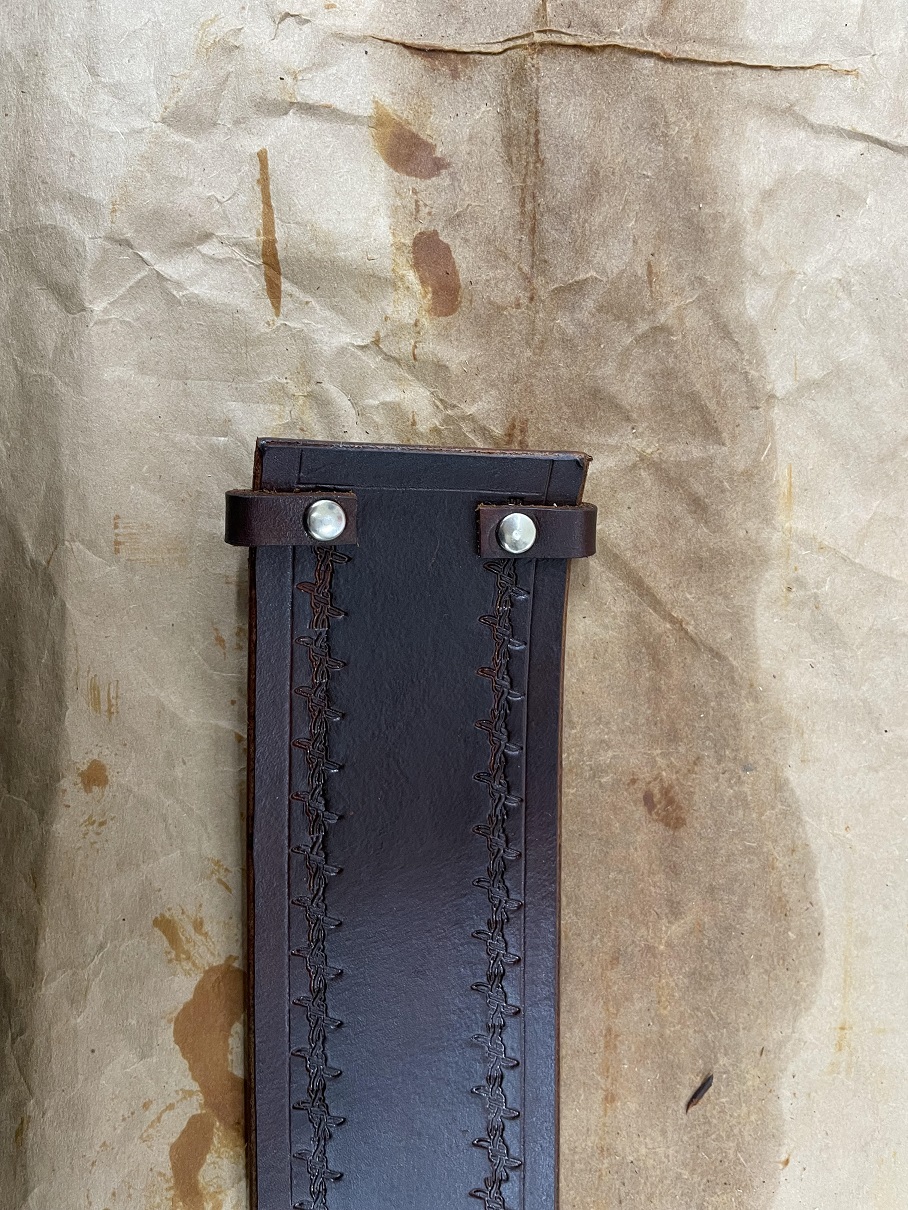
- 19 installed the large loop.jpg (522.38 KiB) Viewed 7961 times
Next up, marking and punching the holes in the billets, then matching holes in the belt and sewing them together.
AFTER a break.
Re: December Western Gunbelt
Posted: Fri Dec 20, 2024 11:02 pm
by BrokenolMarine
Late afternoon session, I got the buckle billet marked and the holes drilled, got the position marked on the belt and glued the billet in position. I'll drill the holes into the belt tomorrow then saddle stitch the billet into place.
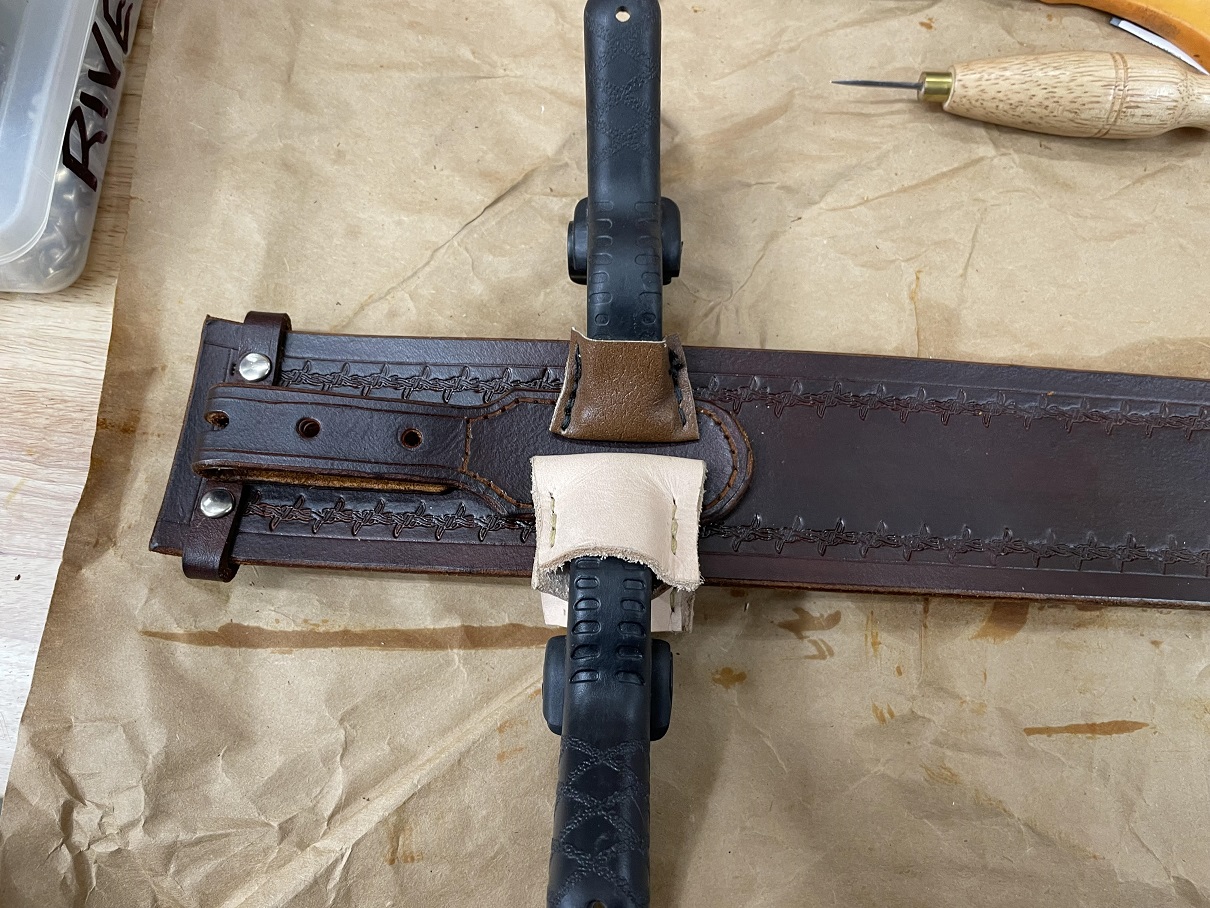
- 20 buckle billet.jpg (450.56 KiB) Viewed 7941 times
I also fitted the silver tip to the strap billet and got it marked and drilled. It will be marked and placed AFTER the buckle is in place so I can DETERMINE where it needs to be. I'll need to put the buckle thru the center hole in the piece, put the belt on, then place the billet into position and mark it.

- 21 end billet tipped.jpg (407.91 KiB) Viewed 7941 times
We are close....
Next up will be the holster and sheath.
Re: December Western Gunbelt
Posted: Sat Dec 21, 2024 12:02 pm
by Hatchdog
The stamping you put on the cartridge loops really stand out and look wonderful. Another successful project nearly ready for work.
Re: December Western Gunbelt
Posted: Sun Dec 22, 2024 1:50 pm
by BrokenolMarine
Out yesterday afternoon and got the belt buckle billet sewn into place and the raw area of the stitching groove and the thread dyed. Looks good.
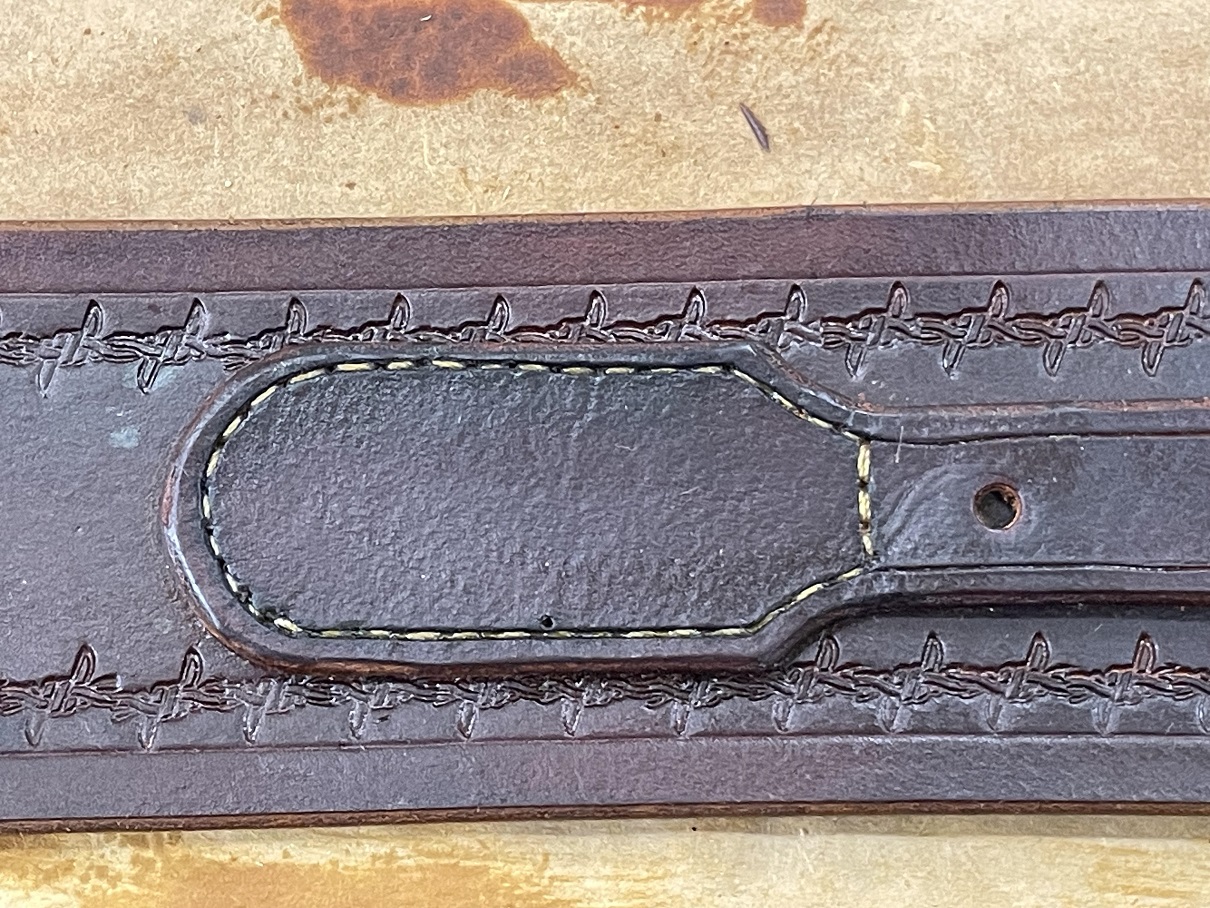
- 22 sewn.jpg (524.25 KiB) Viewed 7877 times
Once that was done, I got the buckle and silver belt loop assembled and riveted in place. That looks pretty sharp too.
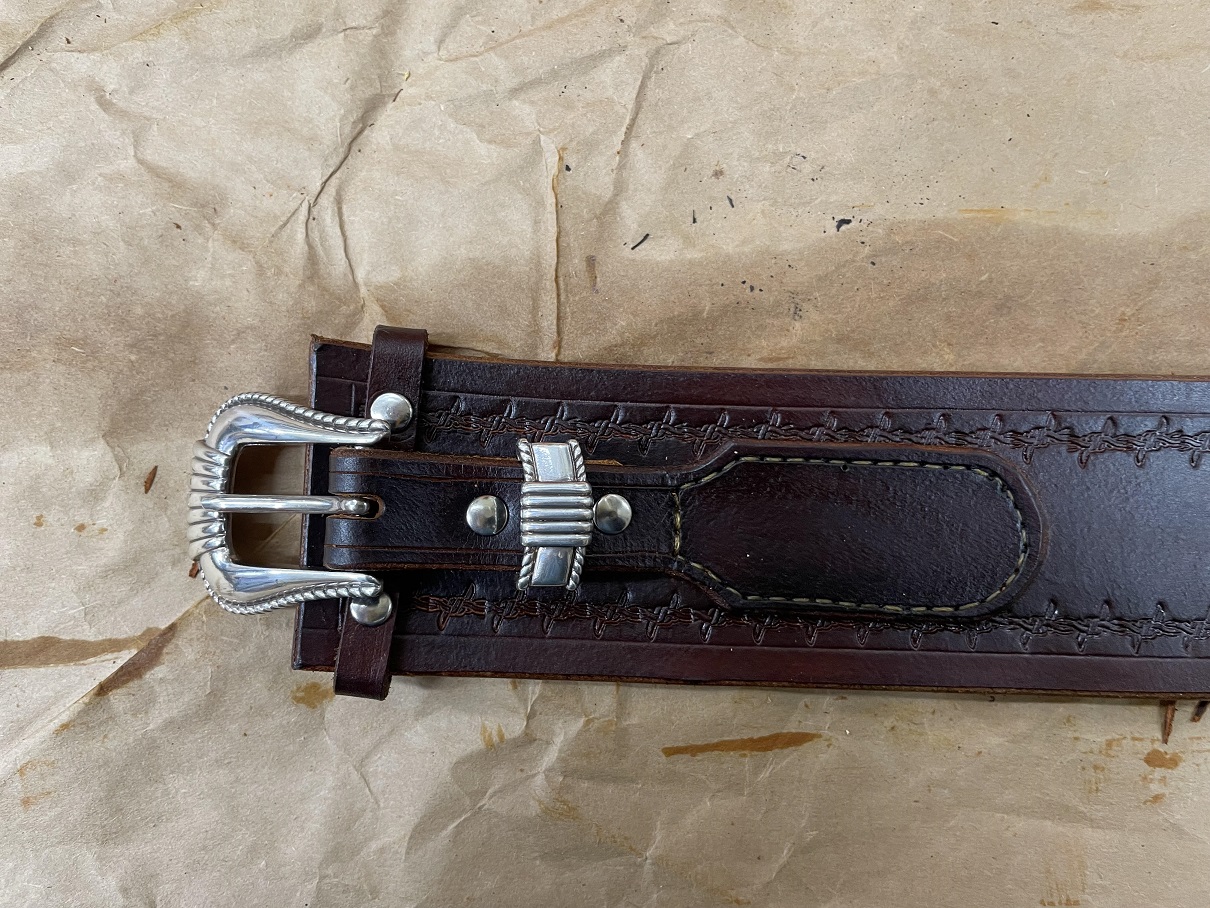
- 23 buckle assembled.jpg (484.34 KiB) Viewed 7877 times
Time to determine the placement for the tip end billet. So, I put the tip end billet in place in the buckle, center hole, and pull 'er tight.

- 24 tip end in place.jpg (520.48 KiB) Viewed 7877 times
Now I don the belt and place it where it will ride, LOOSELY on my hips, to allow for the sheath and holster that are to come, and with the awl, place a light single mark centered at the end of the billet. NOW I know where the end of the billet should fall.
Re: December Western Gunbelt
Posted: Sun Dec 22, 2024 1:53 pm
by BrokenolMarine
I use the roughening tool and rough up the back of the billet and the area I have marked on the belt. (After rechecking the position twice.)
You mess this up there is no going back. You just hope someone else likes the belt that it FITS.

- 25 roughened to prep.jpg (502.71 KiB) Viewed 7877 times
I paint the roughened areas on both pieces with a thin coat of contact cement and let it dry, then a second coat, and allow it to become tacky.

- 26 contact cement.jpg (478.59 KiB) Viewed 7877 times
Then VERY carefully place the billet on the belt. Add the clamps. The belt will sit overnight.

- 27 clamped to cure.jpg (441.23 KiB) Viewed 7877 times
Re: December Western Gunbelt
Posted: Sun Dec 22, 2024 2:00 pm
by BrokenolMarine
After breakfast this morning, I came out and prepped the belt by placing a couple pins at the back end of the billet to insure it didn't move... then began sewing. Once I had sewn down one side it was stable enough to remove the pins and continue sewing.
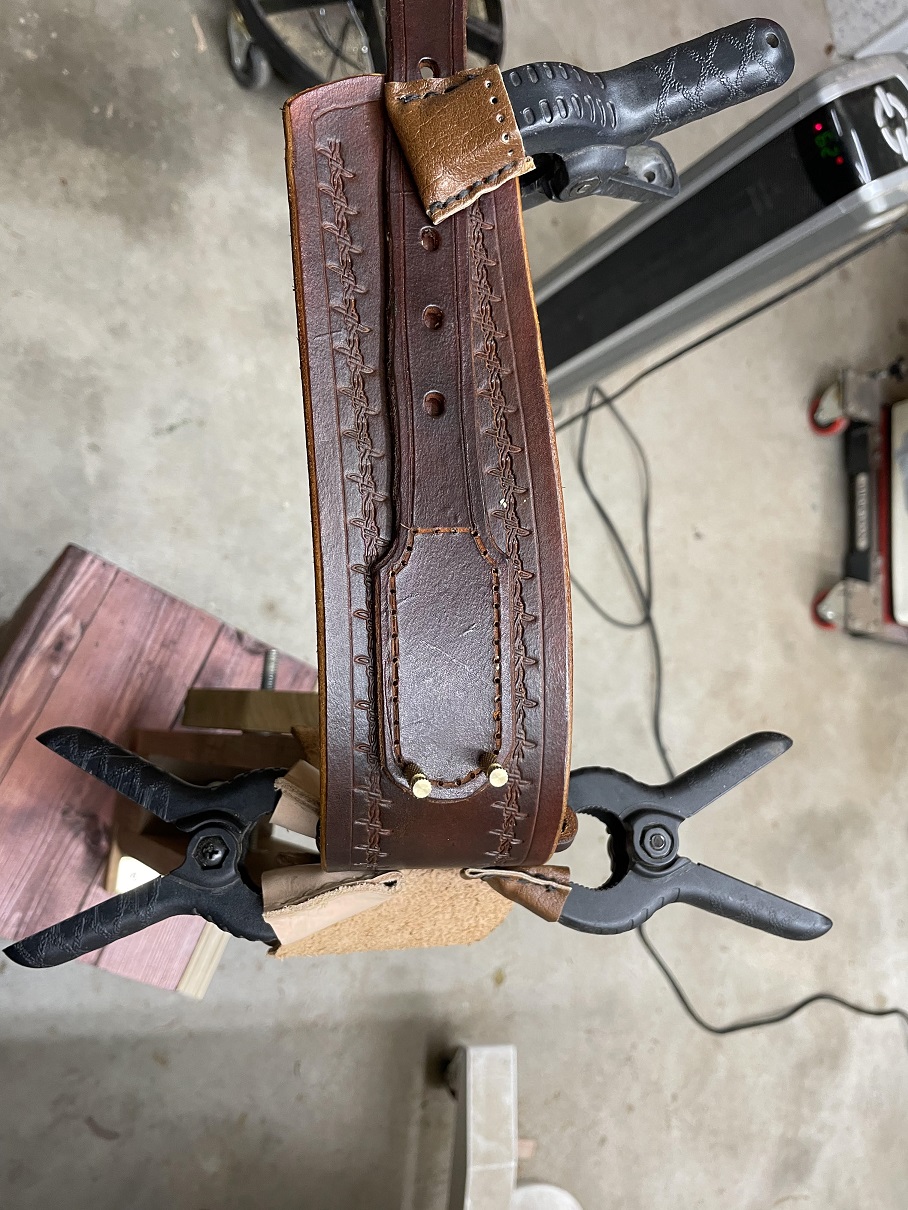
- 28 sewing the billet.jpg (386.27 KiB) Viewed 7877 times
I repeated the dying process to match the Stitching groove and thread.... Then added a concho beside each billet. These larger conchos will also go on the holster and the sheath to tie the set together. The belt is done. I decided NOT to line this belt, but will line the next, fancier one.

- 29 belt is done.jpg (453.65 KiB) Viewed 7877 times
I will wax the entire belt to protect it, once the holster and sheath are done. Taking the rest of the day off, resting the hands.
Re: December Western Gunbelt
Posted: Mon Dec 23, 2024 10:04 am
by Hatchdog
Outstanding and I agree with you, the conchos look great, both front and rear.
Re: December Western Gunbelt
Posted: Mon Dec 23, 2024 2:26 pm
by BrokenolMarine
Watched a couple videos to refresh my memory on Western Holster making, especially on drawing out the patterns and the different styles. This one will be pretty straight forward. I'll lay it out and get started this afternoon, hopefully. Been a minute since I made the last one, so I'm looking forward to it.
Stay tuned.
Re: December Western Gunbelt
Posted: Mon Dec 23, 2024 2:59 pm
by daytime dave
Looks great Marine.