Page 1 of 3
Christmas Presents
Posted: Mon Sep 16, 2019 10:15 pm
by BrokenolMarine
Yup,
Time to start. This year I am going to make all the kids the same thing... Black Walnut and Maple cutting boards. Starting early so that I have plenty of time to work on them and get them just right. Then ship them to Texas, Oklahoma, and deliver the ones instate.
I spent a couple hours in the shop this morning, cutting slices of both species, and will need to cut slices for another hour or so. These boards will take some wood... Especially if you are choosy about the grain patterns.

I am also out of titebond III, the waterproof grade wood glue, got it ordered this afternoon, and I should have it in hand Wednesday. By then I should have decided on layouts, cut to size, and tested the fits, and be about ready for glue ups.
Watch this thread for pics and progress, if you are interested.
Re: Christmas Presents
Posted: Mon Sep 16, 2019 10:26 pm
by markiver54
Looking forward to it Jim.
Good for your planning ahead!
Re: Christmas Presents
Posted: Mon Sep 16, 2019 11:34 pm
by Mags
.
Very interested!
Re: Christmas Presents
Posted: Tue Sep 17, 2019 10:10 am
by BrokenolMarine
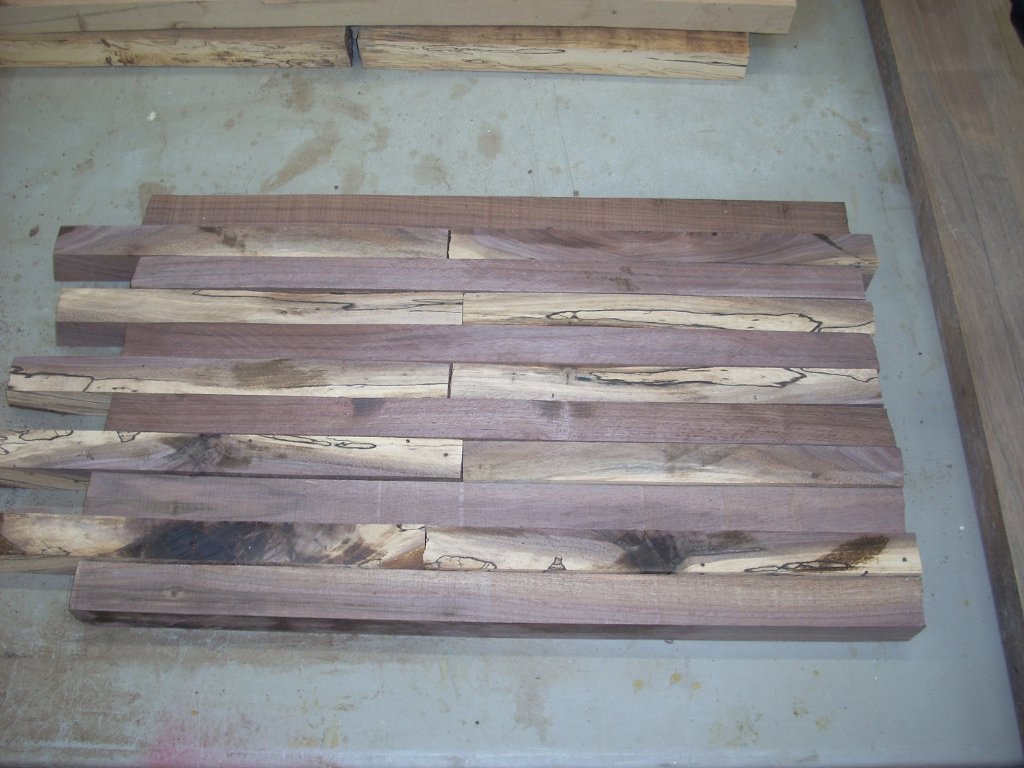
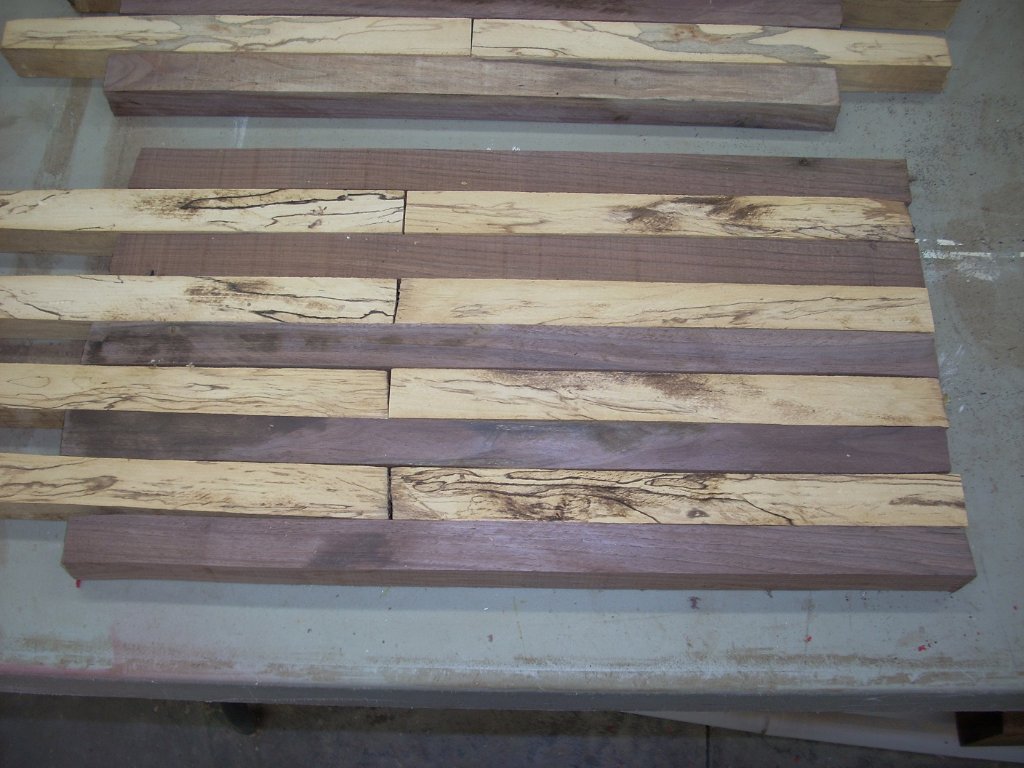
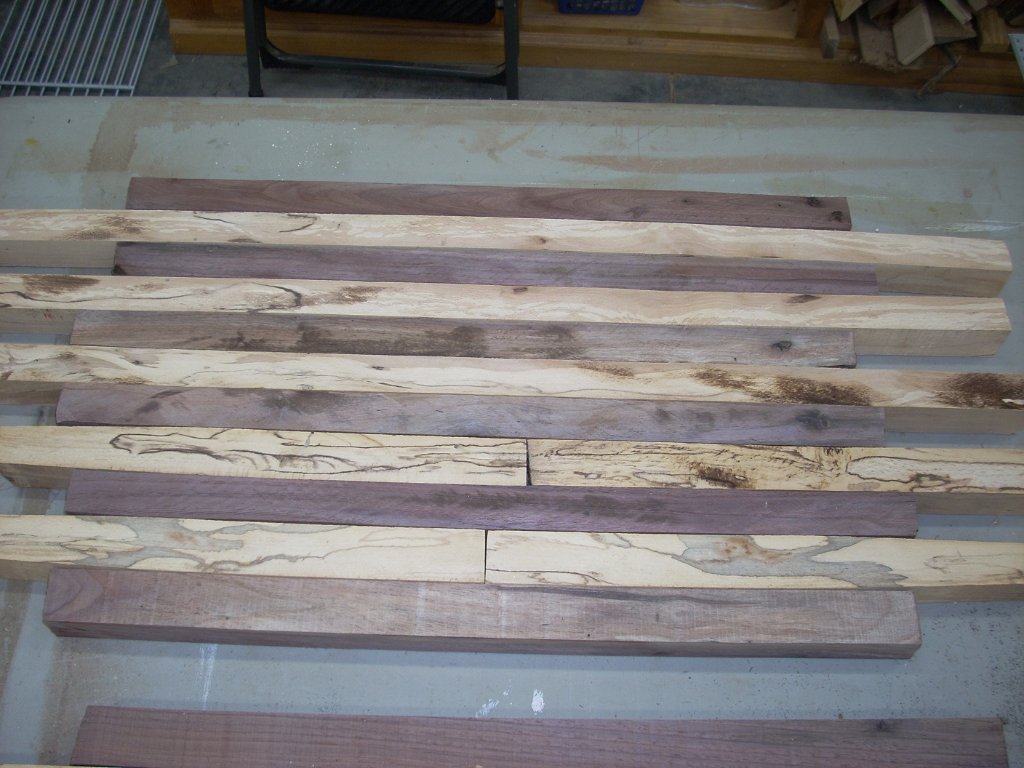
Just getting started, and the first step was to cut the strips of maple and walnut to begin the layout. I have to decide if I am going to try and blend the colors and highlight the spalted grains by laying them out in strips, or cut them into cubes and glue them up with the end grains exposed, then plane them all smooth and get the checker board effect with just the contrasting colors showing.
Here is a temporary layout, with the grain contrasts showing. That maple grain will really pop once the burn marks are gone and the finish is applied, in this case just a mineral oil finish with some wax. Remember, this is a ROUGH layout, no fitting or sizing has been done at this point to close any gaps.

Geez, I know everything doesn't fit perfect and the ends aren't even, and I would move pieces around to better match the grains...

Input?
- 01 one.jpg (160.48 KiB) Viewed 5369 times
- 02 two.jpg (166.94 KiB) Viewed 5369 times
- 03 three.jpg (165.85 KiB) Viewed 5369 times
Re: Christmas Presents
Posted: Tue Sep 17, 2019 11:04 am
by markiver54
To my taste; I think I would go with the horizontal layout as shown in your pics. Unless they are to have a dual use; Checkers/Chess and cutting boards. Whole lot less work, yet would still have the traditional cutting board look.
Just my opinion Jim.☺
Re: Christmas Presents
Posted: Tue Sep 17, 2019 11:34 am
by Mags
.
I think it'll look great in strips. When I blur my vision, I can see past the temporary roughness and get a glimpse of what it will look like finished. FANTASTIC!
BrokenolMarine wrote: ↑Tue Sep 17, 2019 10:10 am
Just getting started, and the first step was to cut the strips of maple and walnut to begin the layout. I have to decide if I am going to try and blend the colors and highlight the spalted grains by laying them out in strips, or cut them into cubes ...
Re: Christmas Presents
Posted: Tue Sep 17, 2019 12:05 pm
by BrokenolMarine
Back out in the shop for an hour or two. I set up the dust collector and the planer and ran all three layouts thru about a dozen passes, plus all the extra materials. (Always a smart move.) If I don't need the extras for these boards, I'll make a couple extras... you never know. Miss Tina will claim them or I'll have them on hand for donations to a charity or someone will need one.
My dust collector is set up to attach to each of my pieces of Dust Making Equipment, here it's hooked up to the planer...
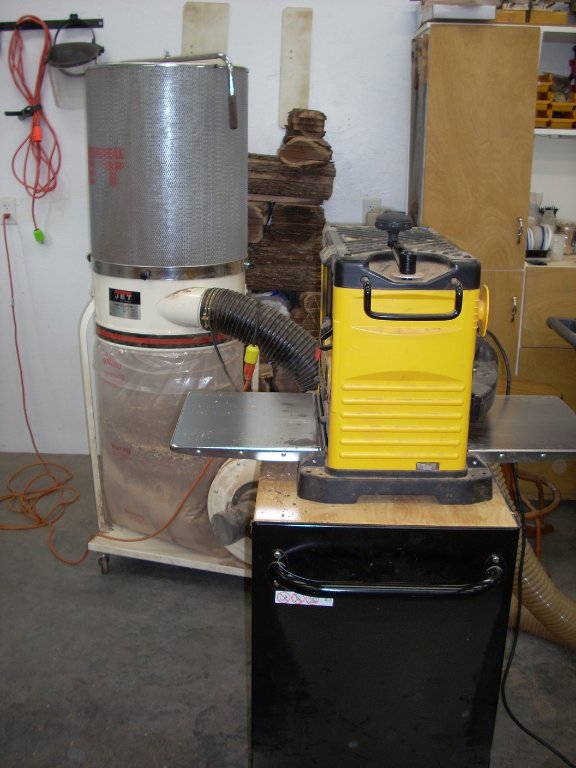
- 04 power planer.jpg (108.66 KiB) Viewed 5357 times
It makes a HUGE difference. I ran all the pieces and parts thru the planer about a dozen times, taking just a couple 32nds of an inch off on each pass.
The spare parts are in the pile all the way to the right.

- 05 three plus spare.jpg (189.42 KiB) Viewed 5357 times
The titebond III glue is due in tomorrow, but today, after some rest, I can start fitting the boards, and cutting them down to size. I am going with 11 x 18 to 20ish. Mainly because the flat rate boxes are 11-3/4 x 23ish x 3" thick.
Re: Christmas Presents
Posted: Tue Sep 17, 2019 12:15 pm
by Dahliathemeh
Can I be adopted? Lol!!
Re: Christmas Presents
Posted: Wed Sep 18, 2019 12:06 pm
by BrokenolMarine
Out in the shop, running stock across the jointer this morning. Got about half... ( Okay, yah got me...
... a third...

done...) Then my lower back and knees told me to take a break. I'll be back at it in an hour or three. Once the jointer is done, I can really start looking at laying things out and working out the three patterns. Then comes the fun parts:
The cutting,
The cussin,
The gluing of things.
You know, all that permanent, point of no return stuff.
All the off cuts?
Another cutting board, or two.

Re: Christmas Presents
Posted: Wed Sep 18, 2019 12:07 pm
by BrokenolMarine
I'm not even good at these, these three will be my second, third, and forth.
I'm faking it.
Re: Christmas Presents
Posted: Wed Sep 18, 2019 12:27 pm
by PT7
I'm certain that numbers 2-4 will all be a "cut above" number 1, Marine. You wouldn't settle for less.

I'm ready to see these before you wrap them up and place under the trees (wood to wood).
Can already see all the holiday meal fixings on those boards. They will all be enjoyed for sure!
I'll be here to watch it all come about.
Have fun.
PT7
Re: Christmas Presents
Posted: Wed Sep 18, 2019 2:45 pm
by BrokenolMarine
Back out in the shop for another session, finished jointing. Ups ran, so the titebond iii glue is on hand when we get to that point. Will likely get back out for a late session this afternoon, and start sorting thru the pieces and working on layouts.
Plenty of time... No need to rush.

Re: Christmas Presents
Posted: Wed Sep 18, 2019 5:21 pm
by Greyhawk
Looking forward to seeing the end result! Thanks for sharing your progress with us!
Re: Christmas Presents
Posted: Thu Sep 19, 2019 1:49 pm
by BrokenolMarine
Pics from the Jointing session. Didn't get back out until this morning to work on the layout.
To make the jointing LESS messy, I had to make a custom connection for the dust collection. I attached a male hookup to a piece of luane with a half moon cutout that fit the small rectangular discharge port on the jointer. Prior to that, I had bungee'd the dust collector hose to a work stand, and stood that next to the discharge port, to catch about 75% of the discharge.
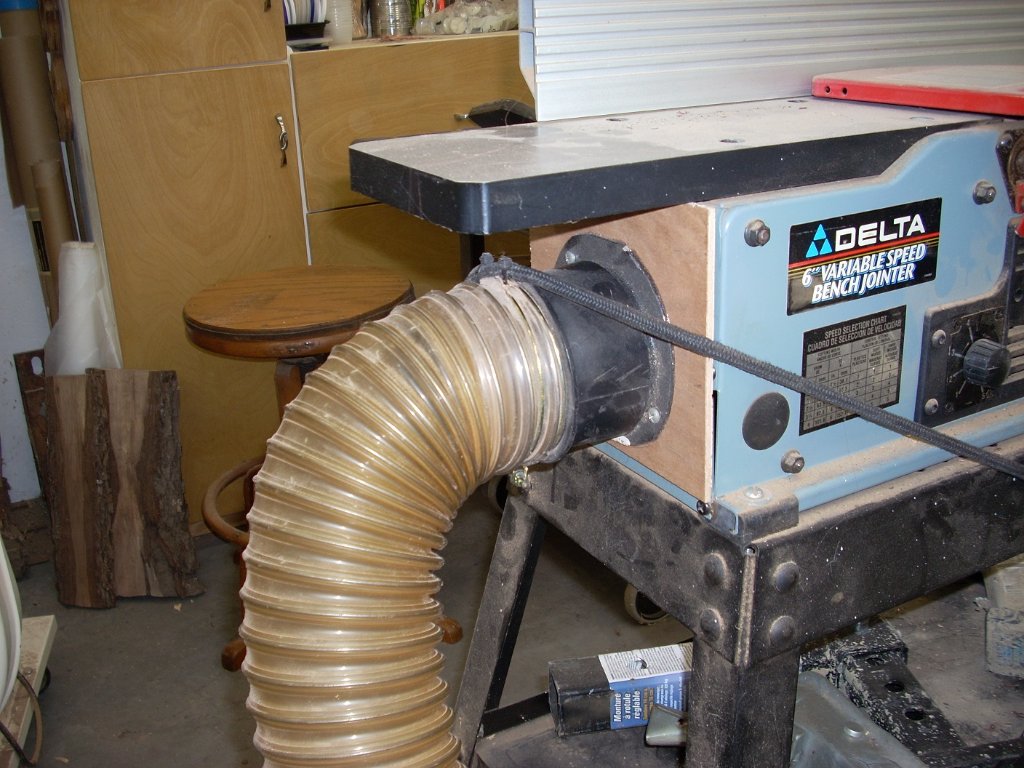
- 06 custom connection.jpg (193.69 KiB) Viewed 4428 times
With the dust collector hooked to the jointer, I got busy yesterday and knocked out the work. With this hookup, the only shavings that escape are the few that are tossed free at the blades.
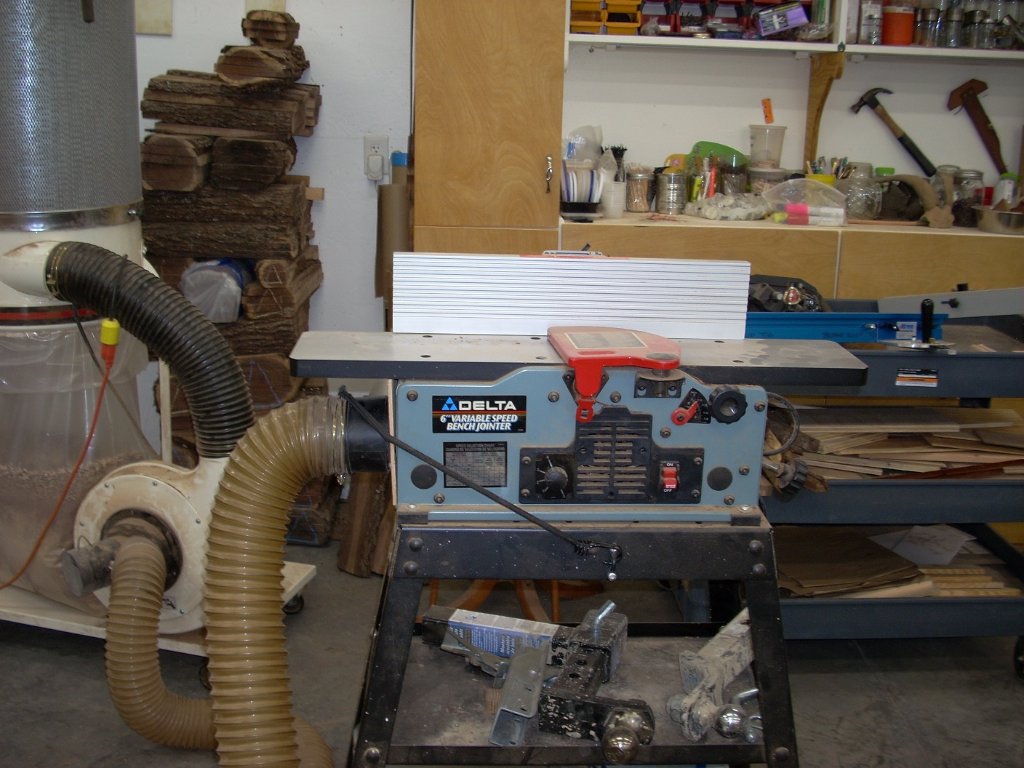
- 07 jointer setup.jpg (178.19 KiB) Viewed 4428 times
All that work had me ready to go this morning....

- 08 jointed and ready.jpg (167.21 KiB) Viewed 4428 times
Re: Christmas Presents
Posted: Thu Sep 19, 2019 1:56 pm
by BrokenolMarine
Jointing after the work on the planer, gave me four clean sides. Now the grain was exposed on all four sides. I had a lot to work with as I started working on the layout this morning. The grain in the two stacks was beautiful. The third had a lot to offer as well.
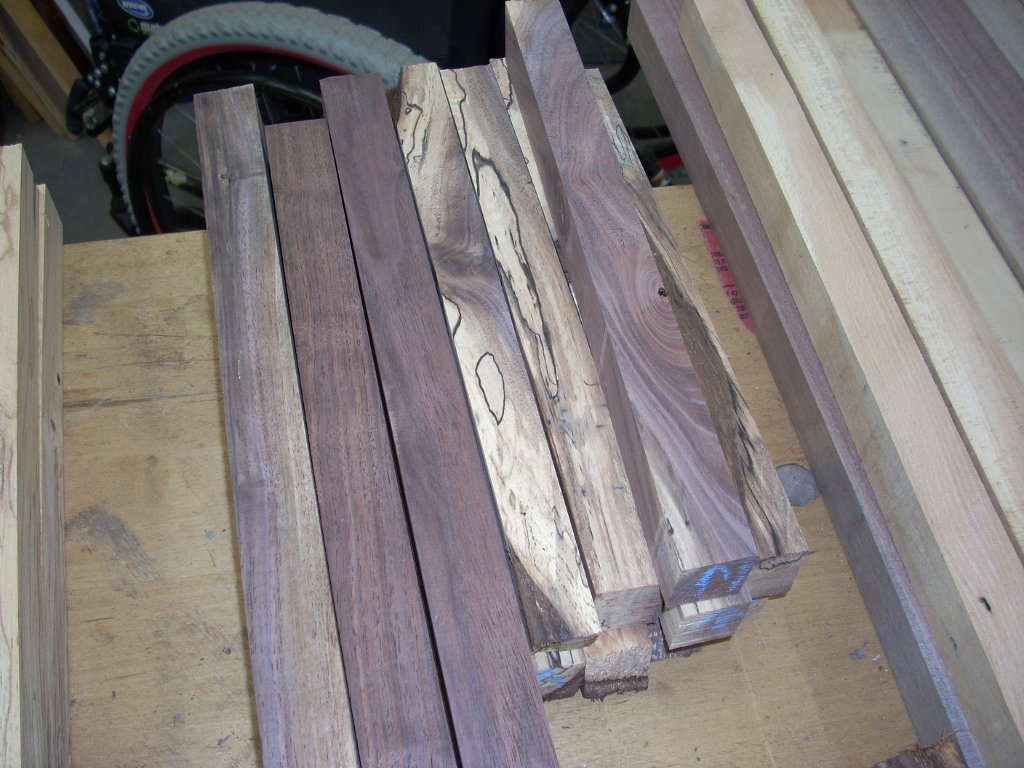
- 09 grain showing.jpg (189.02 KiB) Viewed 4427 times

- 10 grain 2.jpg (113.97 KiB) Viewed 4427 times
I got the first layout done pretty quickly, as everything seemed to fall into place. I used a large carpenter's square as a guide, and cut the ends of each piece square on the chop saw as I worked. The boards will be approximately 10x16 when they are done. I tried to match the grain patterns and color in each section as much as I could. They wouldn't match perfect, but ... you do the best you can.
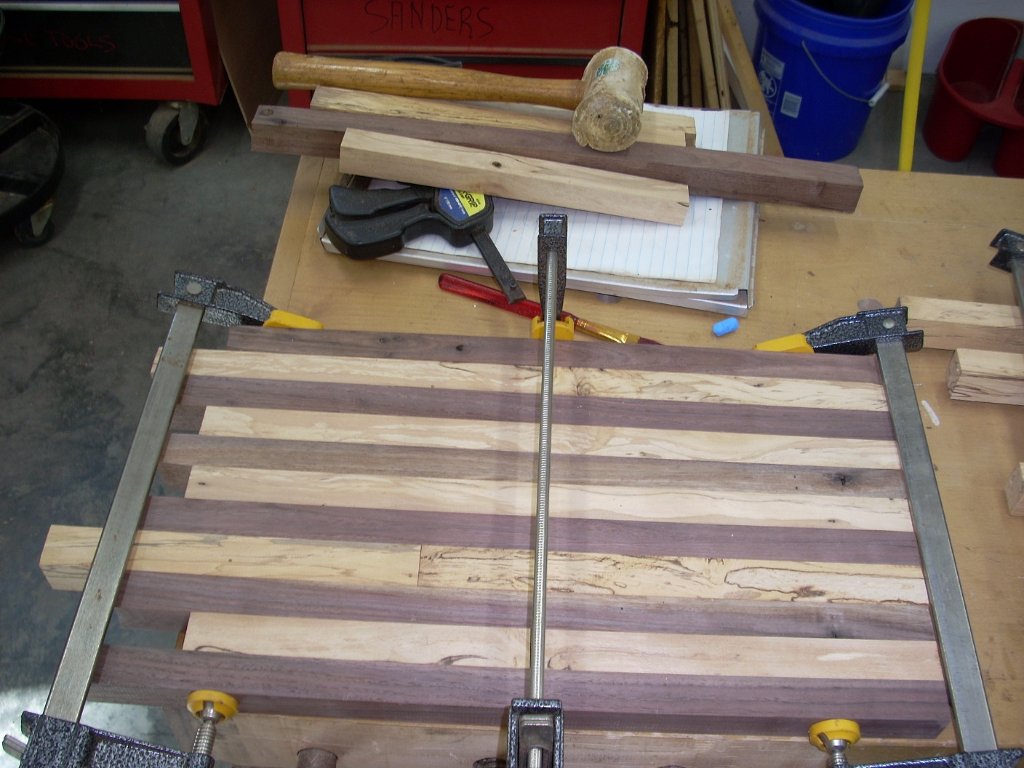
- 11 layout fitting 1.jpg (167.12 KiB) Viewed 4427 times
The second layout was more of an issue as there was some fluctuation in the thickness (width) of the pieces. Finally, I gave up and ran all the pieces thru the table saw to trim them to a consistent width. Then it was easy as pie, just matching the grain and color again, finding the best combinations. I had to take a break before beginning the third.
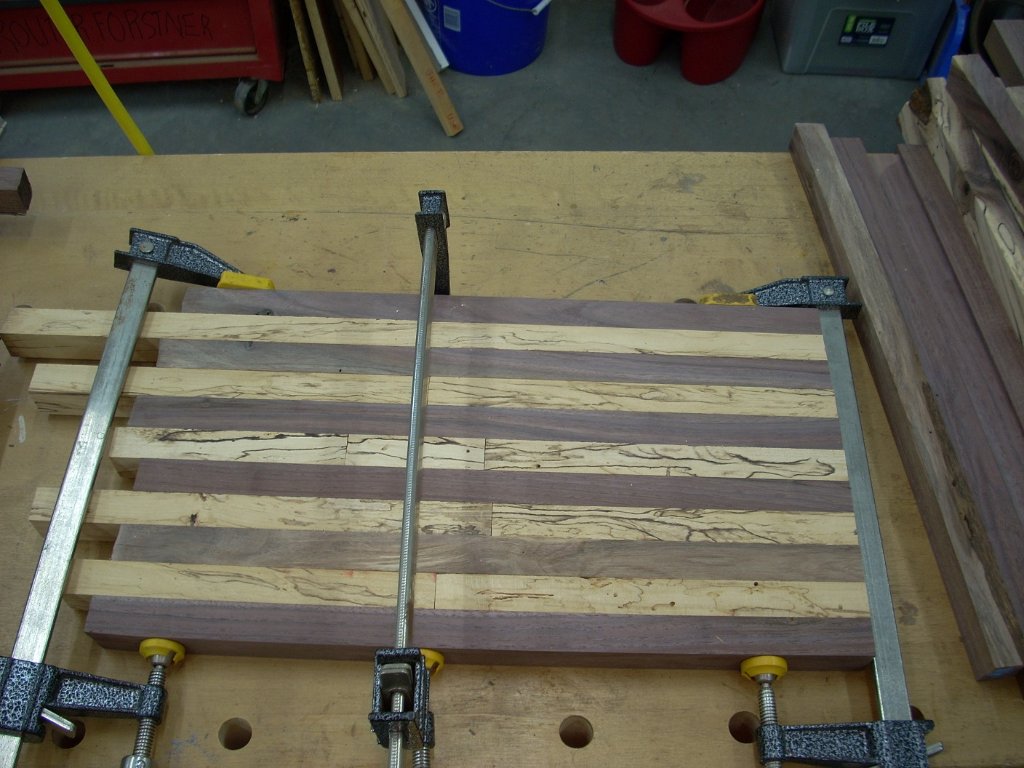
- 12 layout fitting 2.jpg (172.15 KiB) Viewed 4427 times
These are NOT glued up yet, just test fitted and clamped to insure no gaps and a nice color and fit.
I'm happy and Miss T gave her grin of approval.
Re: Christmas Presents
Posted: Thu Sep 19, 2019 7:32 pm
by markiver54
Looking great Jim. Like your dust collection as well!
Best part, Miss-T's grin of approval.

I assume she has one also?
Re: Christmas Presents
Posted: Thu Sep 19, 2019 7:57 pm
by Ernie
Nice work. These are going to turn out well.
Re: Christmas Presents
Posted: Thu Sep 19, 2019 8:03 pm
by BrokenolMarine
markiver54 wrote: ↑Thu Sep 19, 2019 7:32 pm
Looking great Jim. Like your dust collection as well!
Best part, Miss-T's grin of approval.
I assume she has one also?
On top of the potato bin.
I'll get around to her a user once I knock out these Christmas presents. I want to try a Chevron pattern. In addition, a friend dropped off a top to a coffee table that belonged to his parents. The wood came from the Caribbean, and the table was made by local artisans. He gave the wood to me, and wanted nothing for it. I thought I would make two cutting boards from the wood, and give one to him and one to his son. They will have memories of his WWII father, a bomber pilot, when he has passed.
Re: Christmas Presents
Posted: Thu Sep 19, 2019 8:06 pm
by BrokenolMarine
I got out into the shop for a couple hours this evening... Got two of the boards glued up. Only enough of the right clamps to safely glue up the two of the three. I will glue up the third will I deal with the first two tomorrow.
Re: Christmas Presents
Posted: Thu Sep 19, 2019 8:09 pm
by markiver54
Great idea Jim ( converting the coffee table )!
Oh...my bad on the cutting board for Miss-T. Forgot about the top of the beautifull bin.
