Page 1 of 2
Next Leather Project - 22 Plinking Pouches
Posted: Wed Jul 20, 2022 8:07 am
by BrokenolMarine
I have decided to make a couple .22 pouches you can either wear on your belt or attach to a lanyard and hang over your shoulder that would contain a box or two of .22 ammo. You walk the trail and plink, drive around the farm doing your chores, or checking a fence line... your ammo isn't exposed like a belt sleeve or gun belt loops, but you have plenty. You get a few minutes and targets of opportunity... dirt clods, vermin or varmints... you have ammo on hand.
Meh... it may work, may not. But, TIME I have.

First, one of the pouches goes to a friend who offered ME a favor, so a favor I pay in return. I asked them what them they wanted on the pouch. I don't do just plain that often. I offered some options and Oak Leaves and Acorns was the choice.
I haven't carved those in a while, so I thought I'd better get in some practice. A first shot, without watching any refresher videos. Yeah, where did I save those videos.

The acorns need work and the leaves are hacked. I'll get out my backlit tracing panel, find a good sample and give it another shot before I try to carve into an actual project piece.

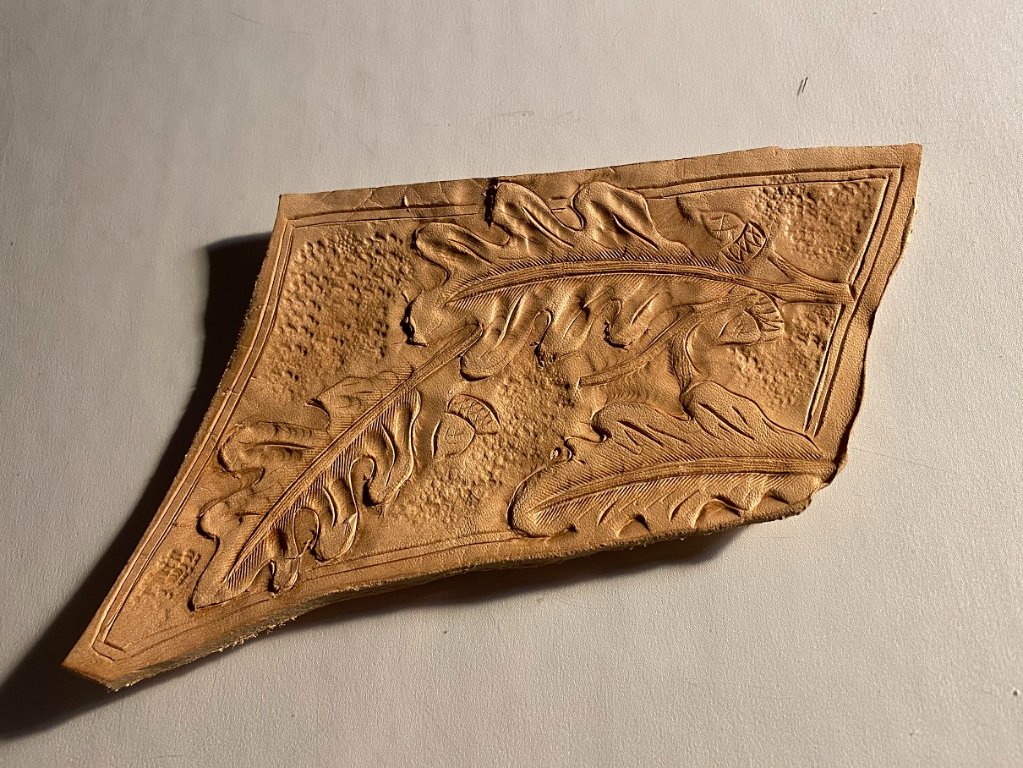
- Practice First.jpg (234.83 KiB) Viewed 11862 times
The pouches should turn out nice. I'll do one with a belt loop on the back and one with D-rings. One with Oak Leaves and one with Basket Weave or maybe something else.

Watch this space, it might get interesting... at least for me.
Re: Next Leather Project - 22 Plinking Pouches
Posted: Wed Jul 20, 2022 9:23 am
by MuddyWaters62
Are you going to fashion the pouch to hold individual boxes (i.e.) Stinger or just dump a couple of boxes ? Sounds like a fun project any way you go.
Good Luck! I will be watching.
(NOT SO) Muddy Waters68
Re: Next Leather Project - 22 Plinking Pouches
Posted: Wed Jul 20, 2022 9:35 am
by BrokenolMarine
I'm planning to have a rounded bottom enclosed pouch so you can dump a box or two in, that way it won't matter the brand or caliber. .22 shorts thru .22 mags, they'll all work. I remember loading from my pockets when I was a youngster... back then, no one batted an eye at a kid legging along the trail with a .22 and a puppy, shooting cans or dandy lions along the way. But we were also Scouts, and volunteers and would never have considered shooting things we weren't supposed to. We started early with BB and Pellet guns and EARNED that .22. We would never do anything to lose what we had worked so hard to earn.
My Grandfather bought me my first .22. A Winchester Single Shot you had to pull that thingee at the back of the bolt to cock the firing pin and it had that 180 degree safety lever. Hours spent on the range in his back field learning to shoot and learning all the rules. With HIM, a box of 50 rounds could last an hour, because after every shot, we had to "Discuss" each shot.
But it was the beginning of a lifetime of learning. By the time I moved up to a semi-auto .22; I would no more have burned thru the rounds in the magazine than I would have ridden my Stingray bike off the bridge. I was better trained than that. "Aim Every Shot."
Re: Next Leather Project - 22 Plinking Pouches
Posted: Wed Jul 20, 2022 9:40 am
by BrokenolMarine
I looked thru the reference books and located a nice pattern and set up the backlit tracing panel. I traced a couple patterns onto the lactate tracing sheet. Now off to the leather working bench to see what we can see.
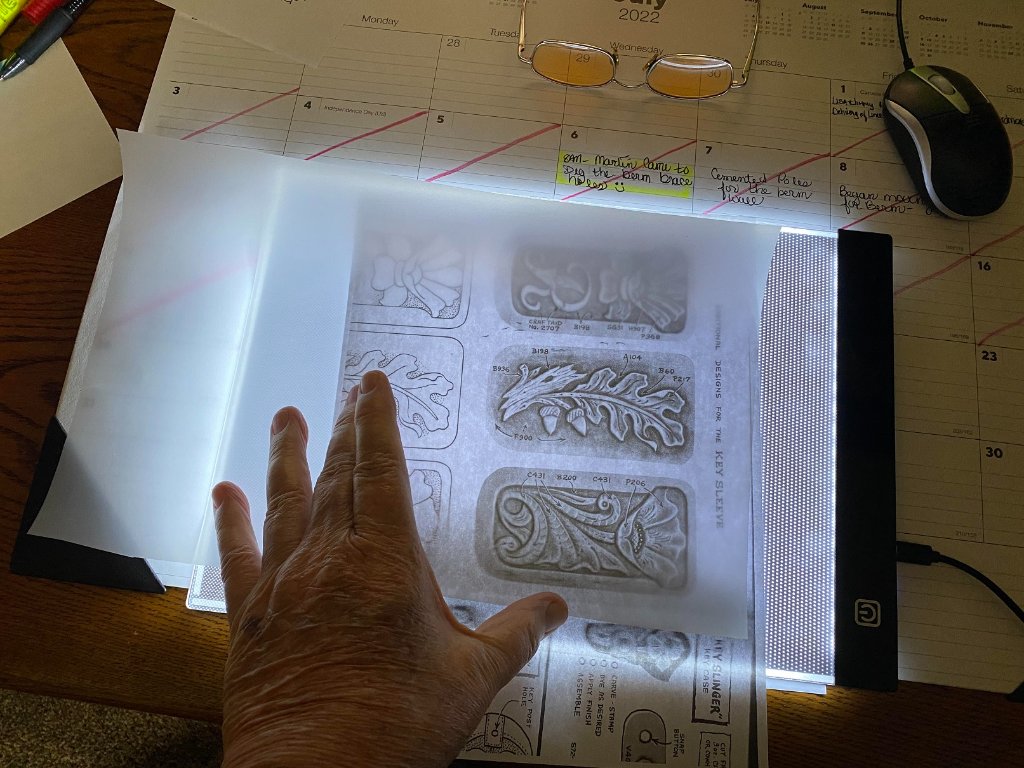
- 02 backlit.jpg (157.93 KiB) Viewed 11852 times
One more practice panel, then work refining the design a bit. The first cut didn't work like I wanted.

They usually aren't perfect first time out of the gate. I don't toss the leather. Too expensive. I can always find a use later. If nothing else, I can carve it and frame it.

Re: Next Leather Project - 22 Plinking Pouches
Posted: Wed Jul 20, 2022 9:43 am
by Sir Henry
I love me the idea. I always end up with a few 22’s in my pocket.
Edit: I like the idea. Dang spell check.
Re: Next Leather Project - 22 Plinking Pouches
Posted: Wed Jul 20, 2022 11:11 am
by BrokenolMarine
Second shot at practice.
Better, but I know there will be a third.
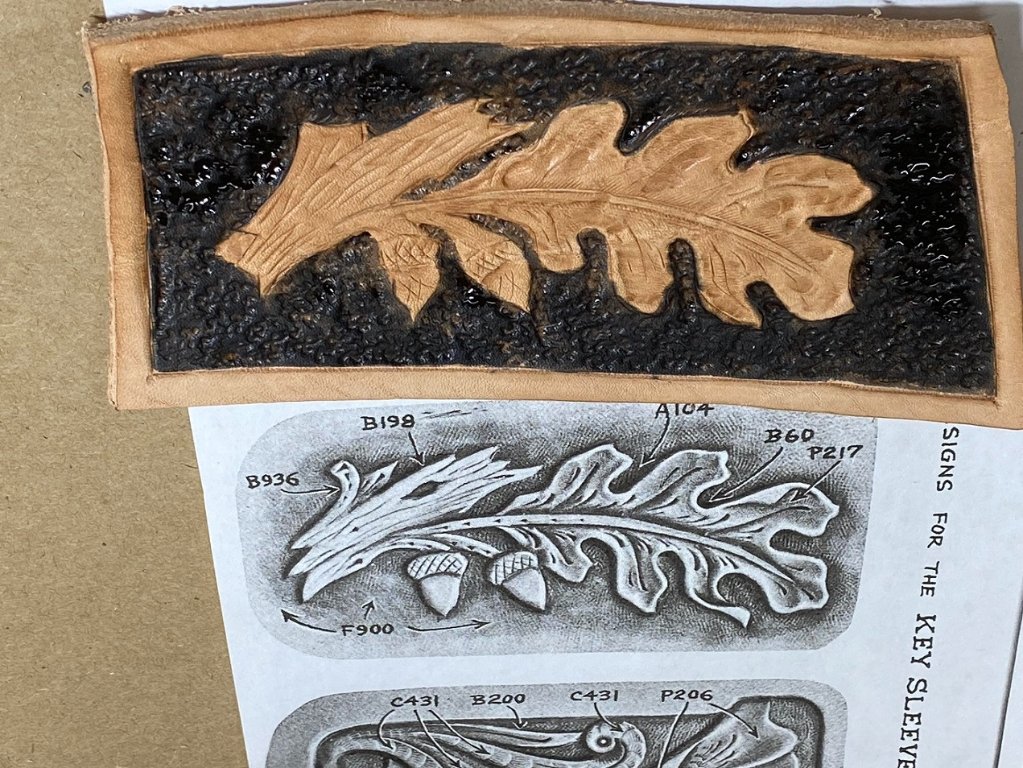
- 03 second practice.jpg (246.6 KiB) Viewed 11846 times
This is how I see the weak spots and the areas I need to work on. I just keep hacking at it, and eventually I get to where I don't "hate it."
Sometimes, I actually think I like it, then I make the mistake of going on the leather forums, and the carvings seem to be ALIVE. Then I have to remind myself... "It's only a hobby, it's only a hobby."

Re: Next Leather Project - 22 Plinking Pouches
Posted: Wed Jul 20, 2022 11:14 am
by BrokenolMarine
I'll rest the hands, maybe watch a movie, then back at it. It actually rained here and instead of 107, it's in the 80s. Tina is clipping the pastures while she can.
The cows are standing out in the middle of the rain, going: "Thank you God." They HAVE been hiding deep in the woods around the creek beds during the day and grazing at night. The milk cow is funny, when she hears Tina wetting the metal roof on the Barn and the Coop to cool the buidlings, she comes up from the creek bed and stands and let's Miss T soak her with the hose. THAT water comes from the well, which is DEEP and COLD. She loves it.

Re: Next Leather Project - 22 Plinking Pouches
Posted: Wed Jul 20, 2022 11:18 am
by BrokenolMarine
Correction....
Really Deep, and Really Cold.
Re: Next Leather Project - 22 Plinking Pouches
Posted: Wed Jul 20, 2022 11:54 am
by North Country Gal
Love it.

Re: Next Leather Project - 22 Plinking Pouches
Posted: Wed Jul 20, 2022 3:24 pm
by BrokenolMarine
Back out for more practice. Third time is (almost) a charm.
I am much happier with this try. I redrew the trace, and transferred it to the leather and tried much harder to bevel neatly. I did a much better job with that. (Still a slip here and there.) I still need to rewatch the pear shading videos again.

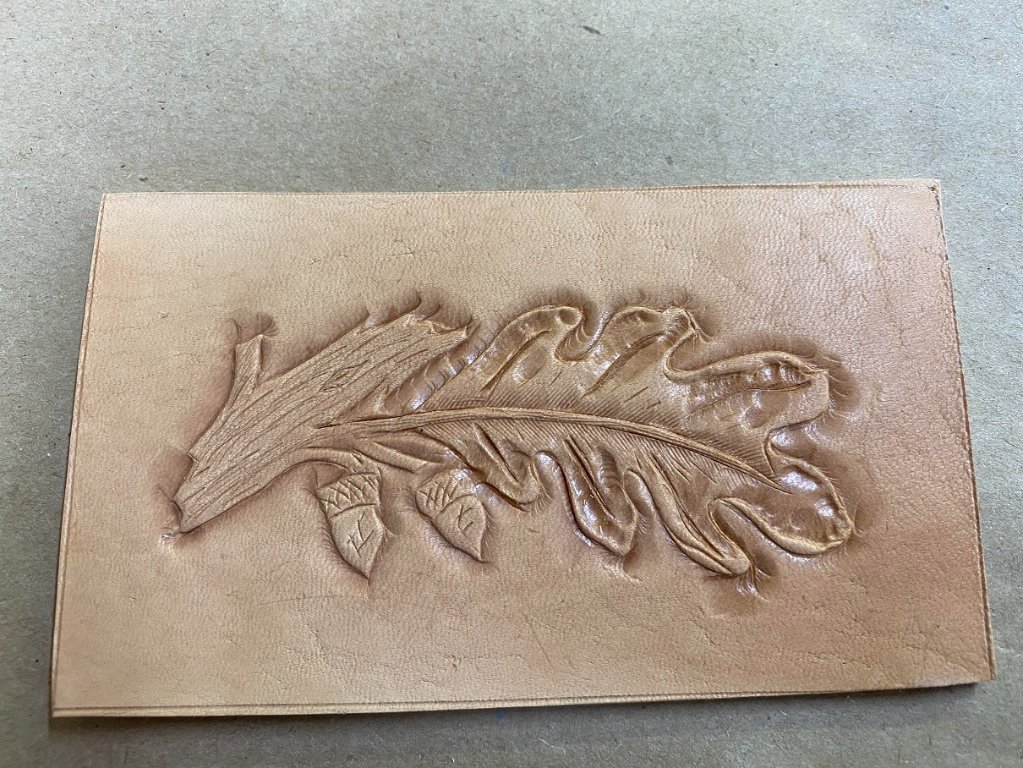
- 04 3rd practice.jpg (227.25 KiB) Viewed 11838 times
The swivel knife skills need a bit of work on this small scale. The acorns need to be rounder and the curves on the leaves could be smoother, that comes with time and skill.
Skill, I looked for a package of skill on Amazon. Out of Stock.
Went all out. Oiled and waxed this one to see the finished product. Not bad.
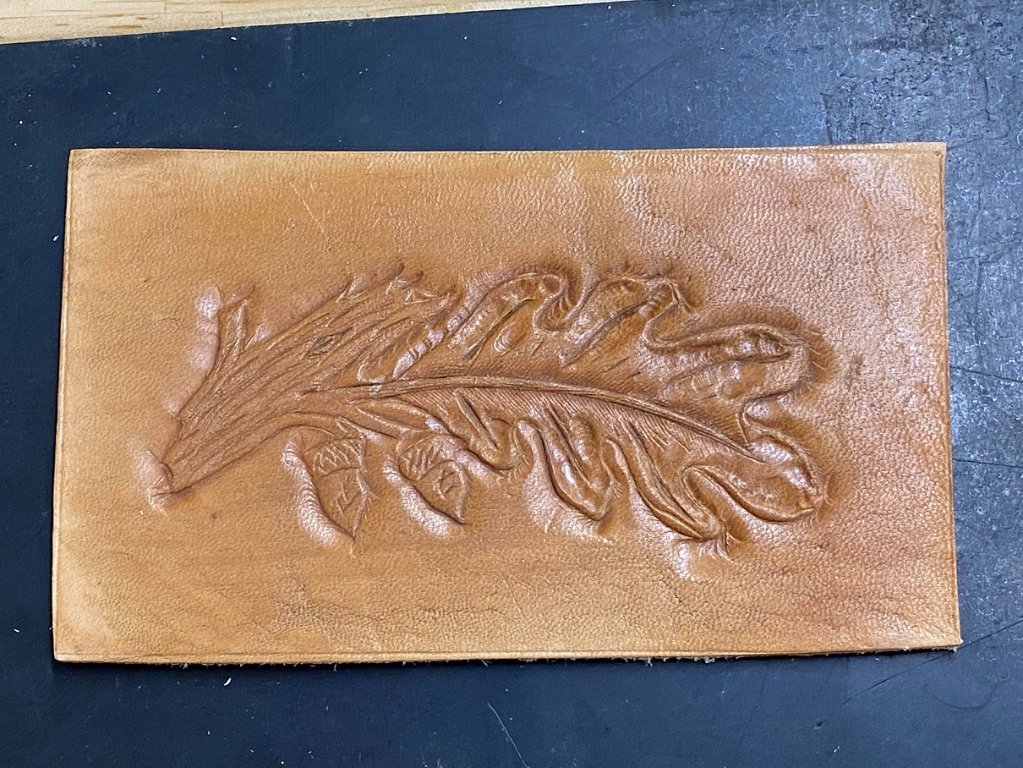
- 05 oiled and waxed.jpg (224.6 KiB) Viewed 11838 times
Hands need a rest so I'll watch the YouTube vids and perhaps rework the design this afternoon... or tomorrow.
Oops, have to drive to Duncan and Back to pick up Miss T's Bernina from the Service Center. That's a six hour round trip.

Perhaps the boss will buy me lunch?
Re: Next Leather Project - 22 Plinking Pouches
Posted: Fri Jul 22, 2022 10:35 am
by BrokenolMarine
Got back from Duncan with Tina's machine around lunchtime, and after a break to recover from the drive, got out in the shop to get some work done.
First, I laid out the design I had modified in my mind on the drive. I tossed the original plan as the testing after cutting it out just didn't please me. The new layout feels like it will work.
I designed, in my mind, an oval side panel with a notch, so the overlapping flap will lay evenly on the lower pouch when closed. I came home and went out to the shop and began drawing the side panel. The first drawing didn't work out... too tight in the interior. The second drawing looked promising.
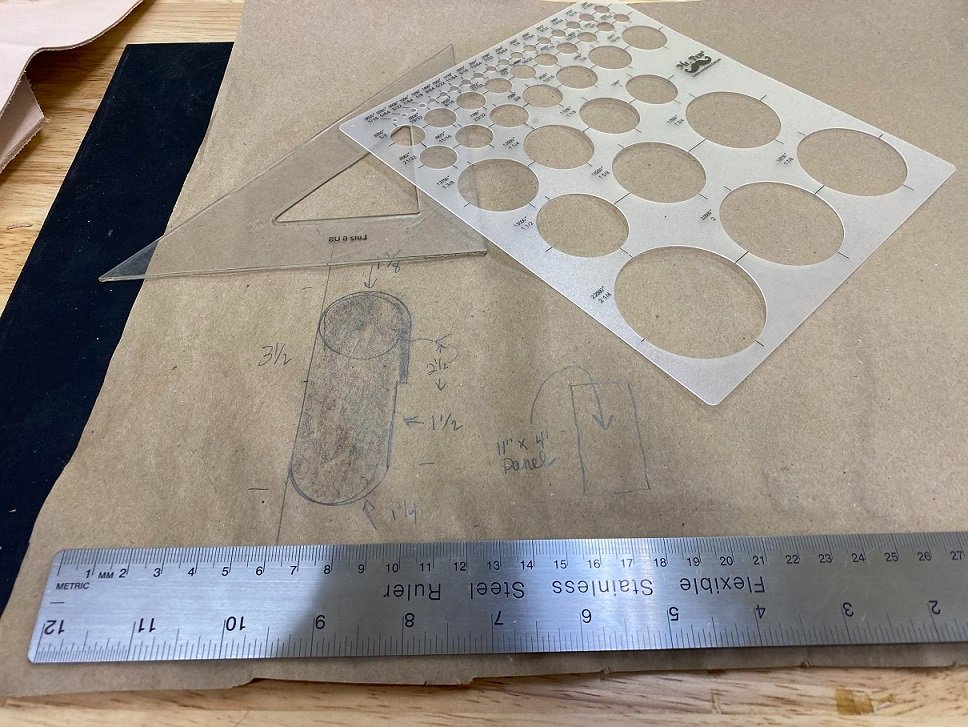
- 06 layout side panel.jpg (157.53 KiB) Viewed 10663 times
With that, I transferred the drawing to a bit heavier leather for stiffness, and then cut out the first piece.
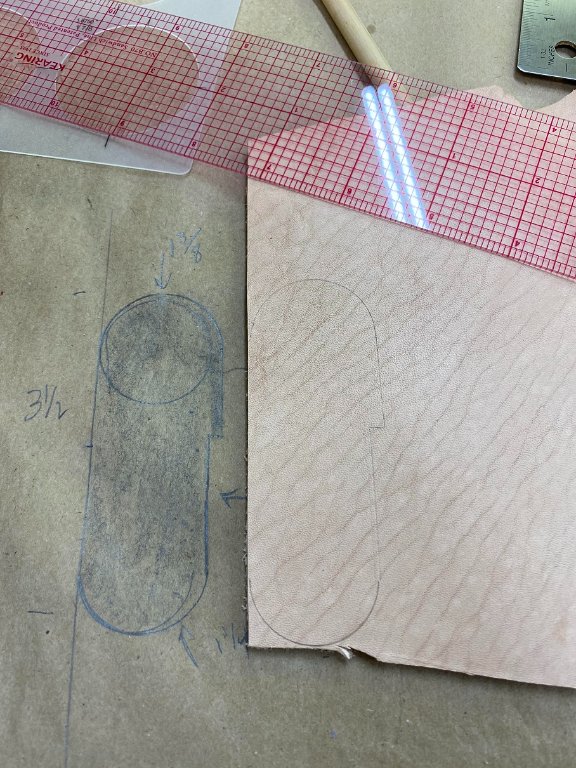
- 07 transfer.jpg (128.95 KiB) Viewed 10664 times
I tested it with the existing panel from the failed first attempt. This let me know about the length I would need. I cut out the other three side panels and made notes on the design parameters.
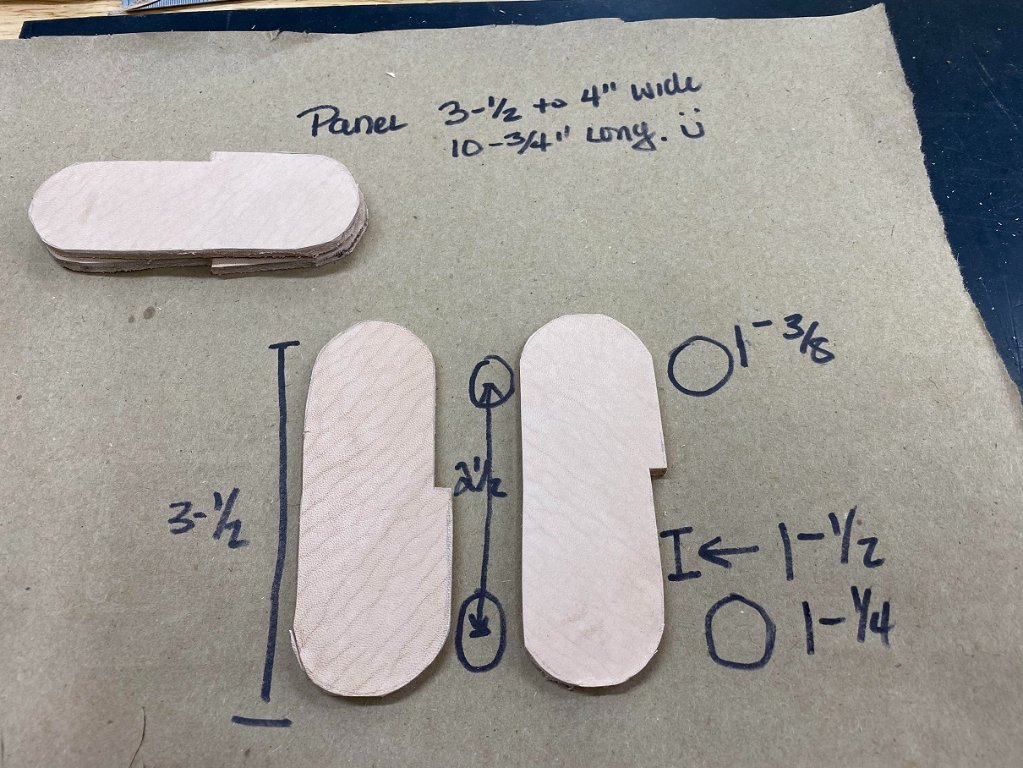
- 08 design.jpg (174.33 KiB) Viewed 10664 times
With a panel in hand, I tested the application. It is a tentative success. If the panel is properly tooled and will be sewn to the side pieces, I will slightly trim the edge to fit exactly before adding the holes for sewing.
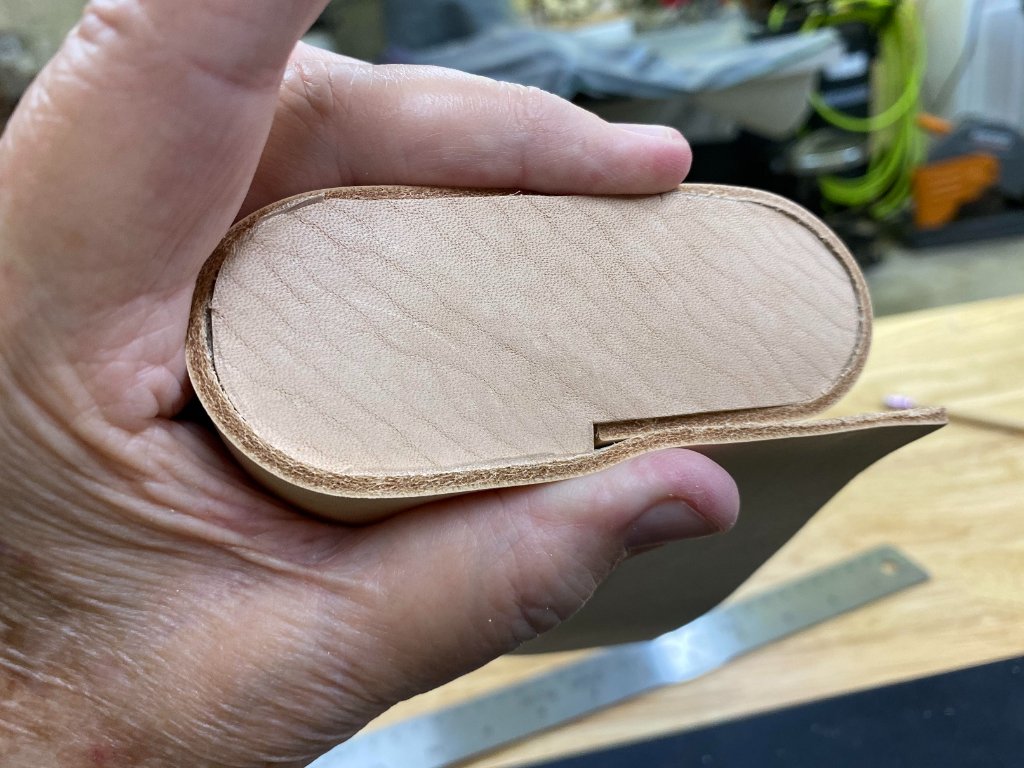
- 09 application.jpg (135.39 KiB) Viewed 10664 times
The panels here are a tad oversized, but will be cut to exact size and exactly square with the flap corners rounded before I start carving and or tooling this afternoon.
They will likely be 3-1/2 x 10-3/4.
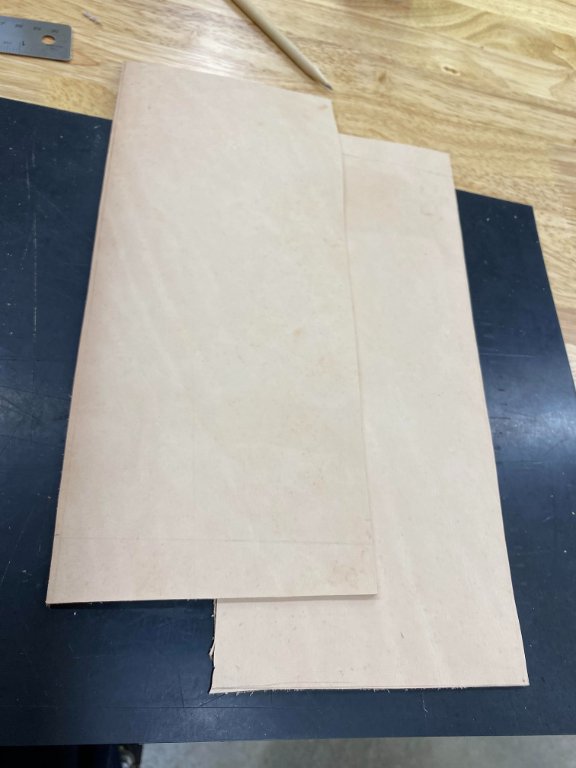
- 10 two panels.jpg (47.19 KiB) Viewed 10664 times
Re: Next Leather Project - 22 Plinking Pouches
Posted: Sat Jul 23, 2022 12:17 am
by BrokenolMarine
Back at the job this morning. Started by using a small square to cut and shape the first panel to 4 x 10⁻³/4 inches. Want it square and even edges to present a good appearance when the project is sewn together.
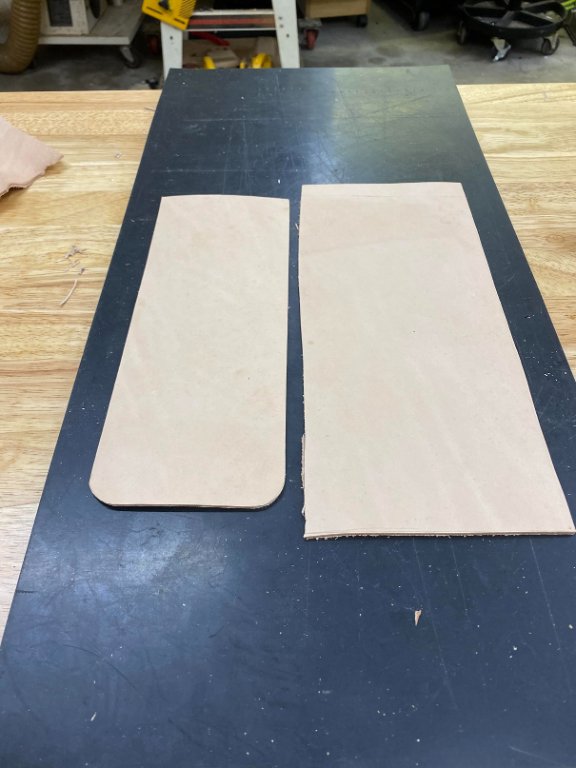
- 11 1st panel sized and shaped.jpg (60.63 KiB) Viewed 10655 times
After the panel was cut and the shape was matched against the notched side panel, I marked the areas that would be the face of the front, and the flap area to determine the areas where carvings would be appropriate. Then where stitching would take place, then marked and grooved for the stitch lines on the panel and the side plates. Next I transferred the design to be cut for the tooling and carving, then the borders.
Once all that was done, I started by cutting in (Carving) the Flap design in with the swivel knife.
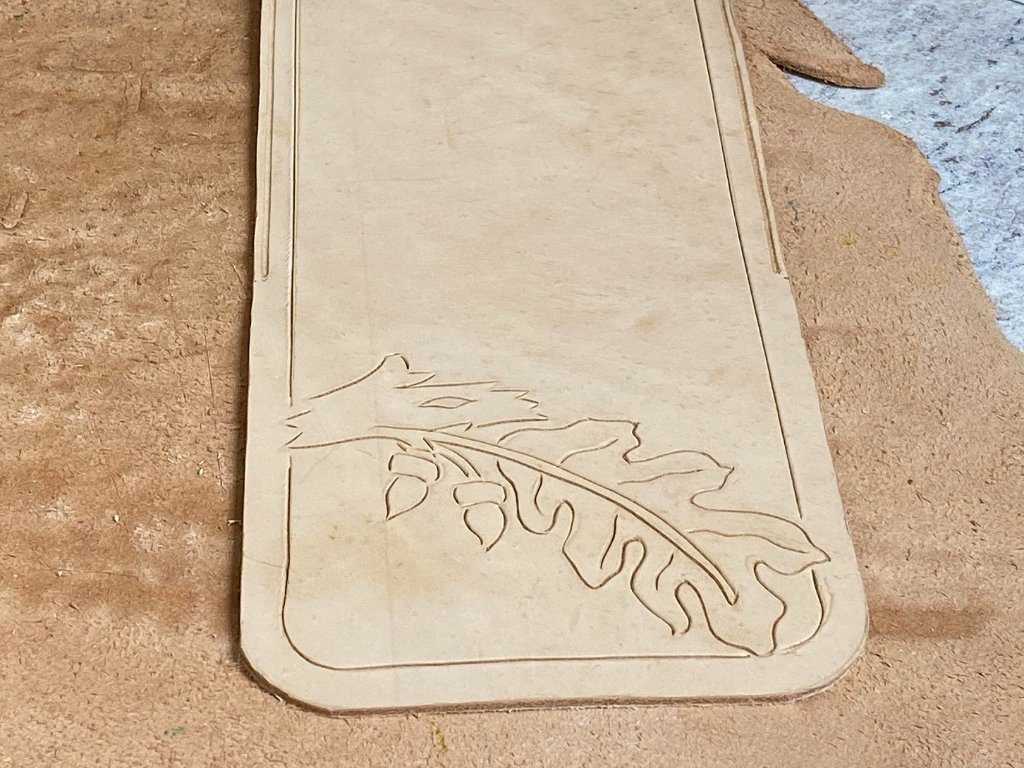
- 12 carved flap.jpg (179.1 KiB) Viewed 10655 times
I also cut in the front panel design.
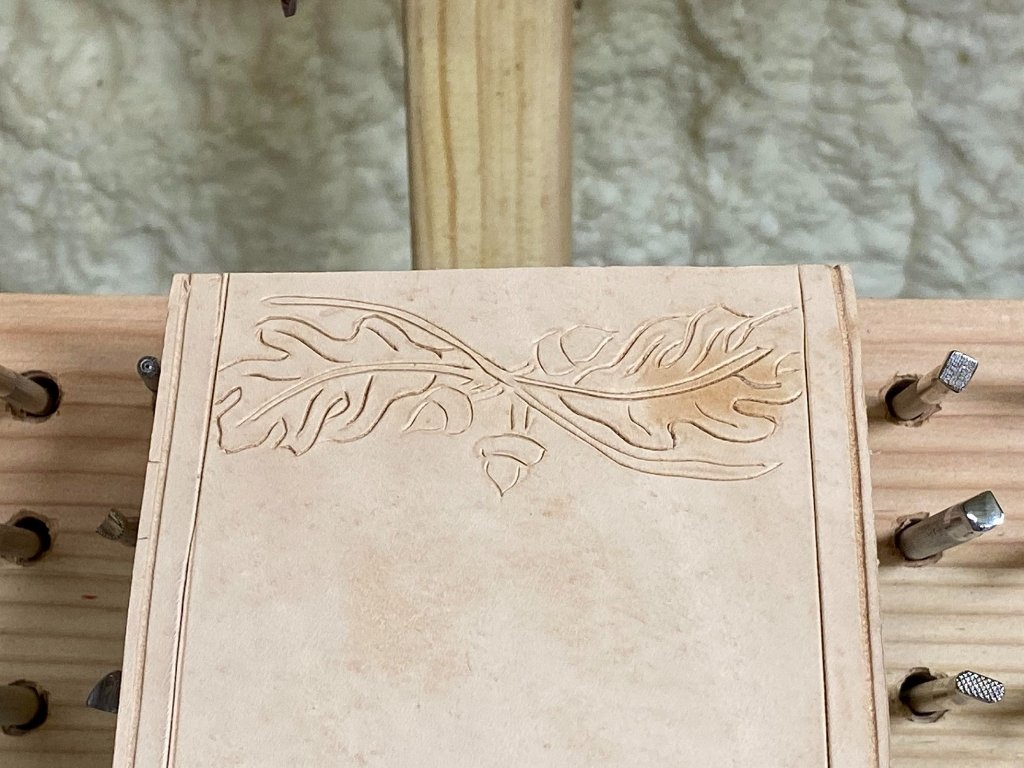
- 13 carved front panel.jpg (136.67 KiB) Viewed 10655 times
Then I went over the border lines with the swivel knife to make them pop as well. The panel is beginning to take shape.
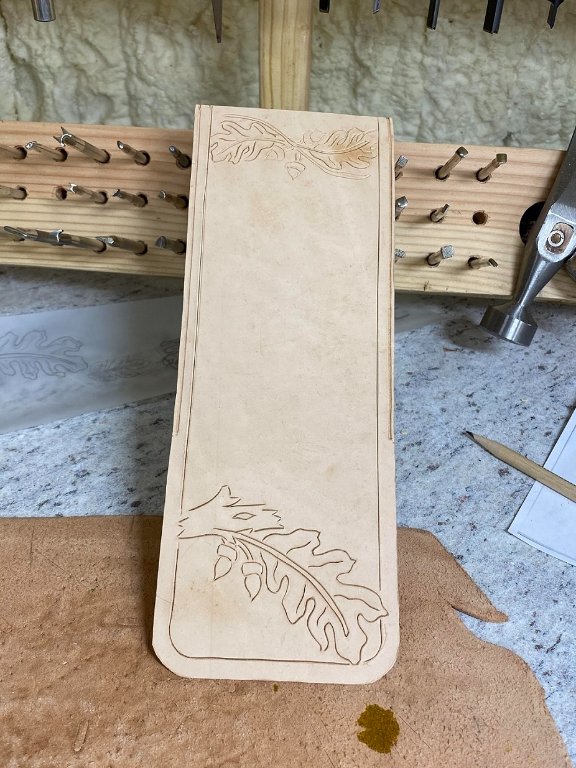
- 14 carved panel.jpg (112.56 KiB) Viewed 10655 times
I began the tooling process on the front panel design by beveling the borders and edges of the leaves.
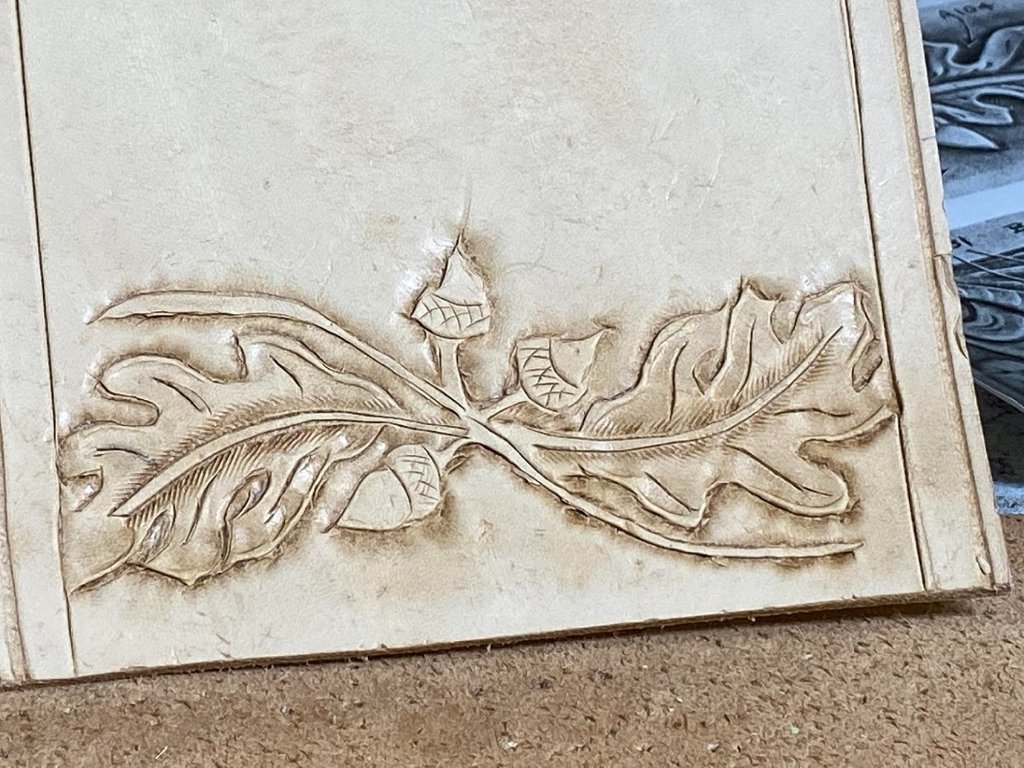
- 15 began tooling front panel.jpg (196.58 KiB) Viewed 10655 times
There is a lot more work to do, but I am hoping I can bring both designs to life and tool in a credible border. Then hand sew it all together. I'll put together the D-ring assemblies and get them attached after tooling and prior to beginning assembly. I can't wait to see it done.
Re: Next Leather Project - 22 Plinking Pouches
Posted: Sat Jul 23, 2022 12:00 pm
by BrokenolMarine
Went out this morning and got right to work. First on the list was finishing the tooling on the front panel. Wanted to dress up some work and add some additional detail. Luckily the acorn I was most unhappy with will roll under the bottom of the pouch when the panel is affixed to the side panel. If I'm lucky.
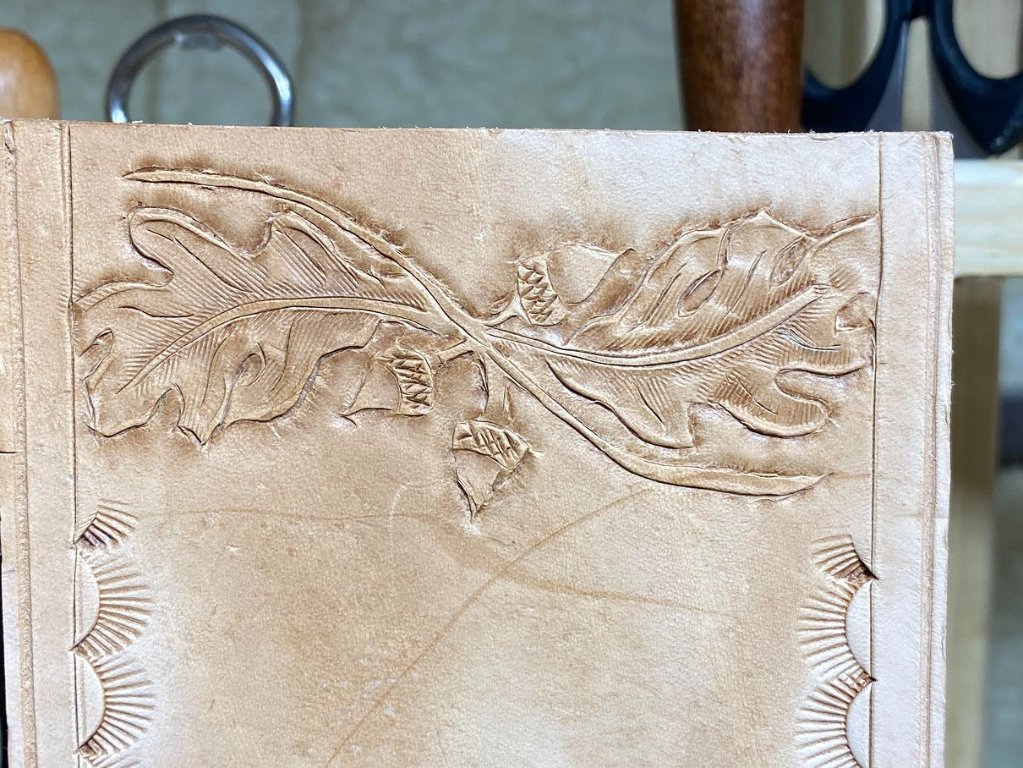
- 16 tooled front.jpg (205.33 KiB) Viewed 10646 times
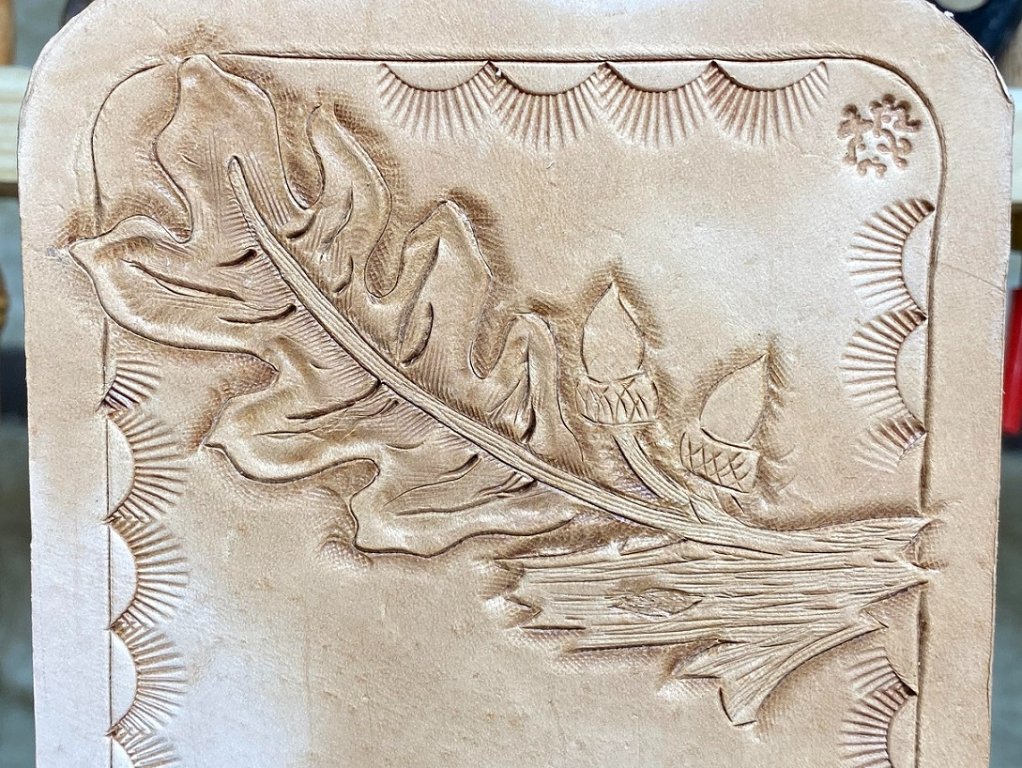
Then I could address that flap, which up to this point had only been carved, or cut in. Taking my time I tried to apply all I had learned in the practice up to now, and the lessons learned from some videos last night. I think the result was better than expected. Still not up to what I would like to see, but not enough to toss the panel and start over.
- 17 tooled flap.jpg (231.81 KiB) Viewed 10646 times
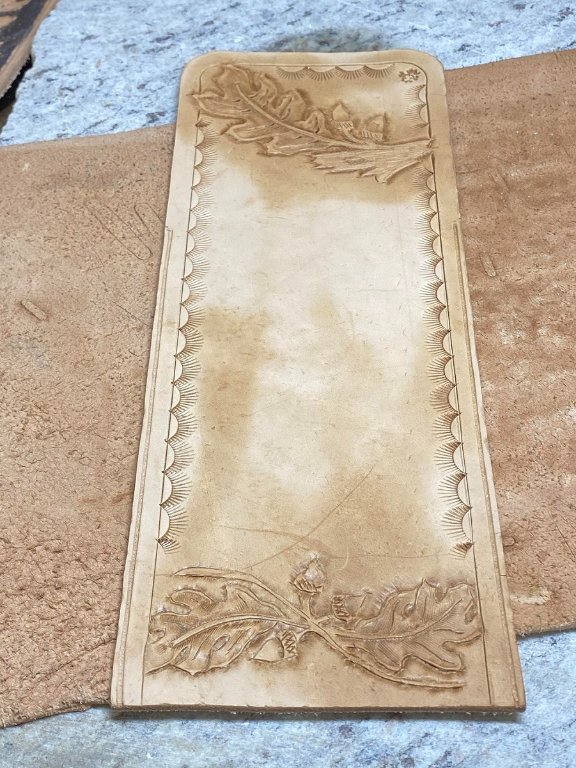
After those two sections were done, I gave it some thought, pulled a camo tool and worked my way around the border. Not too bad.
The edges will need burnished and I'll build the D-ring straps and sew them in place. Looking good.
- 18 tooled panel.jpg (125.2 KiB) Viewed 10646 times
More to come.....
Re: Next Leather Project - 22 Plinking Pouches
Posted: Sat Jul 23, 2022 12:02 pm
by BrokenolMarine
Yup, all the way up until I apply finish, I'll be spotting little things to improve or touch up. It's just the way it is.... sheesh... I love this hobby.
If it doesn't turn out you cut the leather into a circle, turn it upside down and all it a coaster.

Re: Next Leather Project - 22 Plinking Pouches
Posted: Sun Jul 24, 2022 12:07 am
by BrokenolMarine
Another session in the shop.
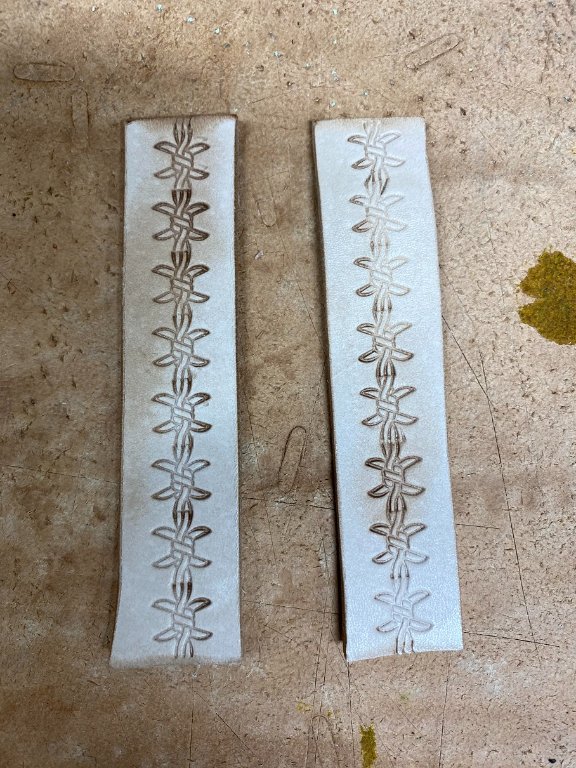
Took a leftover piece and ran it thru the strip cutter set at 7/8 inch. Cut an 8" piece and cut that in half to make the two straps for the D-Rings.
Decided to tool those with the Barbed Wire accent... just like using it. Thought it was appropriate as a minor accent on a Single Action fan's pouch.
Burnished all four edges on each strap.
- 19 d ring straps.jpg (138.7 KiB) Viewed 10639 times
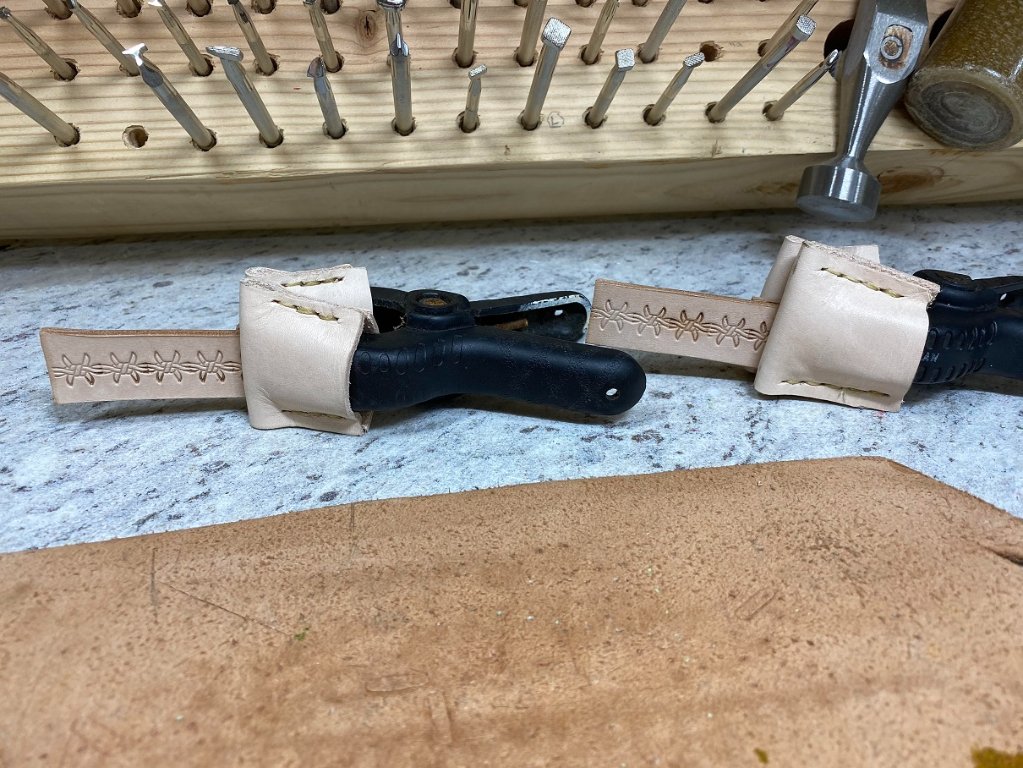
Will restrike if needed once the leather dries, but marked and painted on the contact cement. Once the cement was tacky, slid the D-Rings carefully over avoiding contact with the Contact Cement ...
... and folded the strap over capturing the D-ring and clamped to set aside to cure. Will sew the loops tomorrow.
- 20 glued and clamped.jpg (189.02 KiB) Viewed 10639 times
Have to figure out where on the pouch I'll attach them. Back upper edge or side panel.
It's a crap shoot.
Re: Next Leather Project - 22 Plinking Pouches
Posted: Sun Jul 24, 2022 12:32 pm
by BrokenolMarine
I went out this morning to figure out where to attach the d ring assemblies, and found that folding and gluing had faded a couple of the "barbs" right over the d-rings. Hmmm? Then I marked the holes to sew down the fold and when I drilled them thru the bit wandered because someone didn't mark the holes deep enough.
The d-ring straps are a minor feature in the project and would be unlikely to be seen or noticed by any casual observer of the project while it hangs on the hip of the user. Should be "Good Enough" but this was to be a gift. Not good enough for a gift. I took a razor and sliced down the center of the two folds, pulling the brass D-rings. We will redo the straps, pics to follow.
Good enough, isn't good enough.

Re: Next Leather Project - 22 Plinking Pouches
Posted: Sun Jul 24, 2022 11:38 pm
by BrokenolMarine
Out in the shop today early. Going to be a hot one, and we won't be doing anything outside. Another 100+ outside temp.
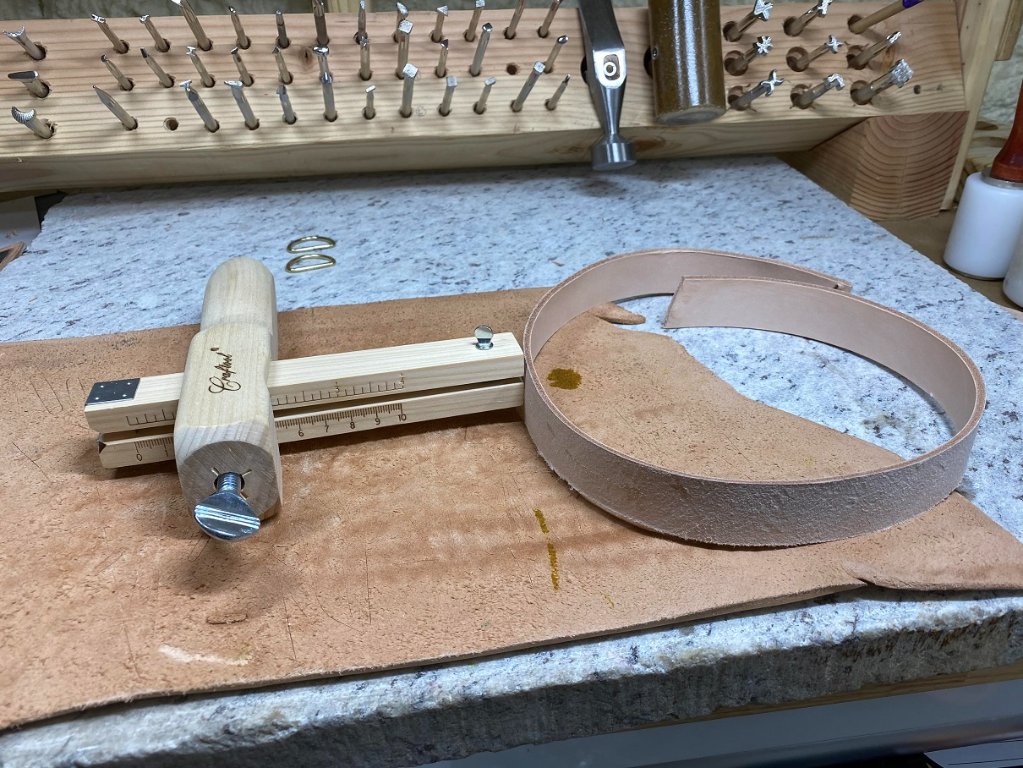
I got one of the leather scraps that was 1" x about 24" and got out the strap cutter. This thing is pretty cool. A vertical blade mounted in a T, with a handle you hold that also works as a guide. It looks something like (exactly like) this:
- 21 strap cutter.jpg (197.54 KiB) Viewed 10624 times
Set the width you want on the scale, and pull the leather thru, just watch to insure the leather stays against the fence as it enters the cutter. The strap coming out the other side will be the selected width. I cut a piece of the 1" wide strip about 9" long and ran it thru the strap cutter.
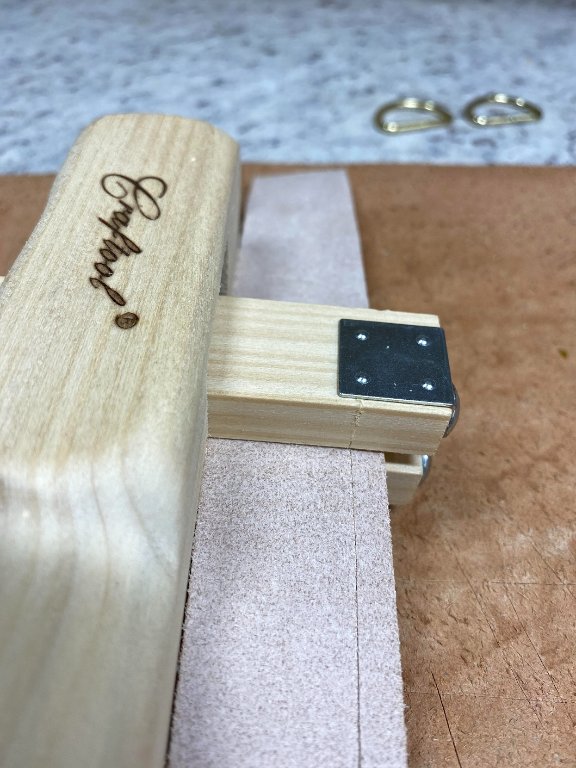
- 22 zip.jpg (86.47 KiB) Viewed 10624 times
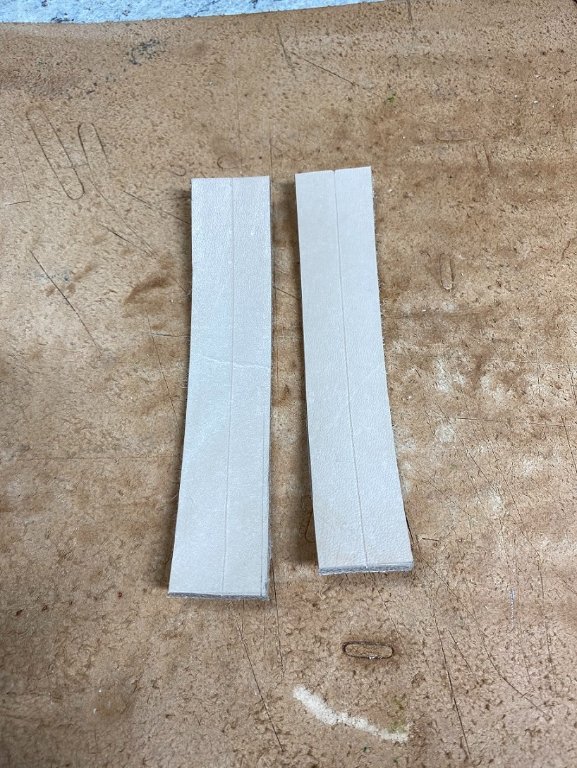
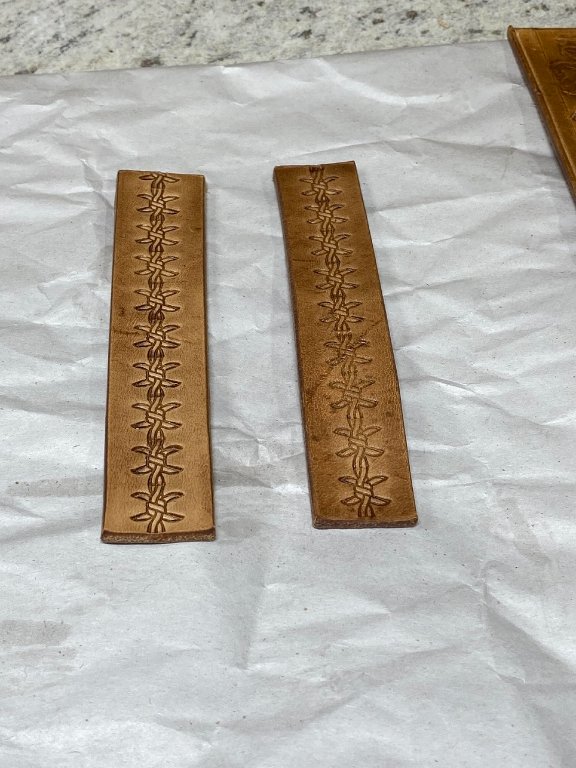
Once I had the strap cut to 7/8 inch, I cut it into two strips about 4-1/2 inches long, then took my dividers and set them for 7/16 and marked a reference line down the center of both straps to use as a guide for stamping the accents.
- 23 ref line.jpg (135.88 KiB) Viewed 10624 times
Re: Next Leather Project - 22 Plinking Pouches
Posted: Sun Jul 24, 2022 11:52 pm
by BrokenolMarine
Next up I took my time, insuring I lined up the barbed wire stamp exactly and then struck solidly on each stamping. ONE stamp at a time, not getting in a rush. BAM, solid strikes and lining each center barb line on the reference line. When they were done I set them aside to dry as each piece of leather is cased (Wet down) to accept tooling. Once dried you can check the tooling.
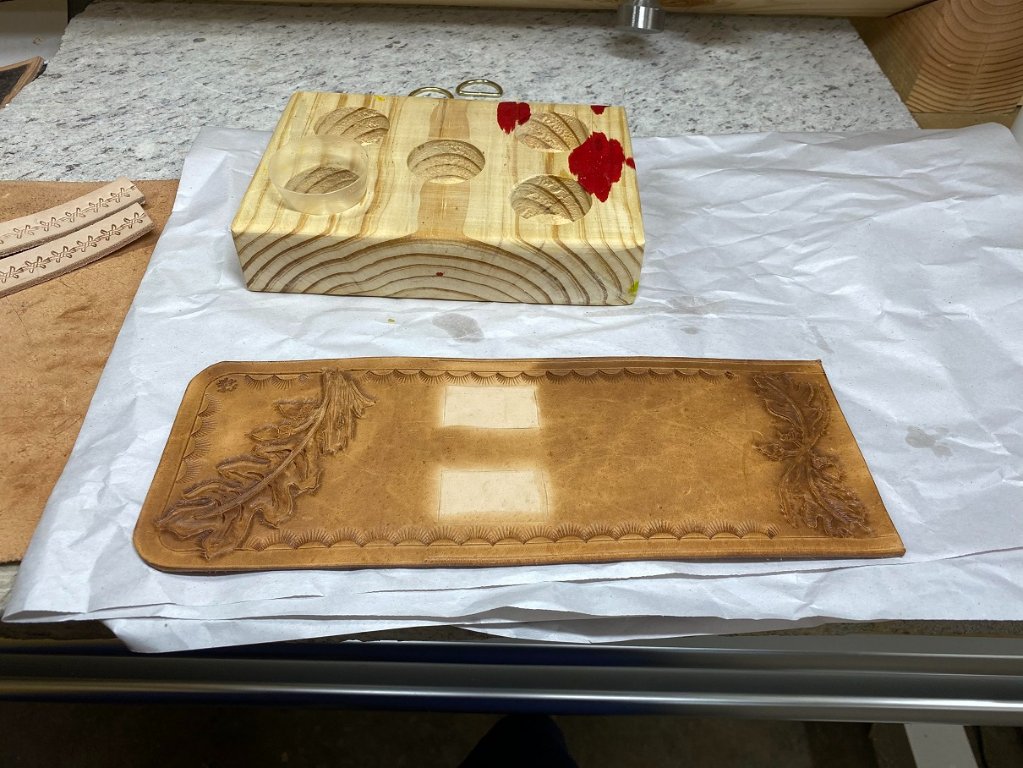
While waiting, I oiled the main panel. The white squares you see in the panel are the areas where the D-ring straps will be glued and sewn down. If I had oiled this area the contact cement will not hold well later. It's purpose is only to hold the straps in place until sewing but it needs to hold. You can see the completed straps in the background.
- 24 finish on panel.jpg (160.94 KiB) Viewed 10624 times
I then went to work on the D-ring straps, oiling them, and then burnishing the sides. The burnishing seals the open edges of the leather and gives it a pleasing feel. The straps look a lot better than the ones I tossed. Much better. I marked the backs of the straps and glued them with the D-rings trapped in the loops, then clamped them and left them to cure.
- 25 straps.jpg (93.12 KiB) Viewed 10624 times
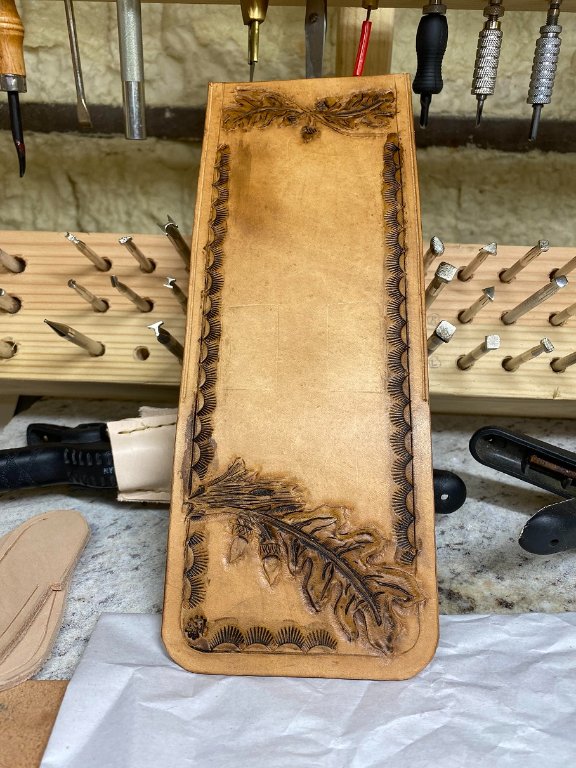
While those cured, I went back to the main panel and applied antiquing to the carved and tooled areas, let it sit for a bit and then wiped away the excess. Then I treated the panel with Mink Oil to insure it stayed flexible. It's a bit dark, but will lighten as it cures.
- 26 oiled and antiqued.jpg (118.68 KiB) Viewed 10624 times
Re: Next Leather Project - 22 Plinking Pouches
Posted: Sun Jul 24, 2022 11:55 pm
by BrokenolMarine
Now as the D-ring straps are cured, I can drill the holes and sew them, then antique those. I knock that out. Then I texture and then Oil the side pieces. We are getting close. These guys are looking good.
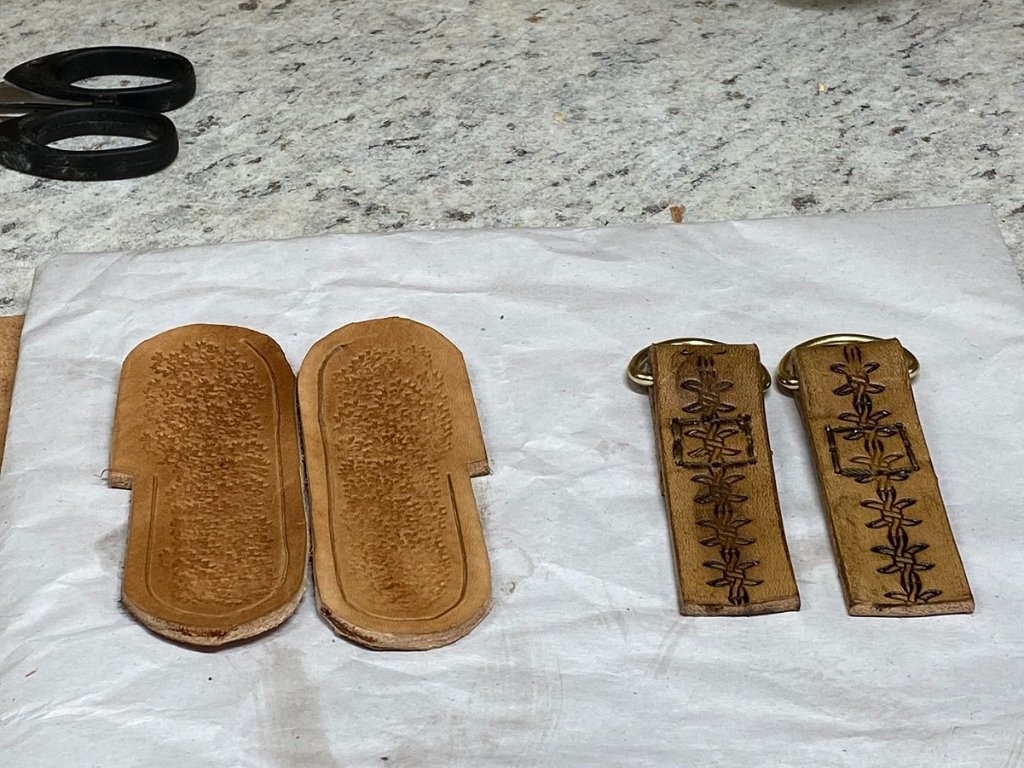
- 28 d-ring pieces after attention.jpg (180.46 KiB) Viewed 10624 times
Tomorrow morning I'll antique the side pieces then while they cure, I'll sew the D-Ring straps onto the main panel. Then... assembly.

The pucker factor is getting higher.
Watch this space.
Re: Next Leather Project - 22 Plinking Pouches
Posted: Mon Jul 25, 2022 7:14 am
by Sir Henry
They indeed looking good.