First, I laid out the design I had modified in my mind on the drive. I tossed the original plan as the testing after cutting it out just didn't please me. The new layout feels like it will work.
I designed, in my mind, an oval side panel with a notch, so the overlapping flap will lay evenly on the lower pouch when closed. I came home and went out to the shop and began drawing the side panel. The first drawing didn't work out... too tight in the interior. The second drawing looked promising.
- 06 layout side panel.jpg (157.53 KiB) Viewed 1528 times
With that, I transferred the drawing to a bit heavier leather for stiffness, and then cut out the first piece.
- 07 transfer.jpg (128.95 KiB) Viewed 1529 times
I tested it with the existing panel from the failed first attempt. This let me know about the length I would need. I cut out the other three side panels and made notes on the design parameters.
- 08 design.jpg (174.33 KiB) Viewed 1529 times
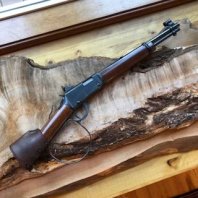
With a panel in hand, I tested the application. It is a tentative success. If the panel is properly tooled and will be sewn to the side pieces, I will slightly trim the edge to fit exactly before adding the holes for sewing.
- 09 application.jpg (135.39 KiB) Viewed 1529 times
The panels here are a tad oversized, but will be cut to exact size and exactly square with the flap corners rounded before I start carving and or tooling this afternoon.
- 10 two panels.jpg (47.19 KiB) Viewed 1529 times