Page 1 of 1
Leatherwork - Saddle Fender
Posted: Fri Jan 16, 2026 12:23 am
by BrokenolMarine
My daughter was up for Christmas, the week after Christmas and dropped a project on me. Seems a friend of hers had a favorite saddle that she had worn out the fenders on. Now, I'm not a horse person, but I do make some stuff out of leather, as some of you know. Belts, holsters, knife sheaths... so she brought the fenders up to me. Seems that Saddles have fenders... they hang off the side of the saddle and the stirrup straps are attached to them. This pair was worn pretty badly.
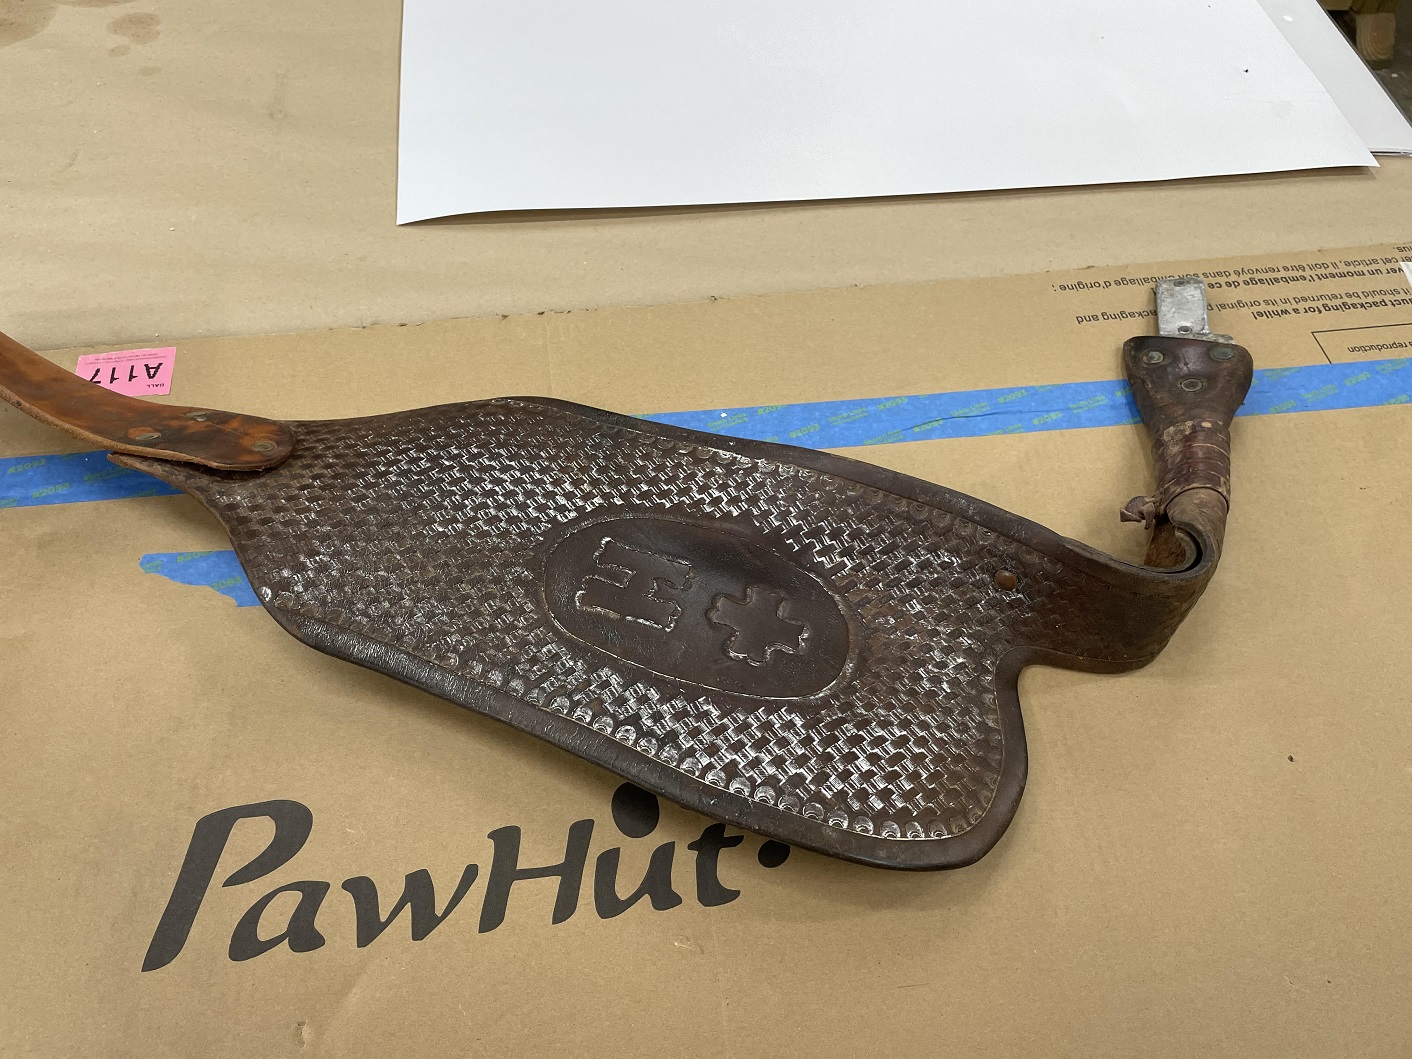
- 03 old fender.jpg (536.32 KiB) Viewed 3167 times
The other side was worn OUT. It had broken.
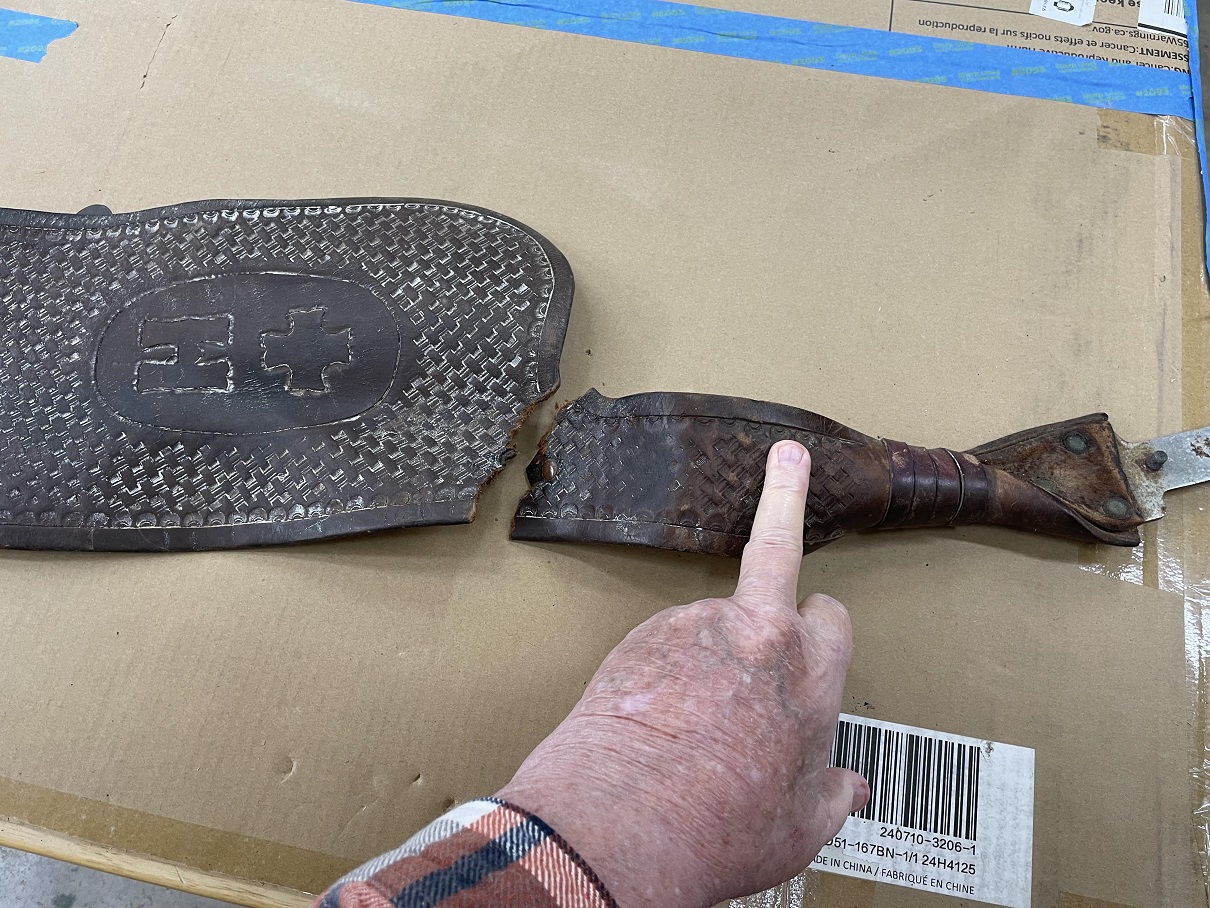
- 09 Second fender broken.jpg (501.45 KiB) Viewed 3167 times
Her friend knew she can order them online fairly cheaply, but they would be lower quality leather, and machine cut and roll tooled. The roller tooling didn't bother her, as she didn't actually WANT the basketweave on the new fenders. Riding in shorts in the 115 degree Oklahoma summers, the basketweave tooling had been eating up her legs for years.

So she wanted to have the Fenders remade to match the old shape and size, and maybe a cool border, or edging, but NO heavy tooling. And, rather than some high end saddle maker with a year long waiting list and prices to match, her friend's dad who knew his way around the leather, sorta. Even though I had never done saddles.

Meh, I'll push myself and give it a shot. I had to order the heavy leather, heavy rivets, and the tool to set them.
Then I had to rearrange my shop a tad to make the room to work larger projects... in leather.... I started with the shop looking like it always did...
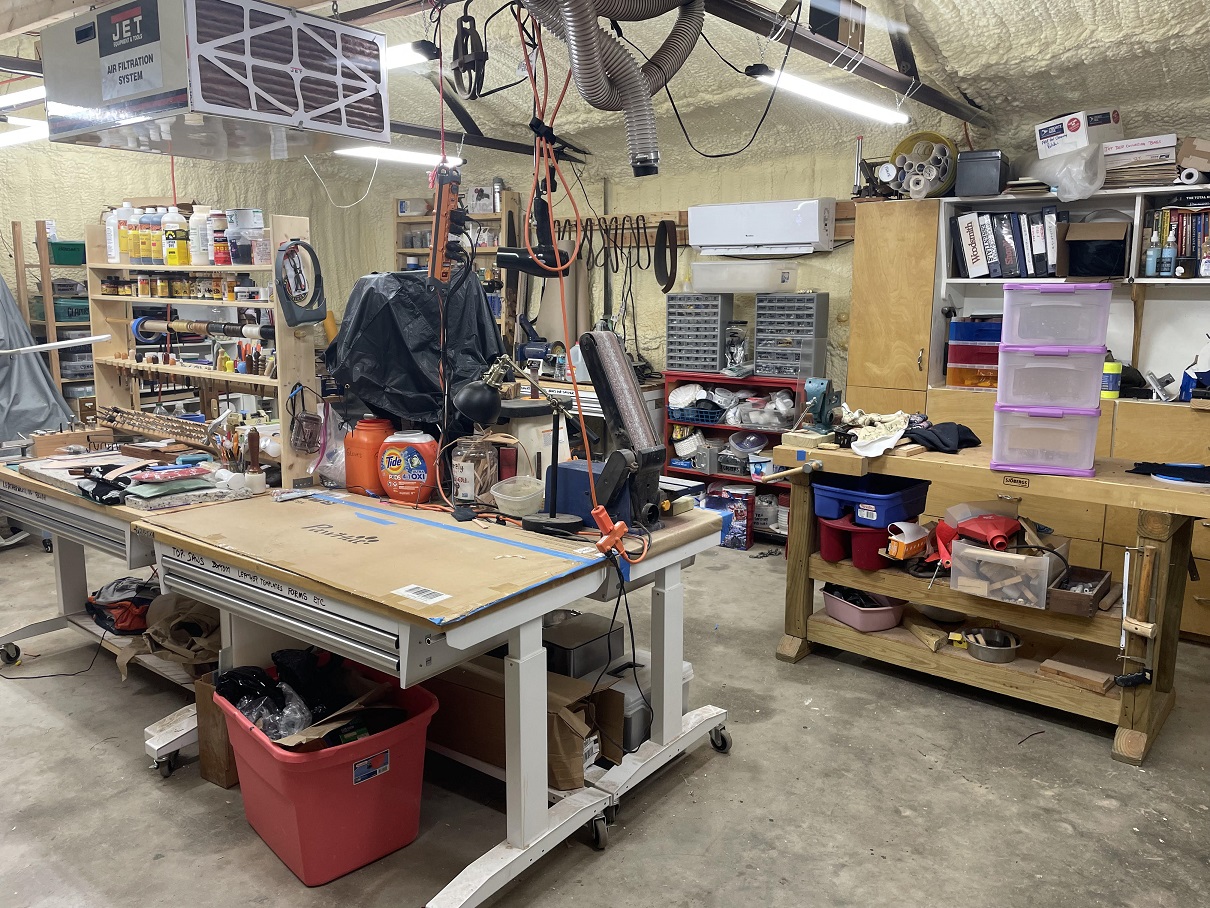
- 01 the shop.jpg (529.49 KiB) Viewed 3167 times
I cleaned off the off side finishing bench of the bench top drill press, oscillating sander, and belt sander used to shape the knives, for now. They went onto the woodworking bench. Then cleaned both the benchtops. The finishing benchtop and the cutting benchtop.
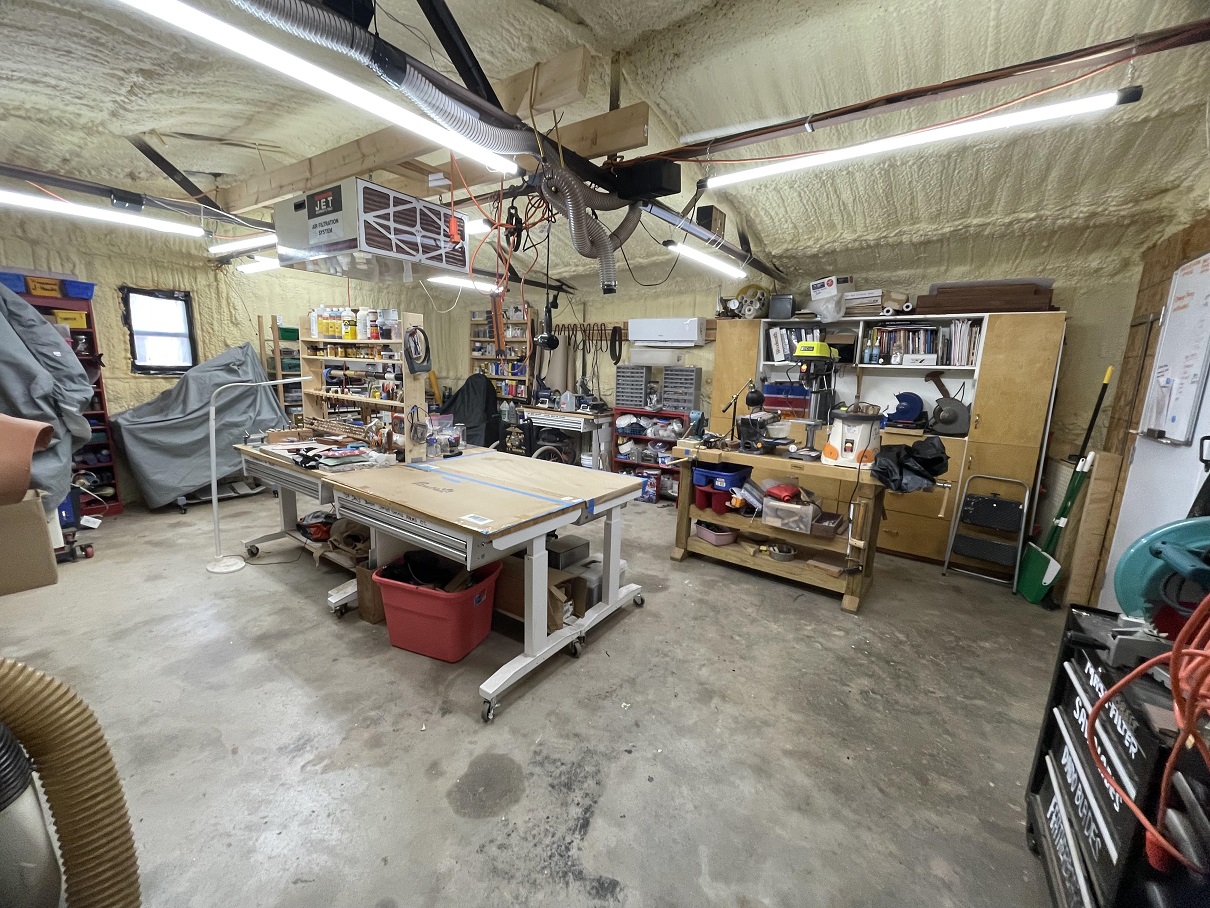
- 02 rearranged.jpg (501.35 KiB) Viewed 3167 times
Ready to start the next step....
Re: Leatherwork - Saddle Fender
Posted: Fri Jan 16, 2026 12:35 am
by BrokenolMarine
The next step would be to Johnny Five the Fenders. "Awww, Disassemble."

Yup, It all has to come apart, the hardware is reusable, and unless I slip removing the rivets, the stirrup straps will get reused. The rest is too beat up and worn.
The Fenders themselves you have seen, but drilling the rivets to remove the various straps will have to go slow and steady. Hammer, punch, Dental Extraction Pliers made for pulling teeth work great on rivets.
After about two hours of careful work, we have pieces and parts. I have one side all disassembled.
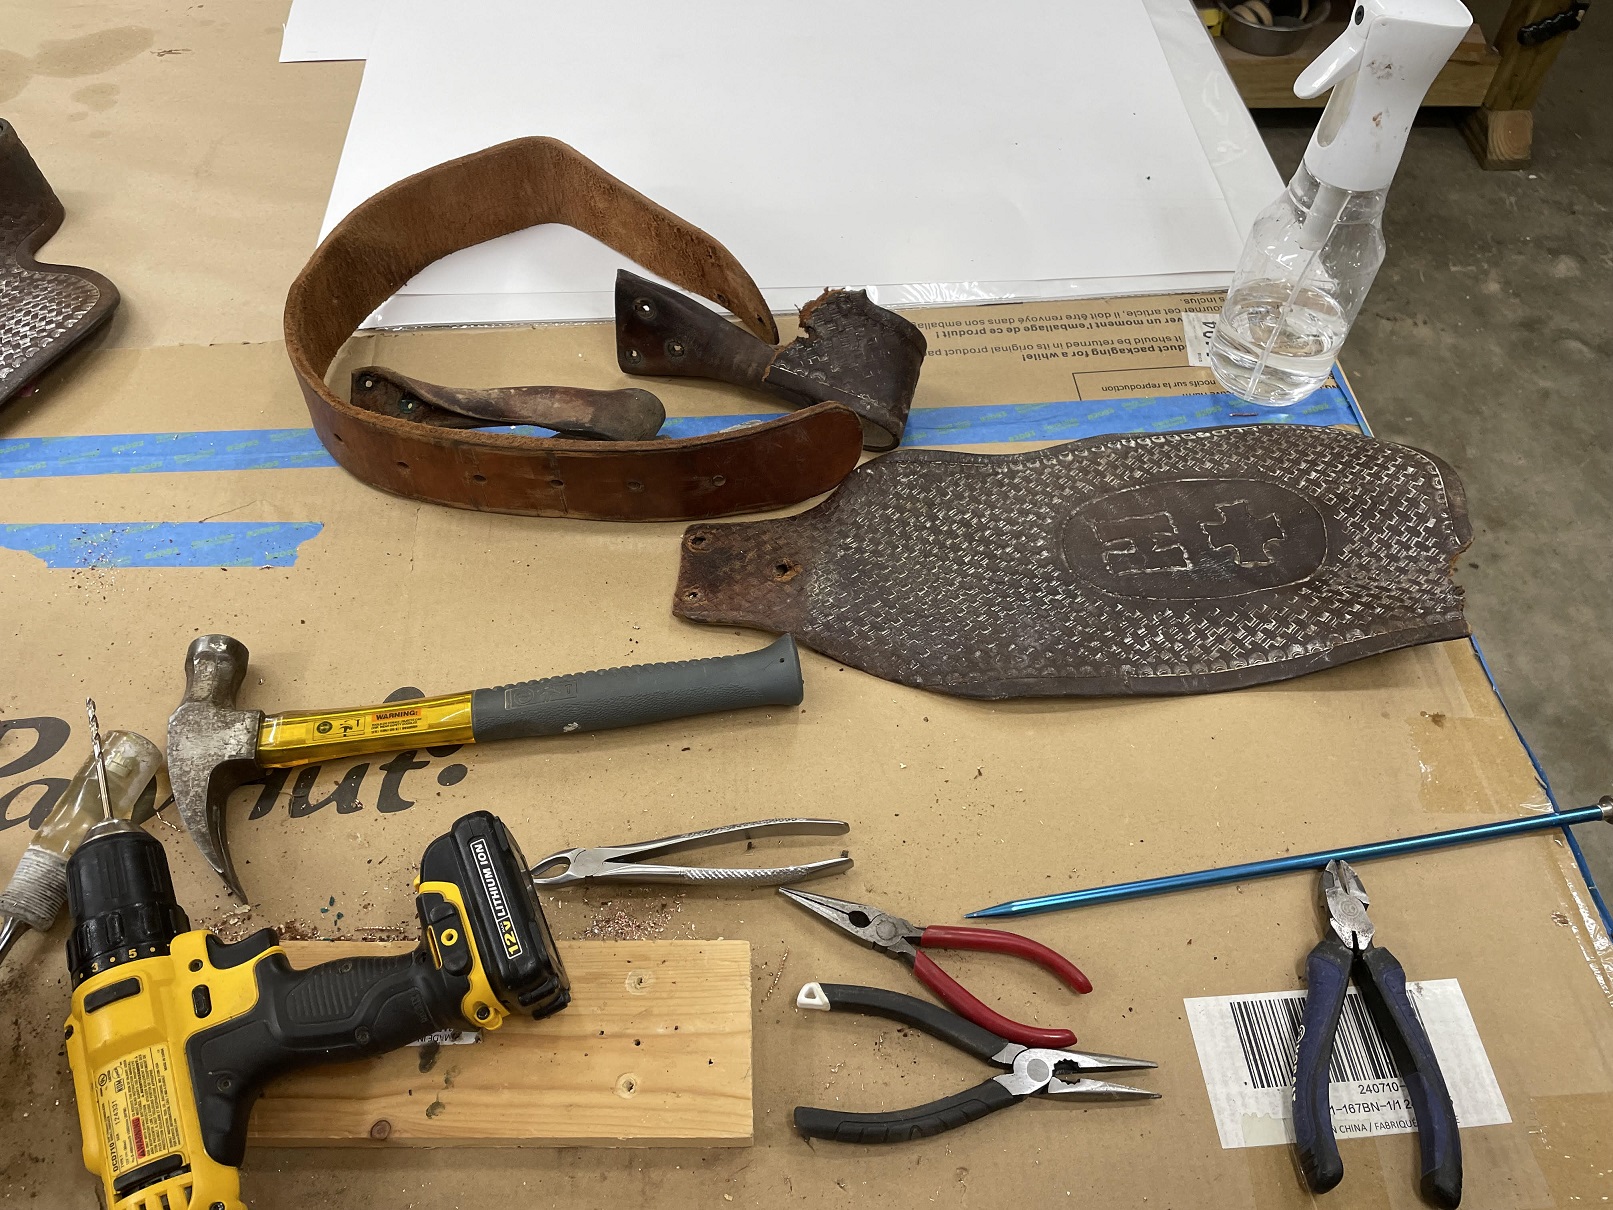
- 11 Disassembled.jpg (712.79 KiB) Viewed 3165 times
I'll leave the one side fully assembled until the project is completed, to use as a reference for the build, at least until I need the hardware and the stirrup strap.

The one belly strap will need a D ring added. This will be a PITA as I'll have to cut back the stitching to remove the rivet, replace the D-Ring, and restitch by hand the area cut back. This is a lined belly band.
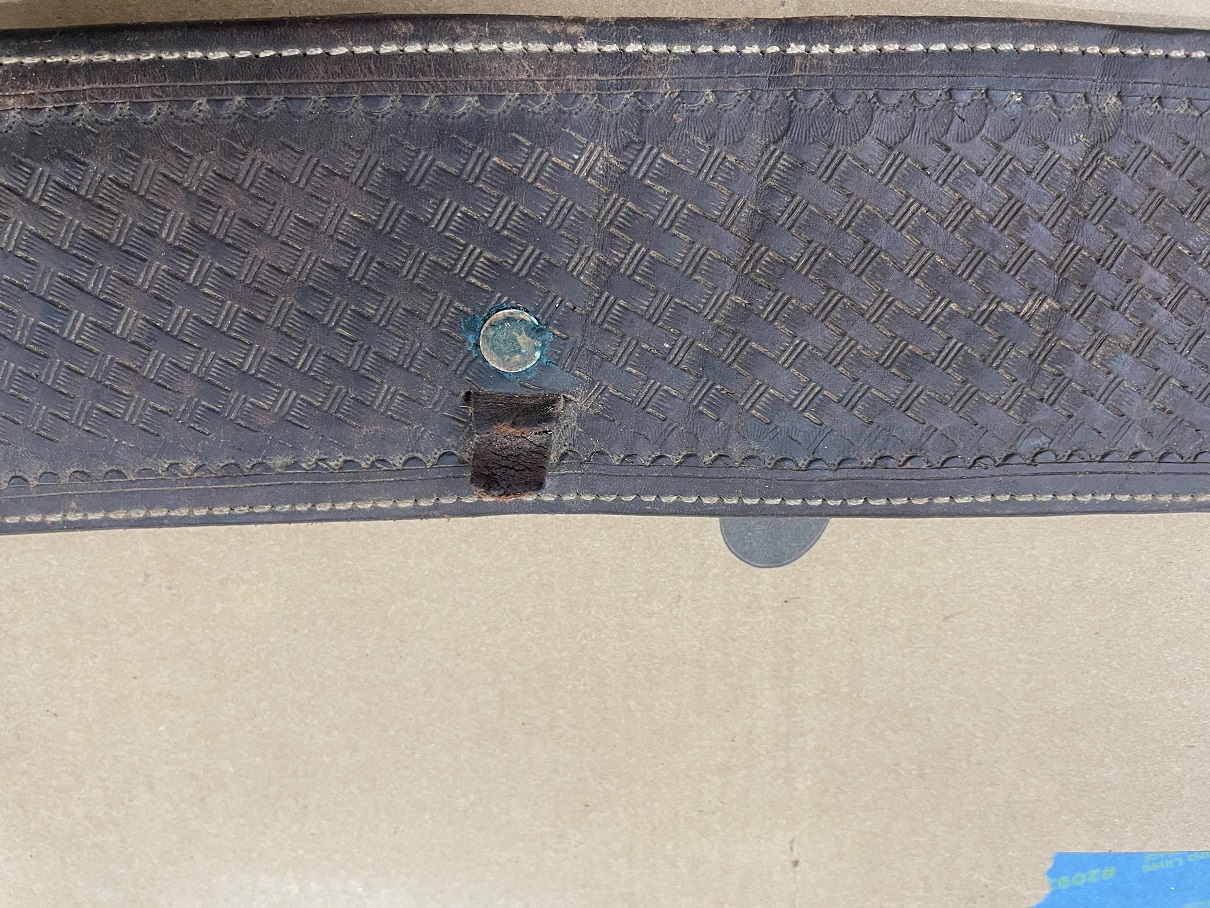
- 07 D ring.jpg (486.45 KiB) Viewed 3165 times
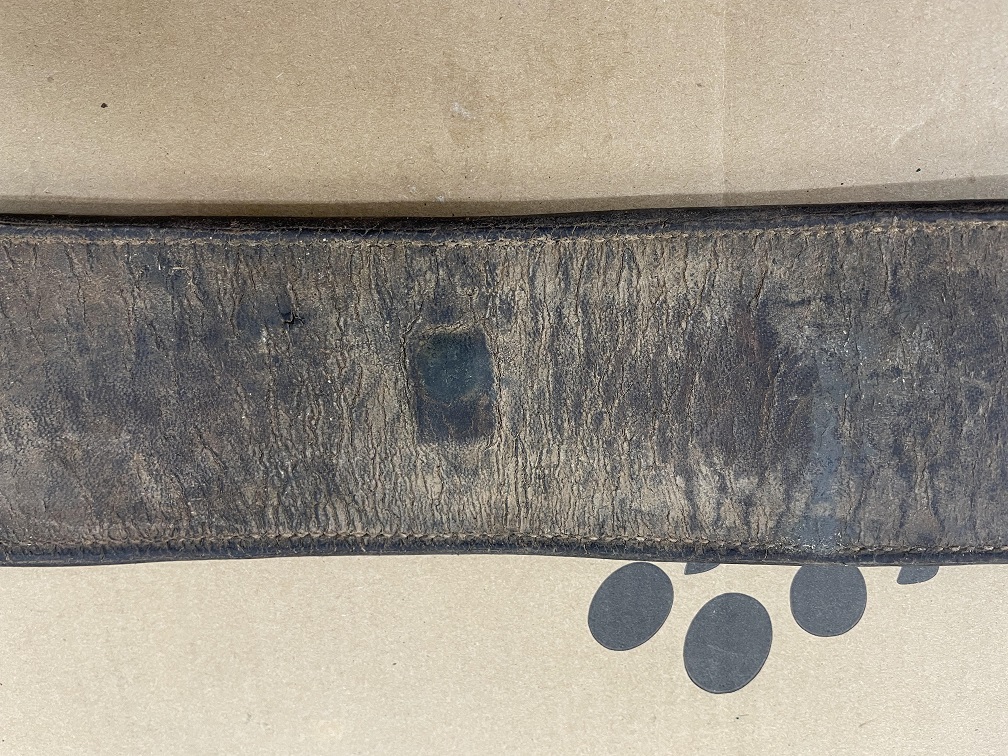
- 08 Dring Back.jpg (409.13 KiB) Viewed 3165 times
Slow and steady will get the job done. Stick around for the ride if you like. (pun intended.) It will be a learning experience for me. I will be learning as I go along, or... it will go as smooth as if I was building a giant holster.
Re: Leatherwork - Saddle Fender
Posted: Fri Jan 16, 2026 10:15 am
by Hatchdog
There you go again BOM, just some horsing around.

Fun project and it will again be enjoyable to ride along…..yes like you, pun intended.

Re: Leatherwork - Saddle Fender
Posted: Fri Jan 16, 2026 5:33 pm
by BrokenolMarine
Back out today to begin the layout of the leather for cutting out the main parts of the project. Sadly

I discovered that I will have to go ahead and disassemble the second solid fender assembly in order to use it as the template as I have planned. It's too twisted as it stands now, and the hardware is "In the Way" as it is now.
Step one is to punch the rivets with the centering punch prior to drilling so that the Stirrup Strap isn't damaged, and the drill doesn't tear up the Fender making it unusable as a template. otherwise, I could CUT out the hardware and toss the rest.
That would be LOTS easier.

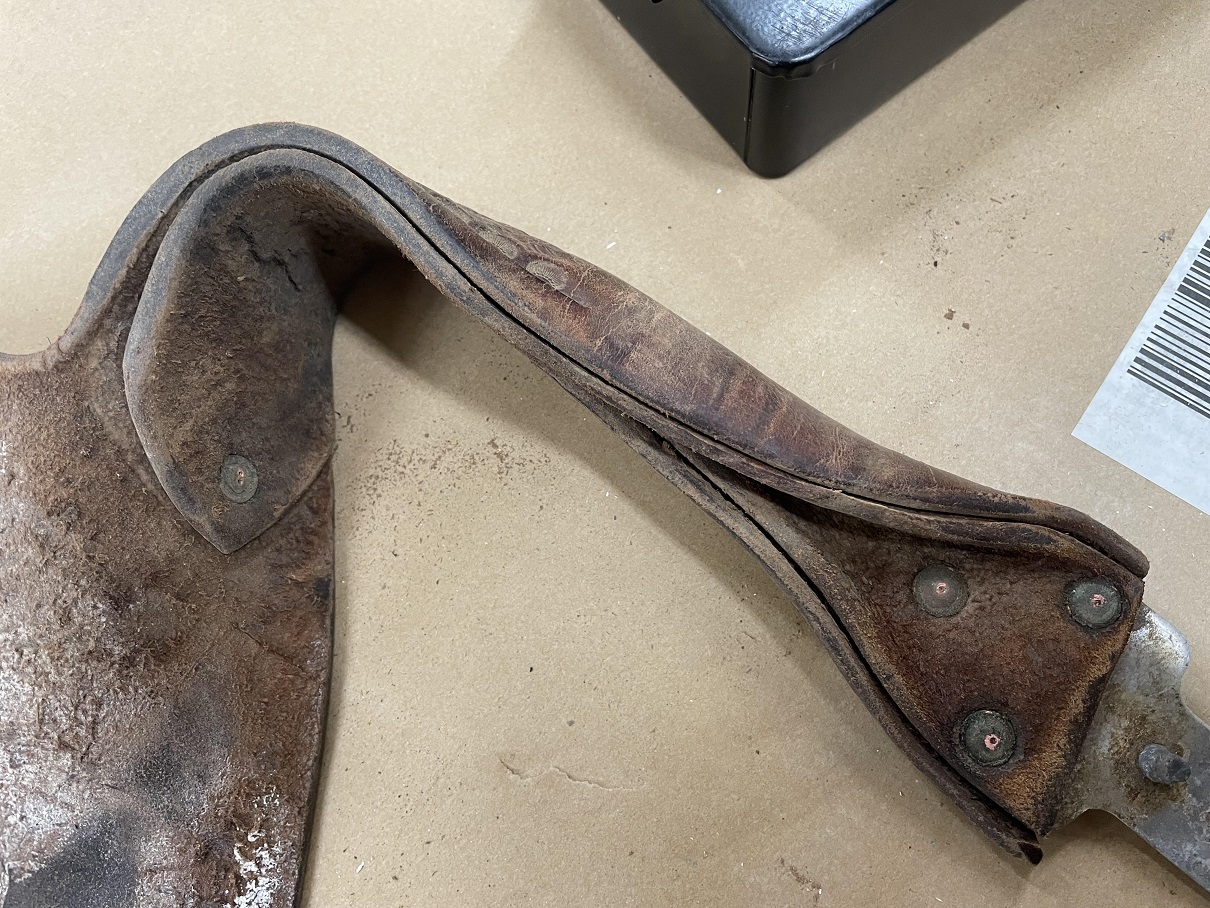
- 12 punched.jpg (507.01 KiB) Viewed 3139 times
Carefully, I drilled out the rivets and disassembled the piece. Next, I soaked the twisted portions well, then using a cutting board and some scrap wood, I clamped the twisted pieces FLAT and left them to dry. NOT as easy as it sounds with only two hands in the mix. I got 'er done. I'll leave it for several hours then check it. If need be, I'll re-wet the leather and put it back in the clamps, then leave it overnight to flatten as much as possible. THIS will be my template. I want it as close as I can get so I don't have to "Fake it to Make it."
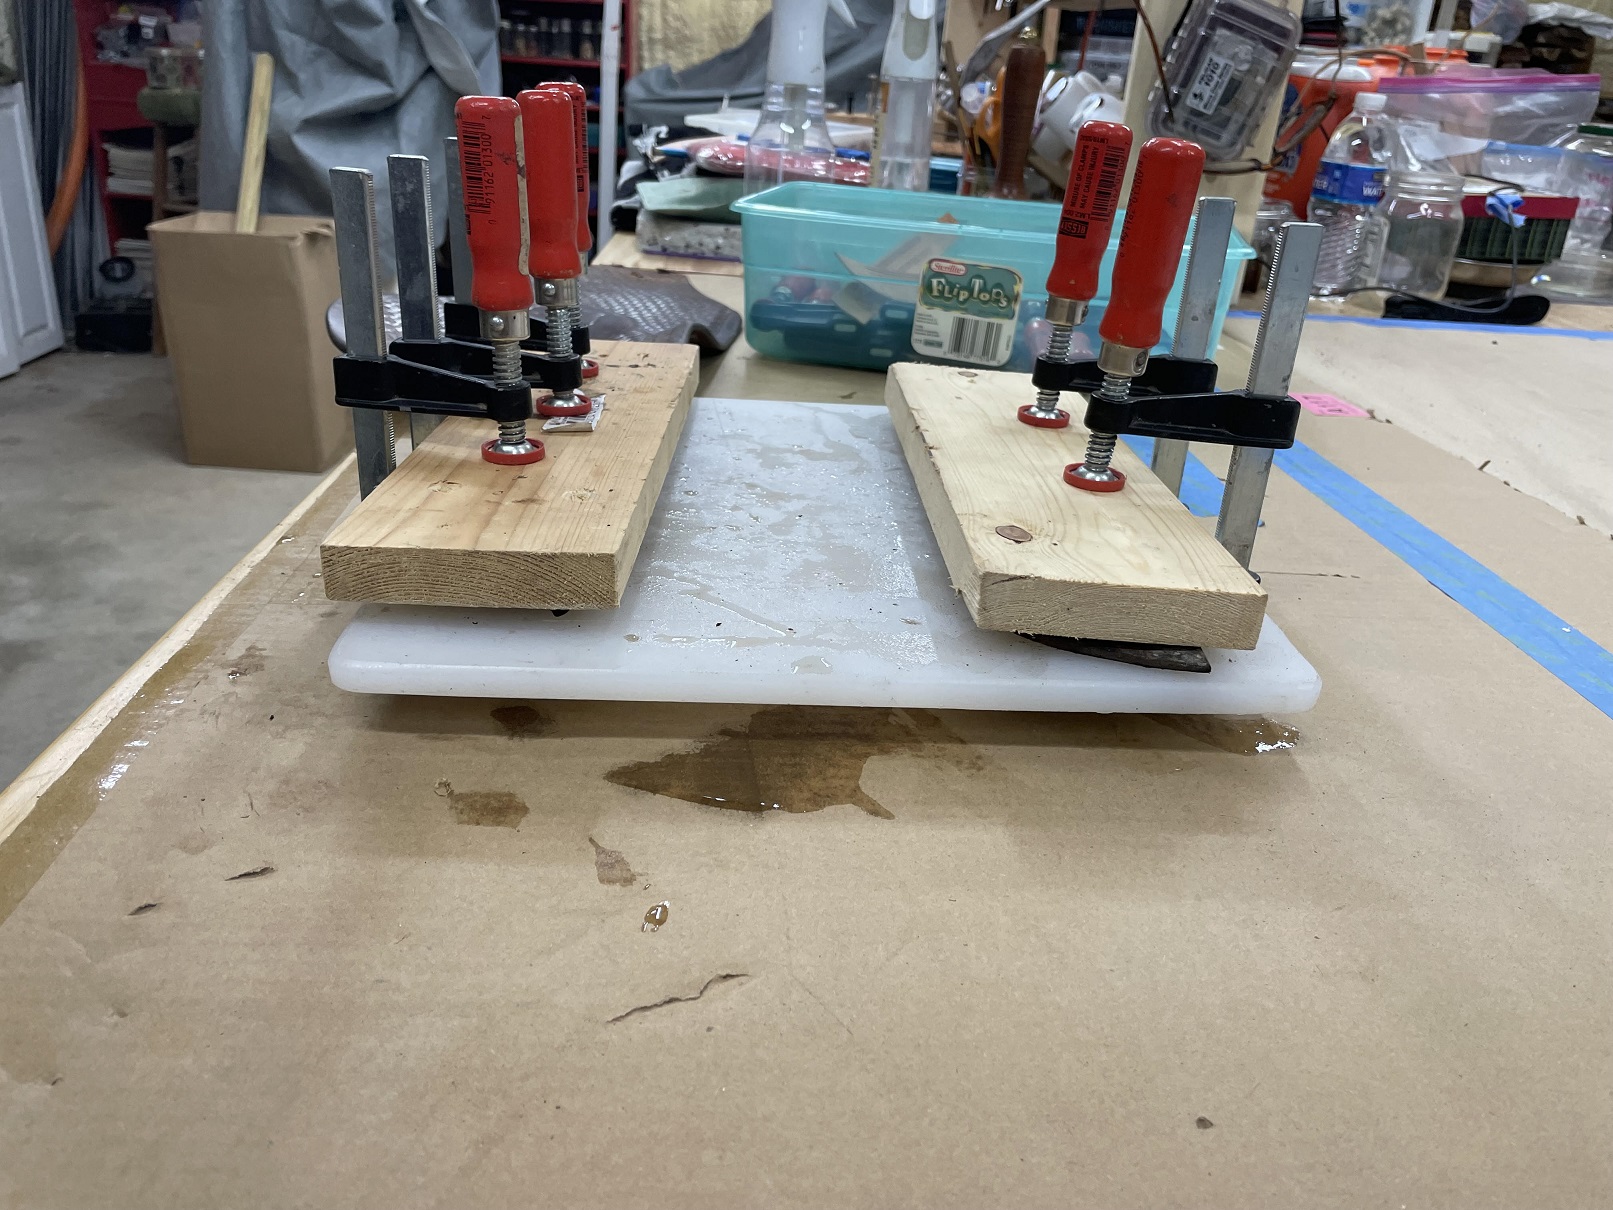
- 13 Compressed.jpg (599.25 KiB) Viewed 3139 times
So MUCH more to come.
Re: Leatherwork - Saddle Fender
Posted: Fri Jan 16, 2026 5:36 pm
by BrokenolMarine
Almost forgot, a long view of the Fender in the clamp. You can see why it might have been fun to try and clamp something that kept trying to twist, with just two hands. Hold 'er flat, position to board, work the clamps... tighten...

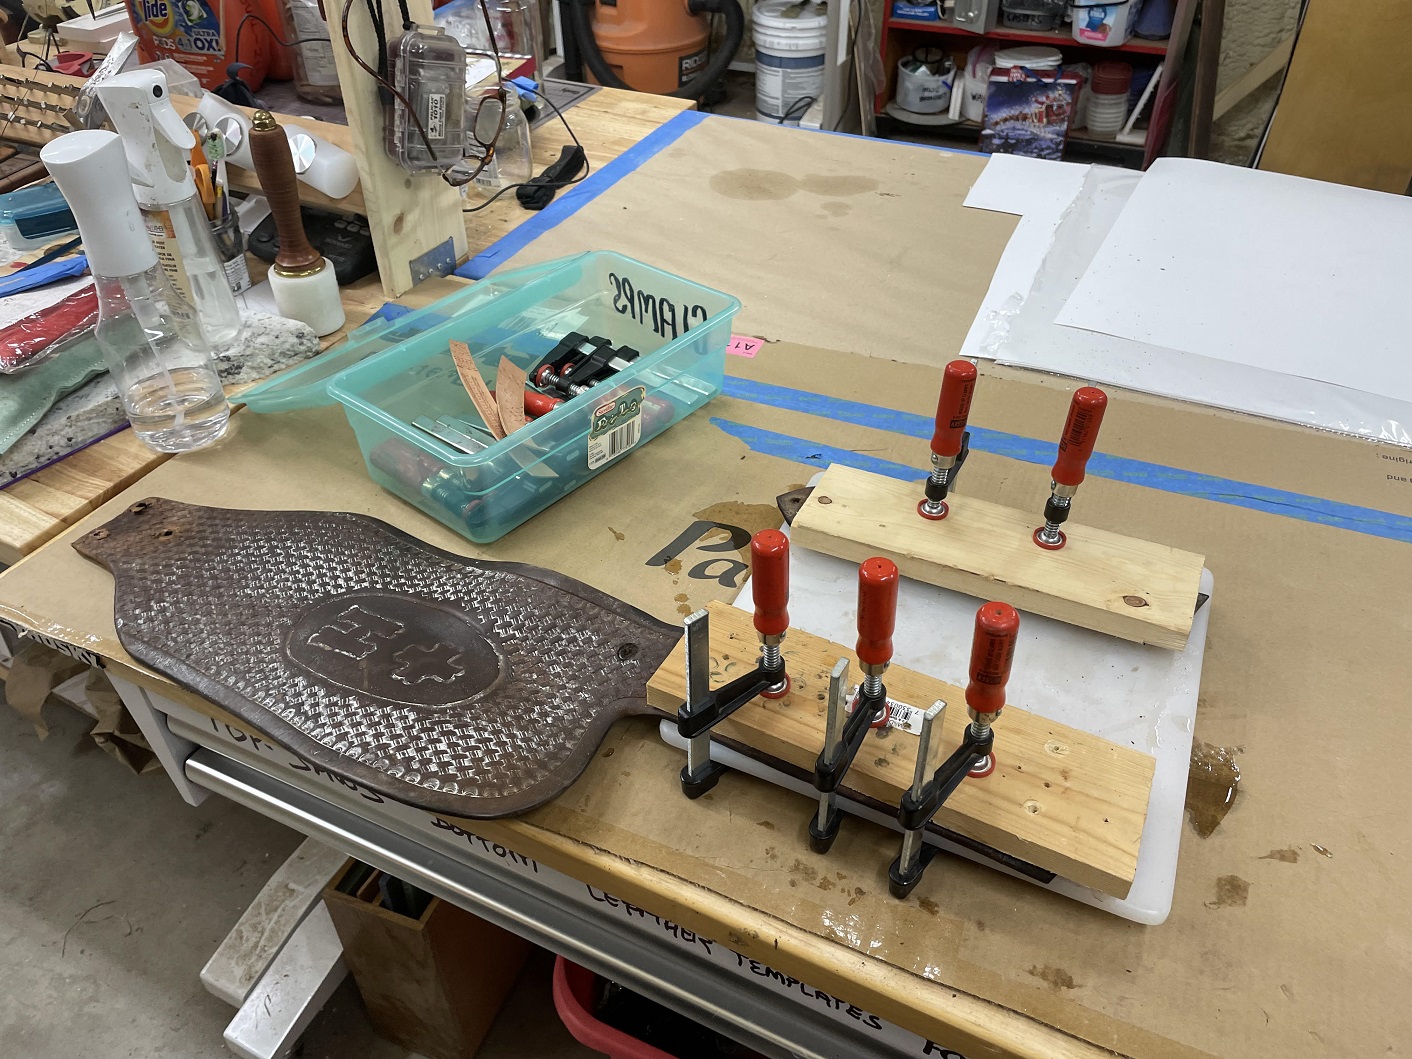
- 14 long view clamped.jpg (554.02 KiB) Viewed 3139 times
Re: Leatherwork - Saddle Fender
Posted: Sat Jan 17, 2026 1:53 pm
by BrokenolMarine
Out at it after breakfast. Took the leather out of the clamps and, Tah Dah, it worked. The twisted parts are (mostly) flat.
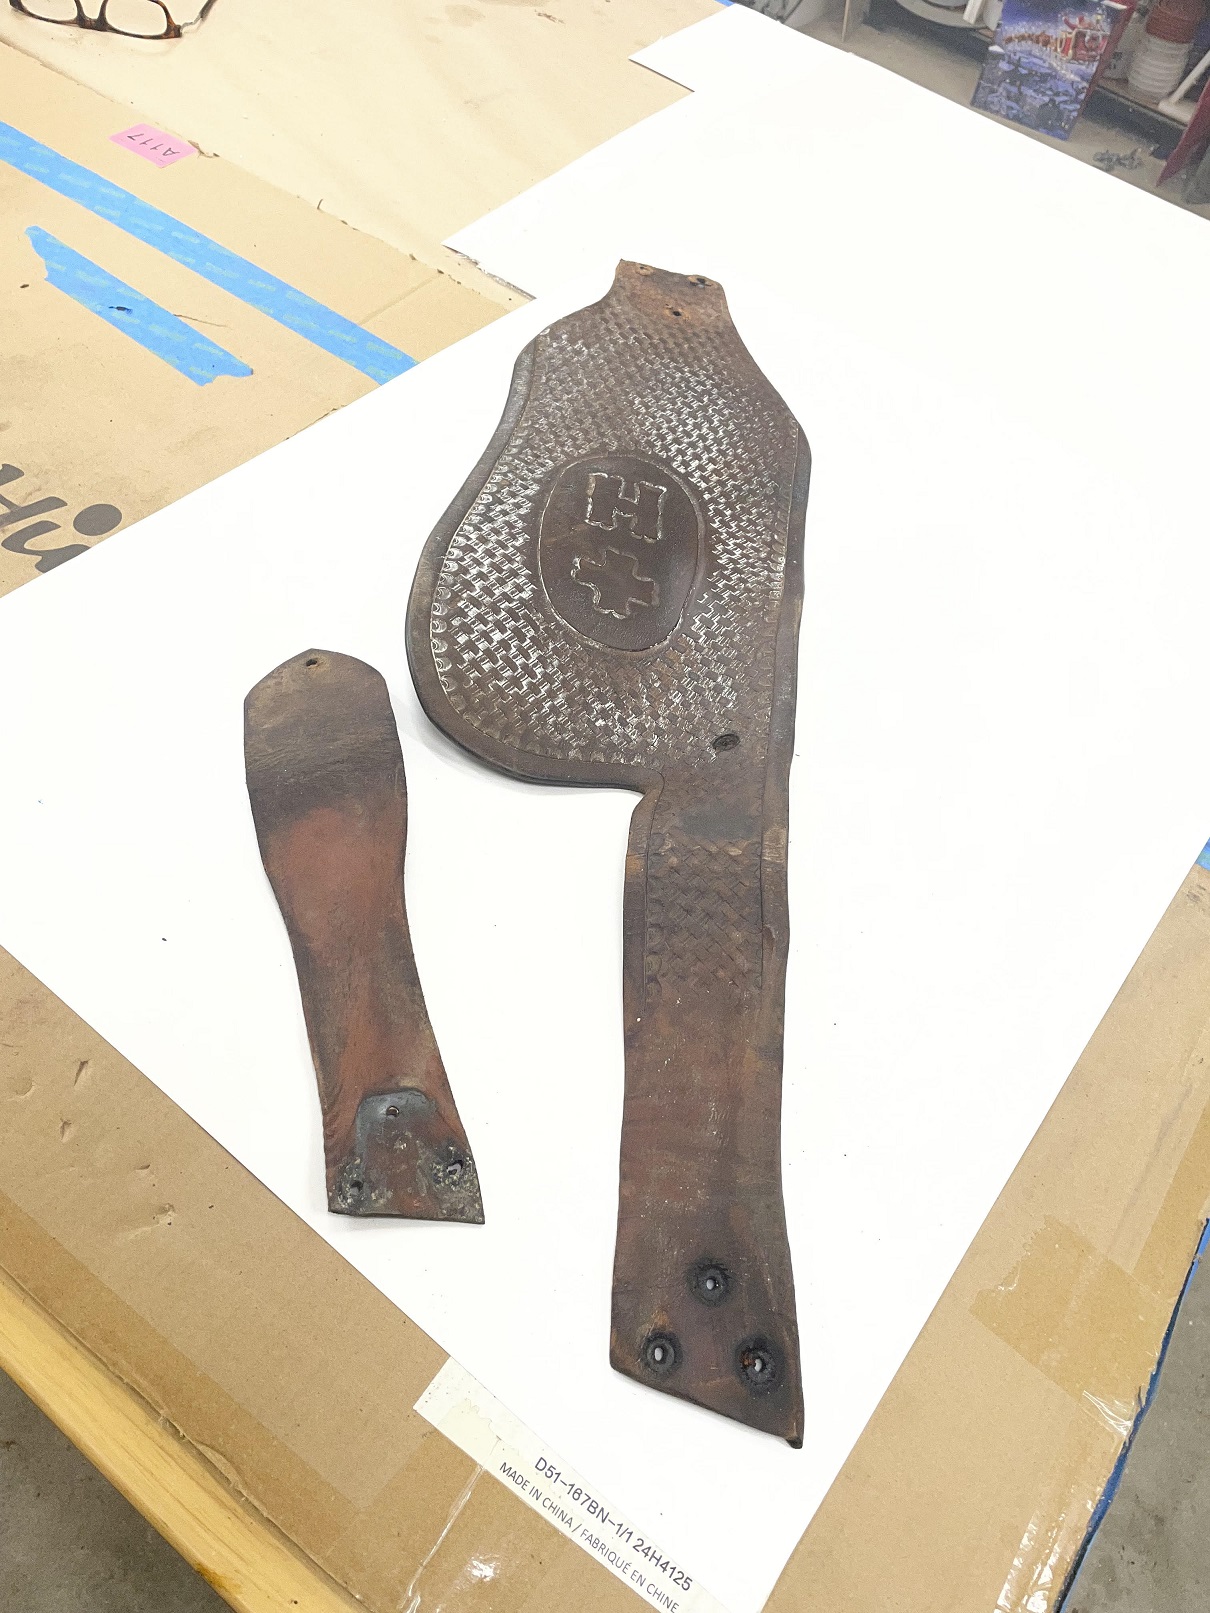
- 15 it worked.jpg (491.91 KiB) Viewed 3120 times
I found I was able to draw out the templates.
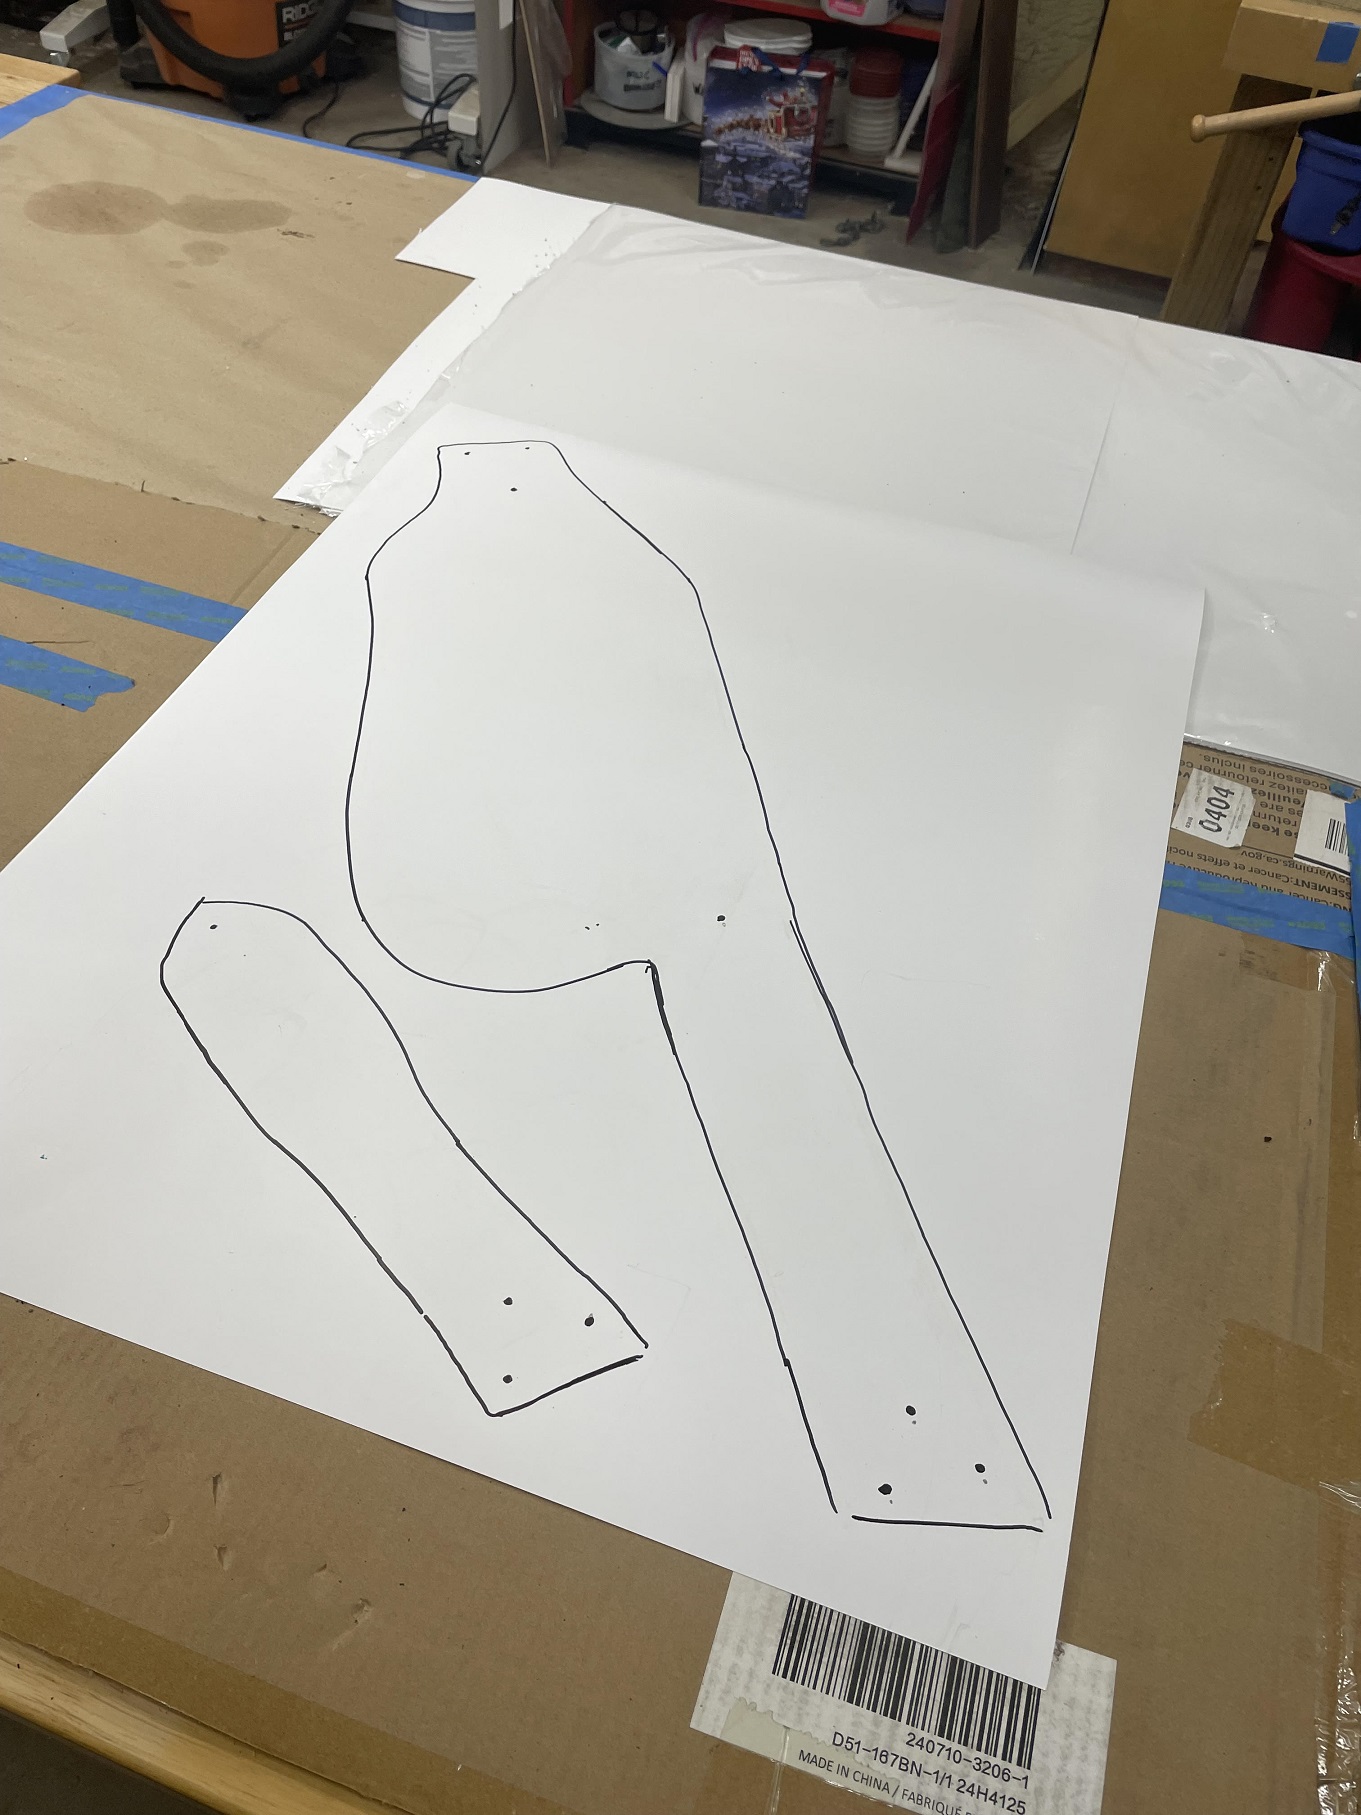
- 16 Templates.jpg (457.38 KiB) Viewed 3120 times
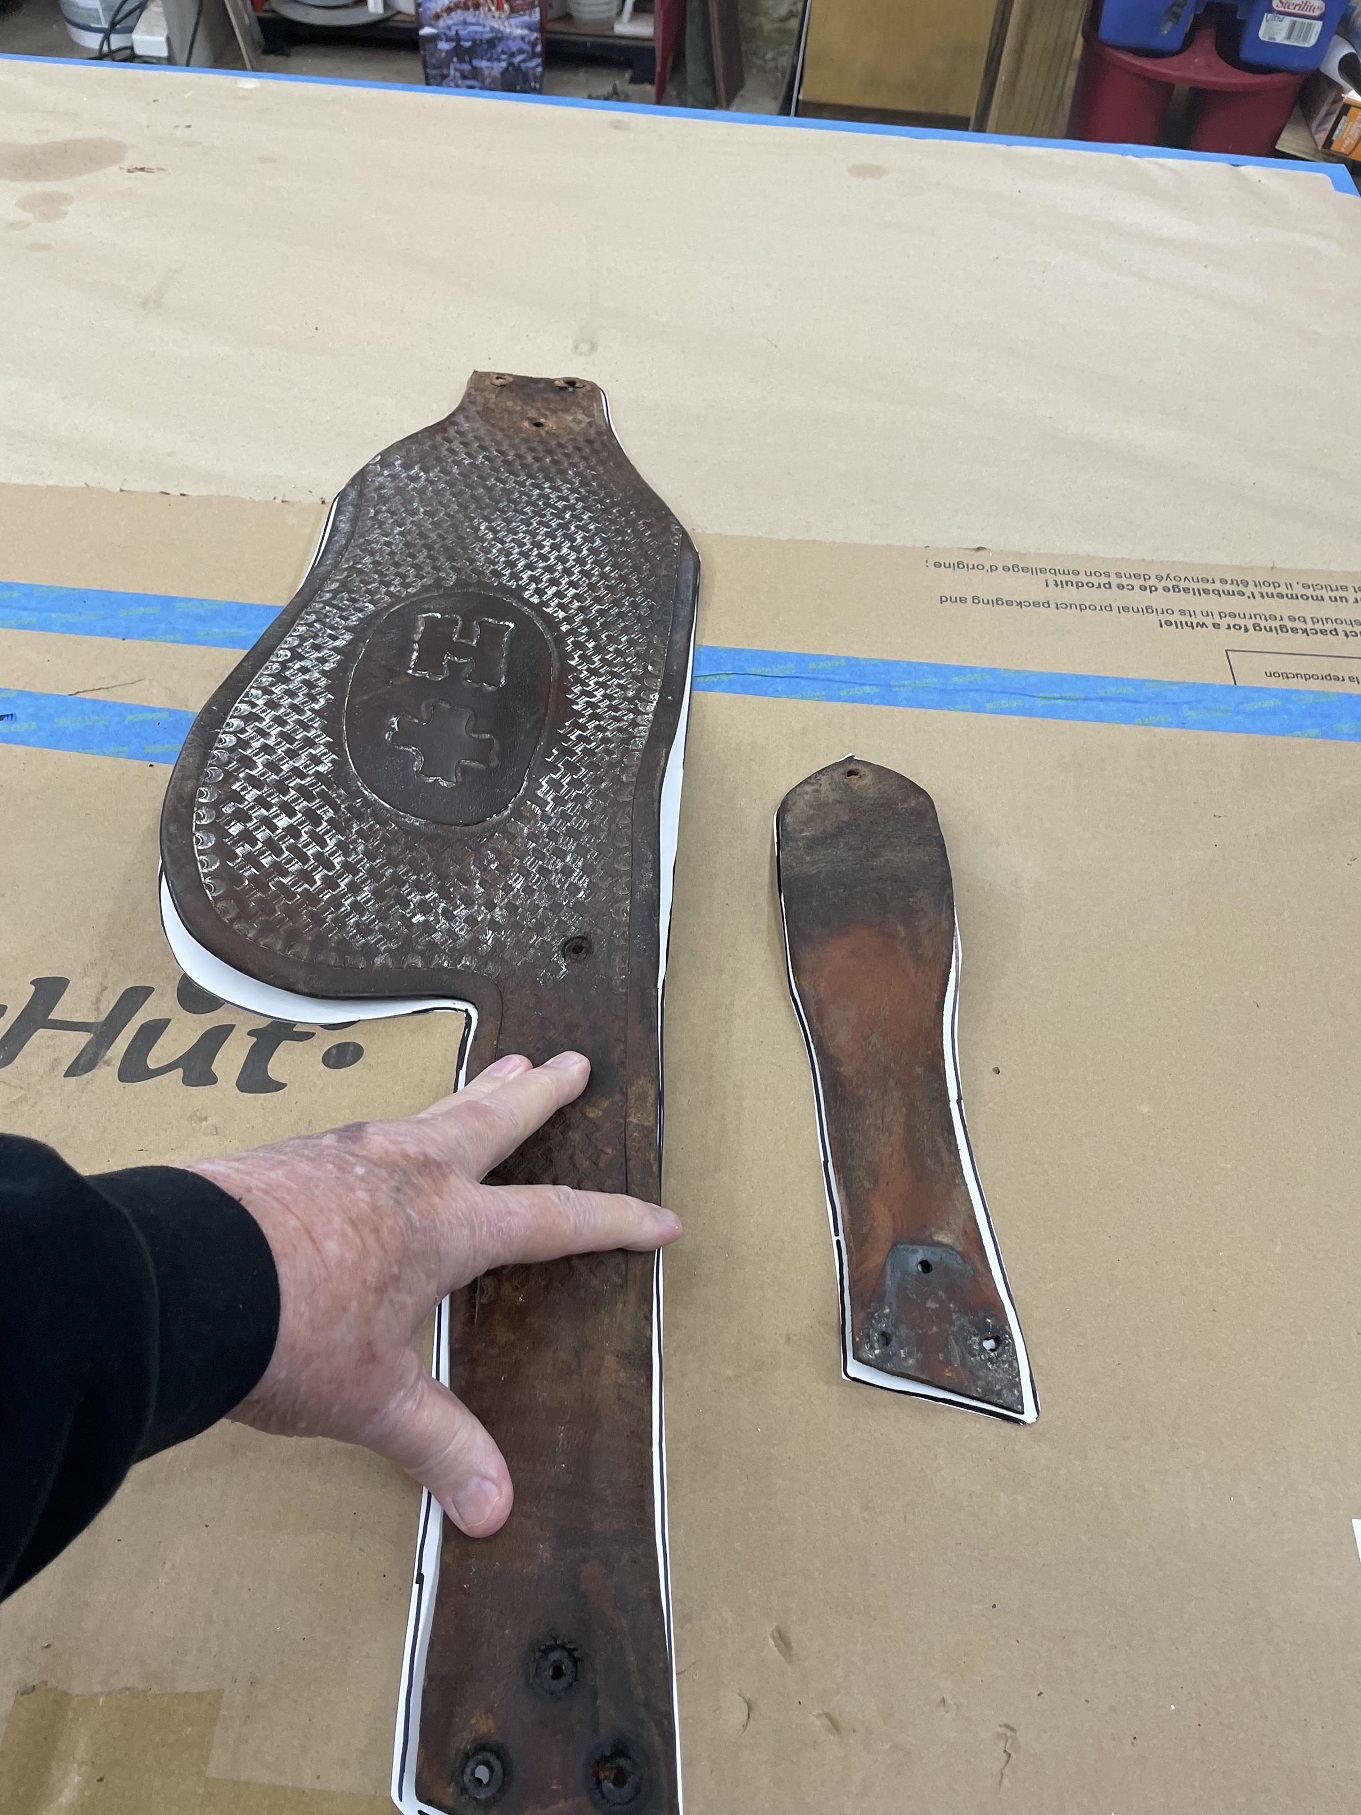
After carefully drawing out the templates and marking the spots where the holes for the rivets will eventually be punched, I verified the layout by overlaying the original leather in place.
- 17 Verifying.jpg (748.6 KiB) Viewed 3120 times
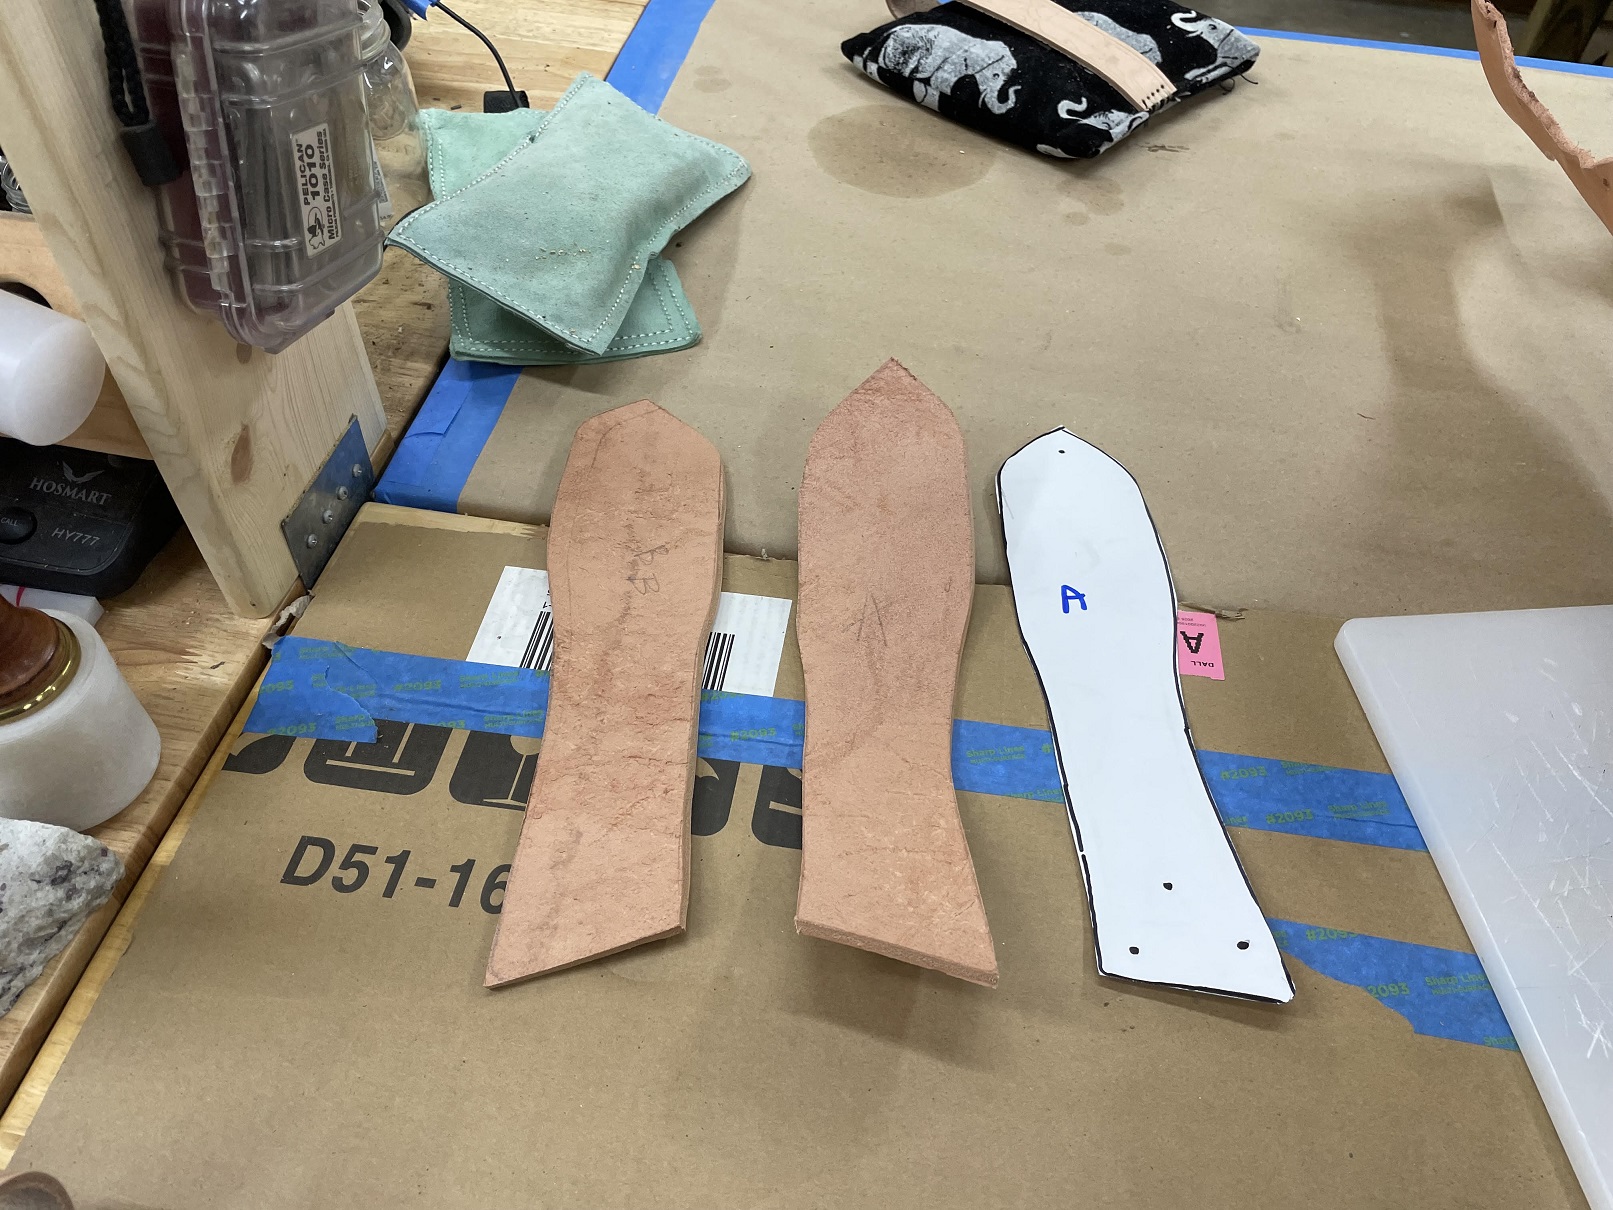
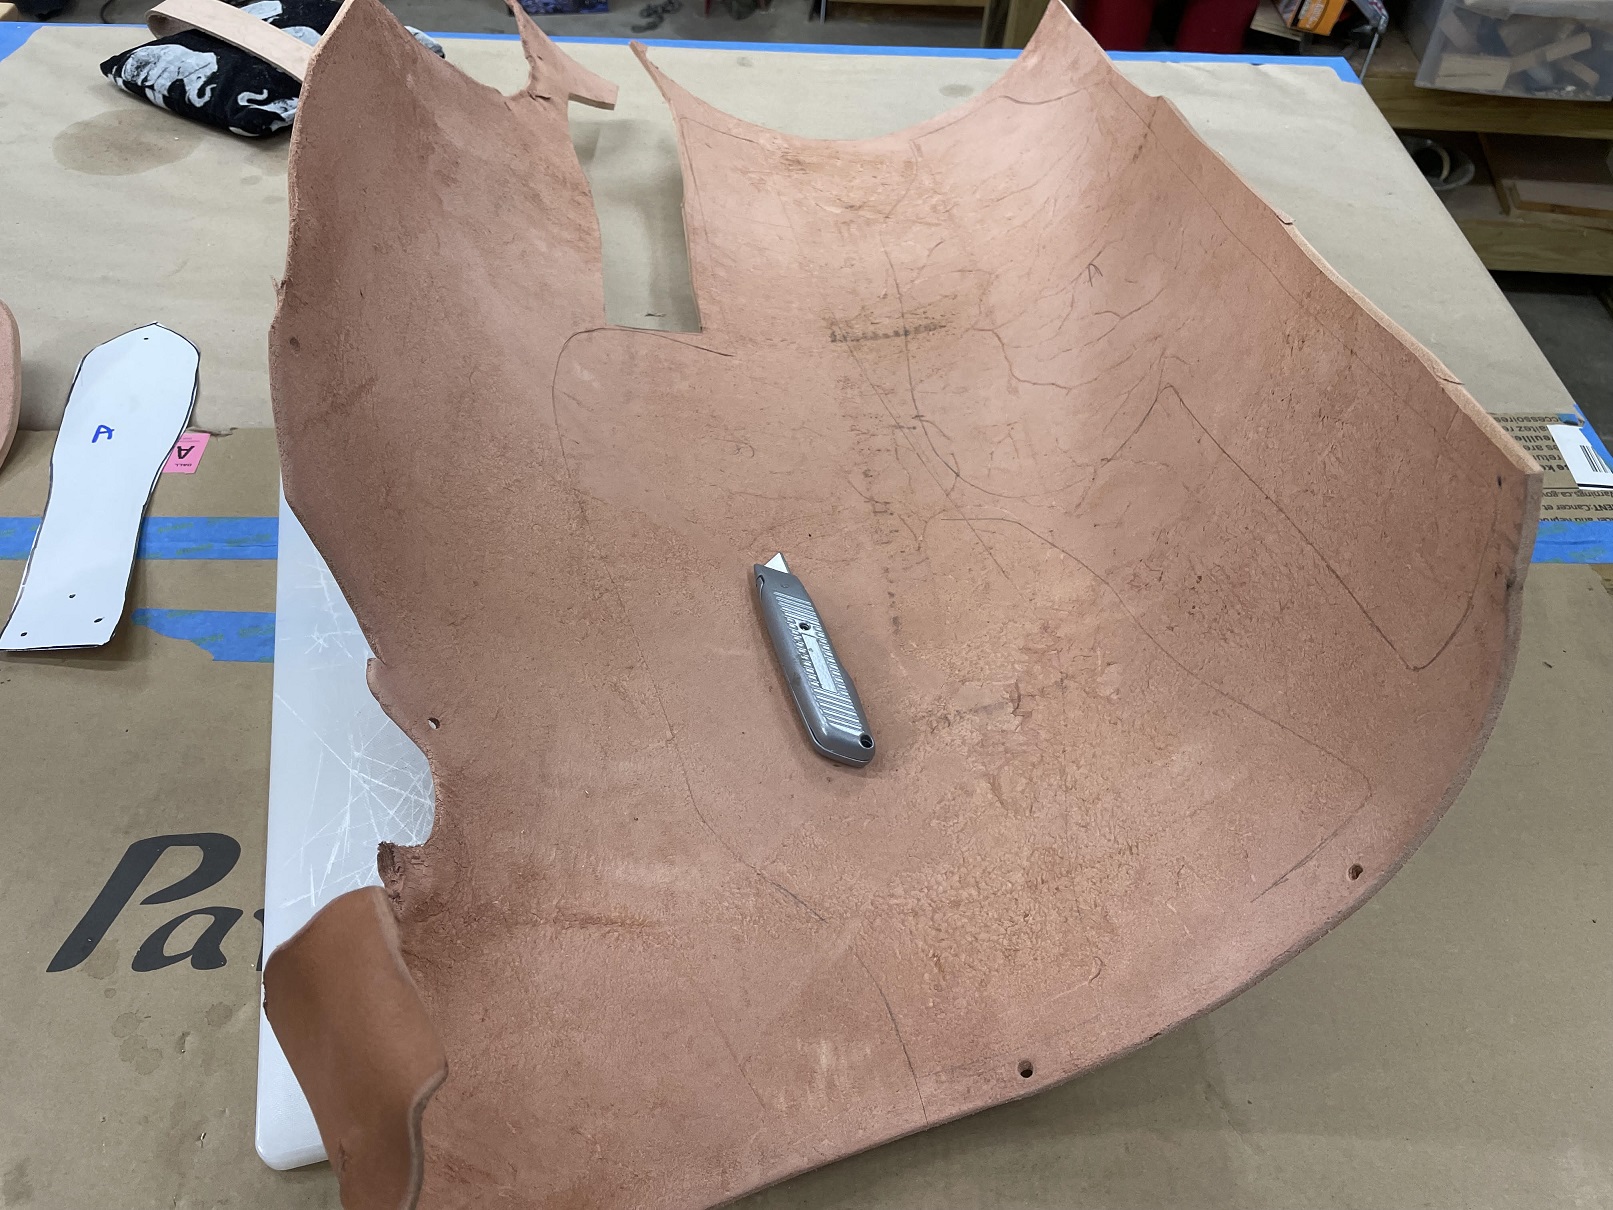
Next came the fun part. The full side of 15 ounce saddle weight leather was both heavy and curled up from being rolled and shipped in the box. I rolled her out face down and weighted her to keep her from moving. But first checking the face for defects. I drew out the A side, then flipped the template and drew a B side pair as well. I cut the small pieces first, that heavy 15 ounce leather is a workout... but I got the first pair cut.
- 18 A and B side cut.jpg (630.1 KiB) Viewed 3120 times
I decided to take a break to rest my old broken Marine hands before tackling the larger fender pieces. Getting close to the fun parts, tooling and detailing.
- 19 a break before the bigger pieces.jpg (643.19 KiB) Viewed 3120 times
I rolled up the leftover from the side of leather and stuck it in a dark bag to prevent fading. More to come.
Re: Leatherwork - Saddle Fender
Posted: Sat Jan 17, 2026 10:39 pm
by BrokenolMarine
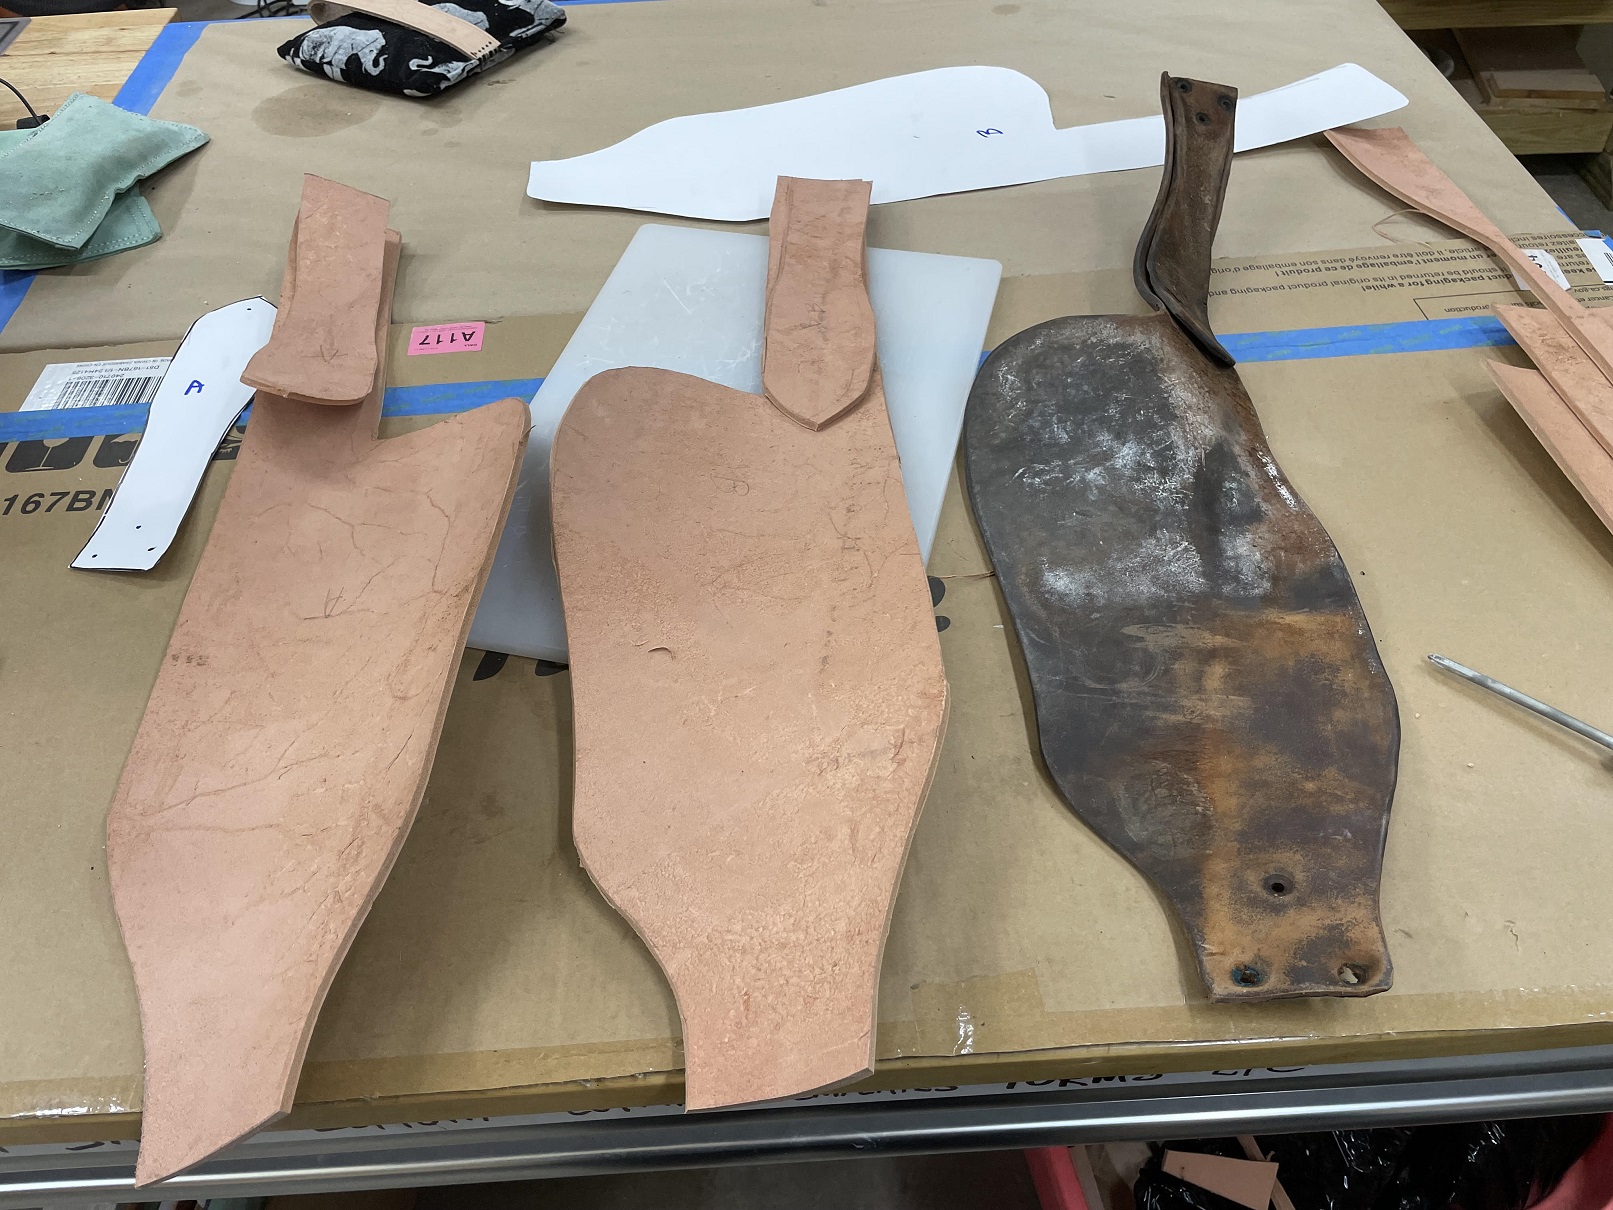
Back out at it, and cut out the fenders. I changed the blade in the knife and it helped.
Now the fenders are cut out and I'm done for the day. Tomorrow I'll look at what I'll do as far as detailing work. Just a linear border? Perhaps some tooling? We shall see.


- 22 ready to detail.jpg (546.54 KiB) Viewed 3104 times
- 21 with original fender.jpg (619.04 KiB) Viewed 3104 times
Re: Leatherwork - Saddle Fender
Posted: Sun Jan 18, 2026 10:50 am
by Hatchdog
Makes my healthy but getting older hands hurt just thinking about cutting that thick leather.
Re: Leatherwork - Saddle Fender
Posted: Mon Jan 19, 2026 1:19 pm
by BrokenolMarine
Went out yesterday evening and did some touch up to the cutting, reducing the size of the small pieces, cutting them down to match the original pieces. They were both oversize by about 1/8" all the way around. Got that done, then took a piece of the same 15 ounce leather, and started tooling some border tests, rough test borders. Now these are rough, I didn't take my time and perfectly space or match the tooling as I would when I actually did the pattern on the fenders, but it would give the girls the idea of what the border would look like. Then I took a pic and sent it to my daughter to share with her friend, and took the sample in to the wife. #7 is a rope border and didn't turn out that well. The spacing of the lines was off, and I didn't work hard enough to get the placement of the tool correct. I have done much better in the past. That's on me... Might have looked a lot better if I had taken more time.
"I" personally have always liked the two serpentine patterns, although they are a lot of work. (#3 and #4)
Miss T voted for the double line and shell (#2)
Jess liked the Barbed Wire (#1) knowing I would open up the lines a bit to center the string of wire.
But her friend agreed with Miss T, voting for the simpler / thinner pattern represented by #2.
Fine by me.... a lot less work.

- 23 tooling choices.jpg (615.02 KiB) Viewed 3080 times
I'll go out this morning and dress up the edges of the fenders, then decide on the layout for the borders and cut a cardboard template to insure the lines are consistent. Pencil in the line, then CAREFULLY cut in the border line with the swivel knife, and tool the pattern on both fenders. Might take two or three sessions.
Re: Leatherwork - Saddle Fender
Posted: Wed Jan 21, 2026 1:16 pm
by BrokenolMarine
Back at it over the last couple days. The first step was to make the tooling template so the tooling would be consistent on both sides. I don't know why I was worried, you can't see both sides at once... but I'm just like that. I took the original template and messed with the design in my head. I needed to lay out the location of the rivets so they wouldn't mess with the border. In the original, they were in the pattern, but since she didn't want full coverage, I want to try and keep the hardware OUT of the pattern.
So... I'll at least, try.
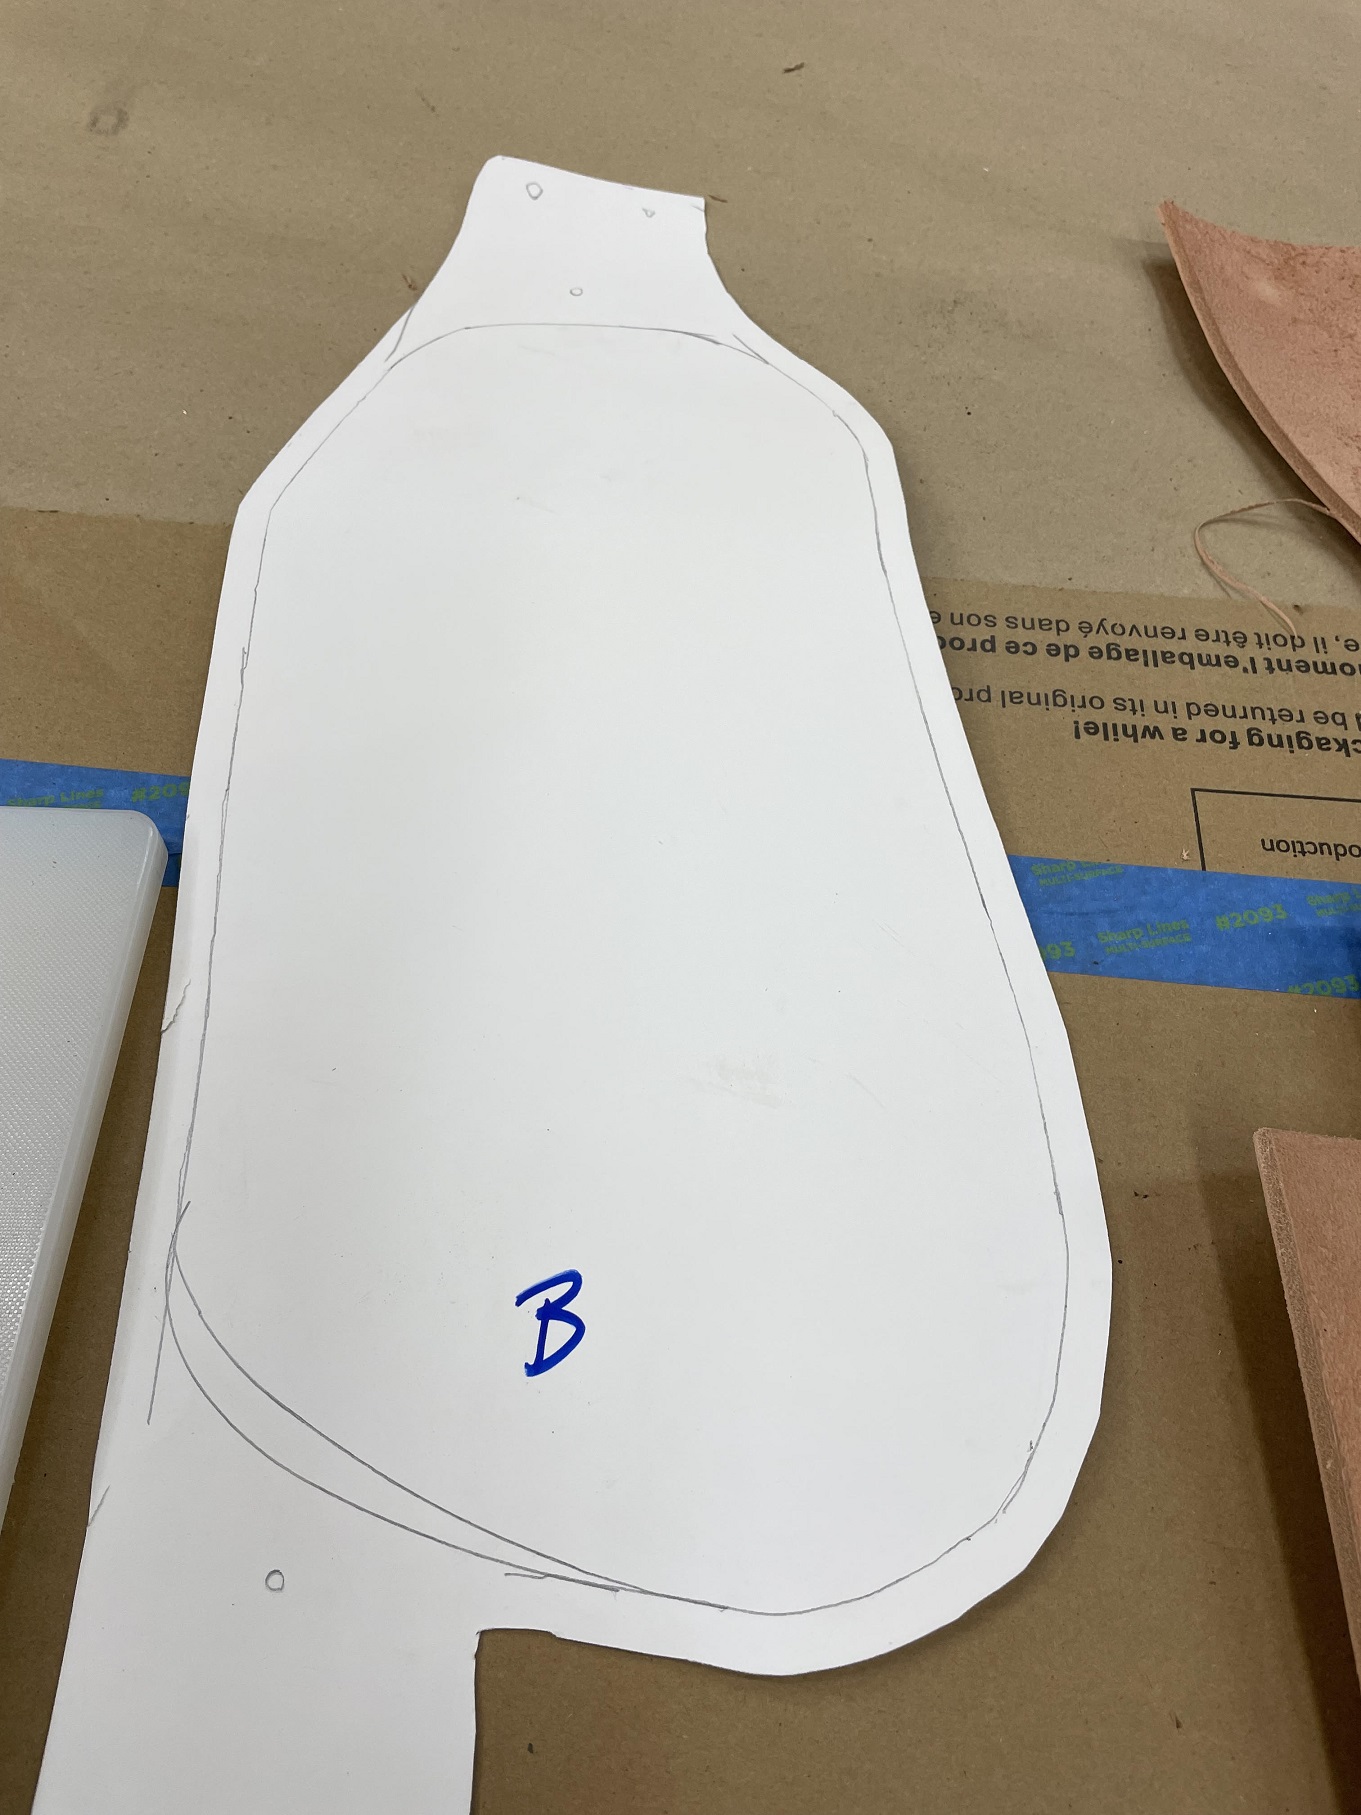
- 24 tooling template rough.jpg (480.94 KiB) Viewed 3014 times
Once I had it drawn out, I used the razor knife to carefully CUT it out, then tested it on the fender. Looks pretty close, and I could transfer it to the fenders in pencil. There was still a slight curl in the fenders and I wasn't going to deal with that when tooling, we'll get to that.

- 25 tooling template.jpg (536.54 KiB) Viewed 3014 times
So, on a bit larger scale, let's flatten the fenders. Wet them both down, and weighted them. Left them until the evening, but still a bit curled, Re-wet them and left them overnight.

- 26 flatten the fenders.jpg (617.05 KiB) Viewed 3014 times
Came out the next morning to check and Boom... it worked.

- 27 it worked well.jpg (600.58 KiB) Viewed 3014 times
The first step was to take the border swivel knife and CAREFULLY cut in the border. This took a bit of time and after I was finished with both fenders, my hands reminded me that arthritis doesn't care for detail work. I'll take a break.

- 28 borders cut.jpg (566.69 KiB) Viewed 3014 times
The tooling inside the border will be the next task.
Re: Leatherwork - Saddle Fender
Posted: Wed Jan 21, 2026 11:12 pm
by BrokenolMarine
The second afternoon session got the tooling completed. Slow and Steady, with careful strikes to avoid misses that could cause skids with the tool, or bounces that could cause double strikes and mess up the entire line. I went around the inside of the double border with the half floral punch as the gal asked. Then I set my Maker's Mark, once on each fender. You can see the maker's mark at the bottom of the two fenders in the first pic below.
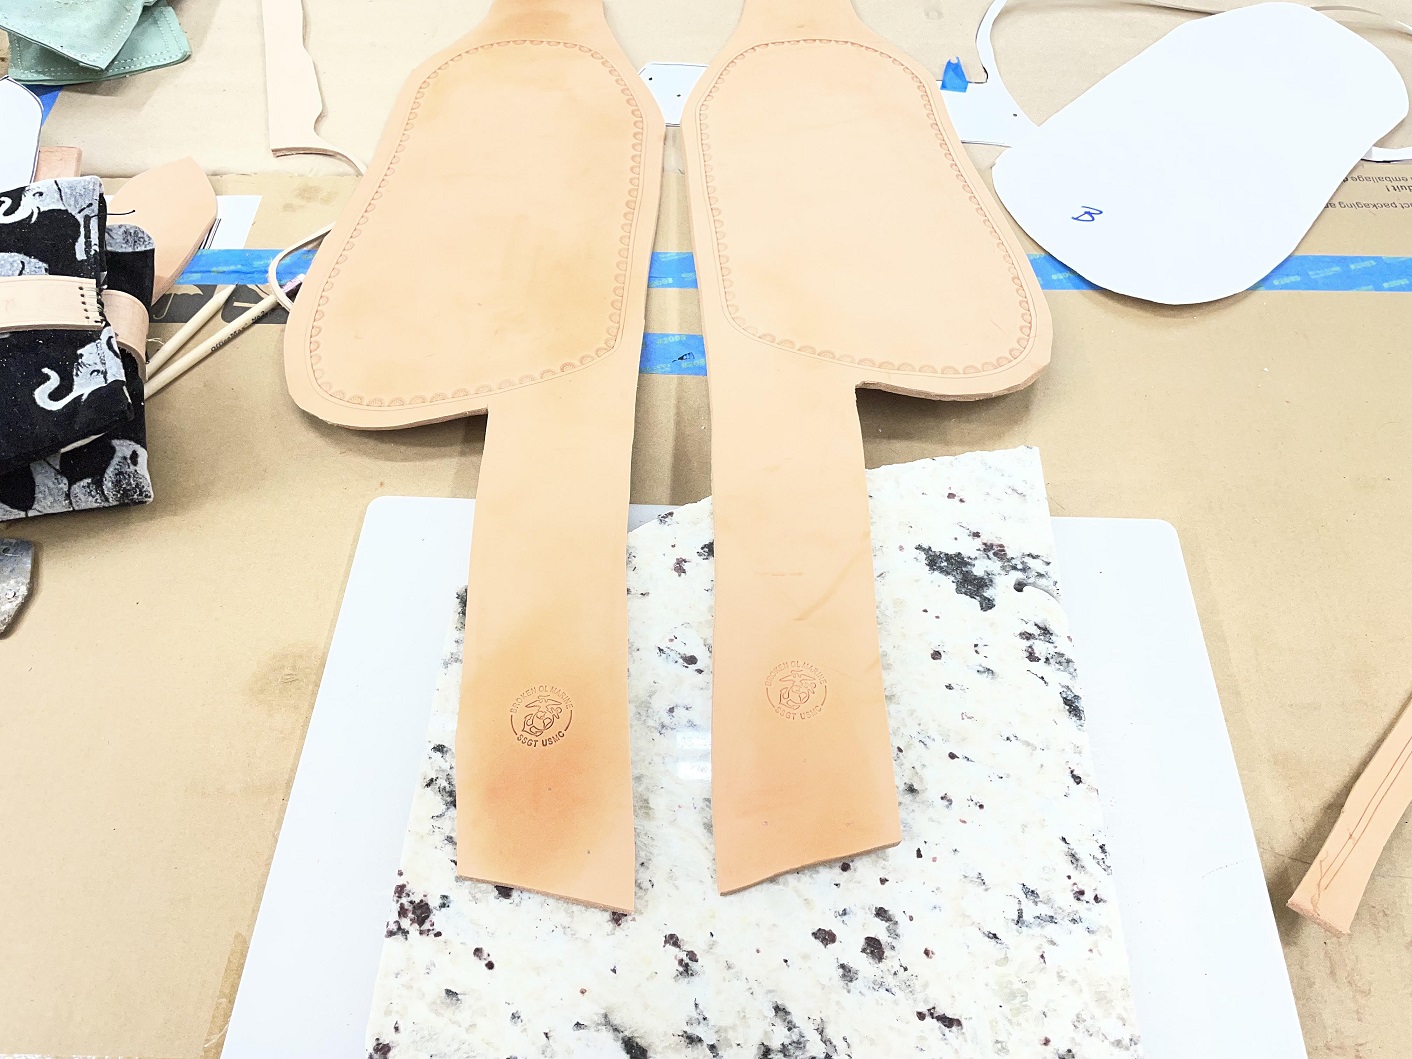
- 29 tooling done.jpg (373.28 KiB) Viewed 3212 times
A closer look at the tooling in this pic. I haven't added any stain or color yet, but will before I burnish the edges of the components. I have been waiting for reference pictures of the saddle itself from my daughter.
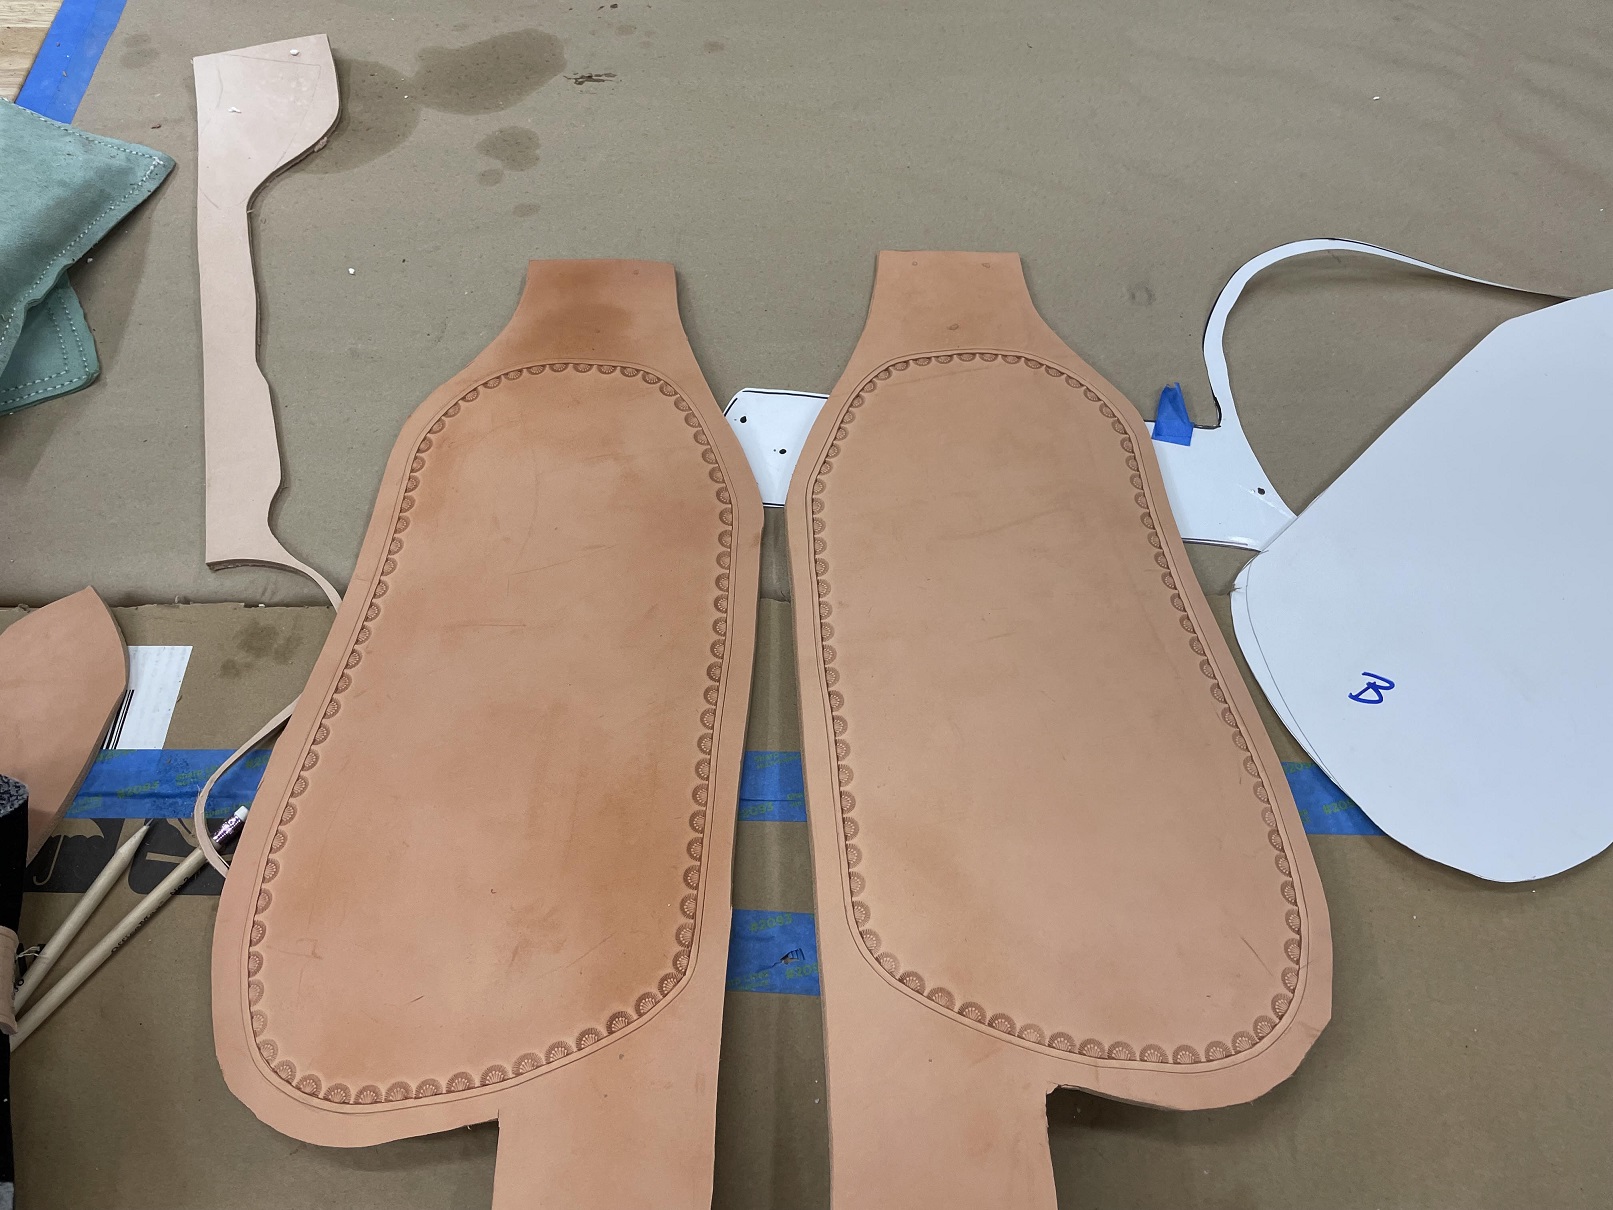
- 30 closer look.jpg (498.38 KiB) Viewed 3212 times
Before I called the afternoon's session done, I cleaned up the glue, rust, and accumulated dirt on the Blevins. The metal piece that locks into the holes on the stirrup strap. I had asked if the owner wanted to order new or re-use these, got no reply, so these will be riveted back in place. I can't get much cleaner than this due to pitting and stains... but they aren't seen when the saddle is in use, so she may not really care.
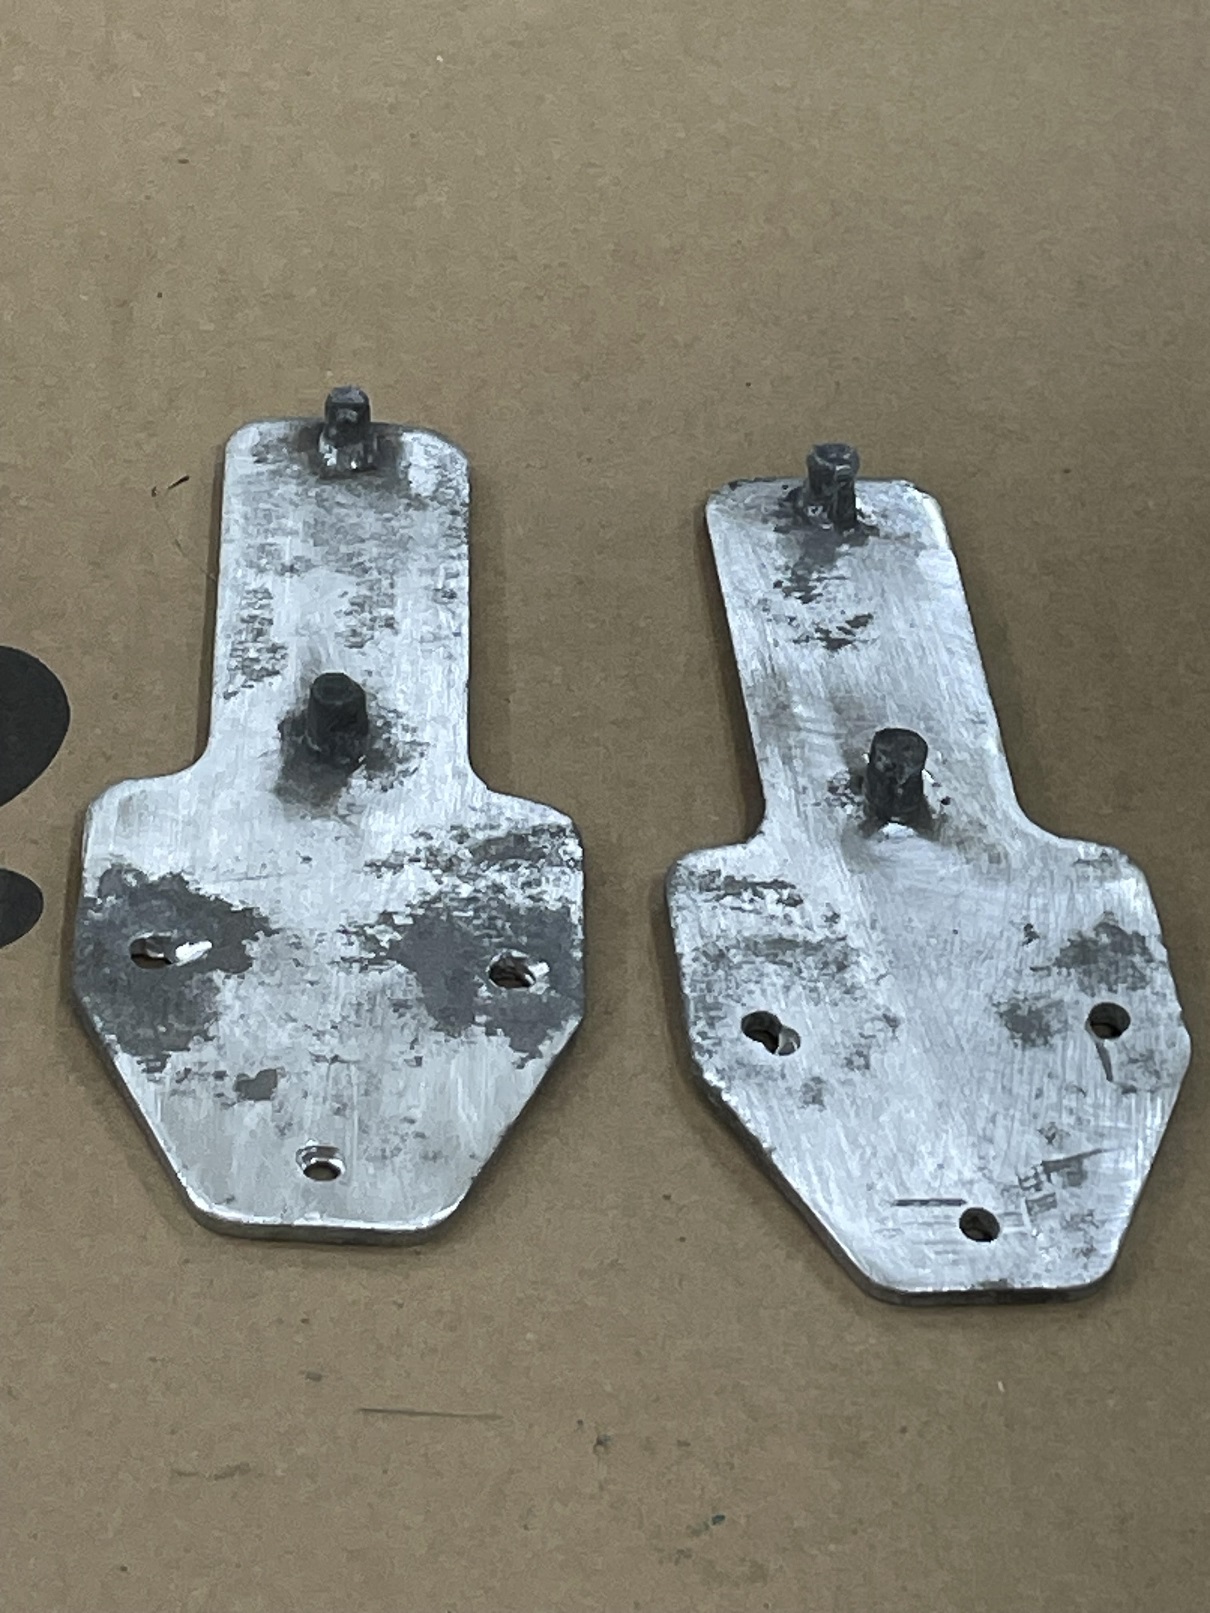
- 31 blevins cleaned up a bit.jpg (527.75 KiB) Viewed 3212 times
We are moving right along.
Re: Leatherwork - Saddle Fender
Posted: Wed Jan 21, 2026 11:13 pm
by BrokenolMarine
I'll dress up the edges, and prepare to burnish after oiling/staining, tomorrow. I will first test the various Watco oils on scraps for color comparison before staining the fenders, etc.
Edit:
Not WATCO oils.

Those are my woodworking finishes. I'll pre-oil the leather to condition it with neatsfoot, then use the various stains... I have plenty on hand. I should find a good match.
Re: Leatherwork - Saddle Fender
Posted: Thu Jan 22, 2026 11:06 am
by Hatchdog
Great progress particularly with the stoppages to flatten the leather. Hope your hands hold up.
Re: Leatherwork - Saddle Fender
Posted: Thu Feb 12, 2026 12:15 pm
by BrokenolMarine
Wow... finally had a few days to get out in the shop and finish the Saddle Fender Project.
We had about ten days of ice and snow and I wasn't allowed to leave the house. I am unstable enough on uneven ground without adding ice in the mix. (Pun intended.)
Miss T was adamant... "You don't need to be out in the weather, if you fall and break something, you are on your own." She wouldn't have left me to fend for myself, but she would have been VERY vocal about every thing she had to do for the next six months.
I stayed in the house. SHE only went out to check the fowl and make sure they had food and water. They were "Cooped Up." Gee, that's where the term comes from..
Anywho, the items I had been waiting for finally came in during the time I was stuck inside...
More Mink Oil, longer rivets and burrs, and additional Light Brown Dye. Good to go. I got out and treated the leather, dyed it with two coats of light brown dye, massaged it with Mink Oil to protect it, and then began, after a practice run at using the rivets and burrs, began the assembly. Slow and steady.
The Saddle Assemblies turned out pretty nice.
Back View:
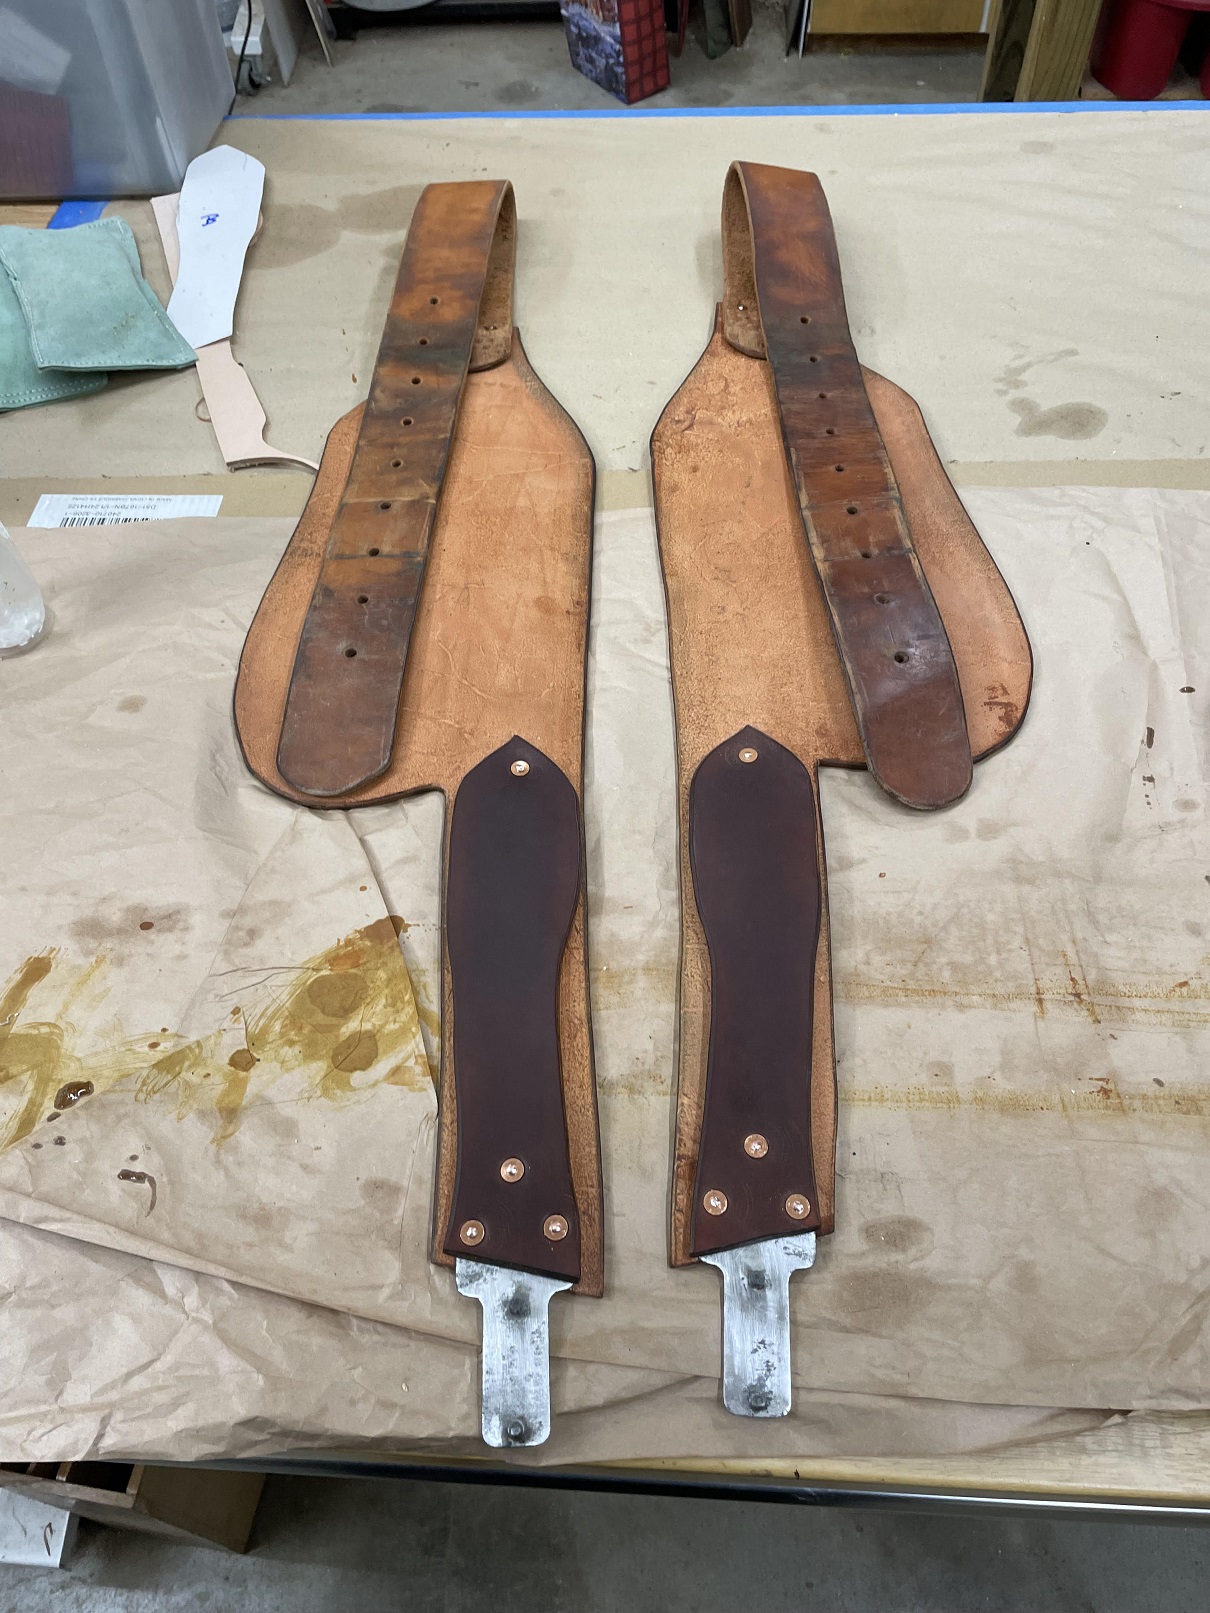
- 32 Done back.jpg (593.84 KiB) Viewed 3132 times
Front View:
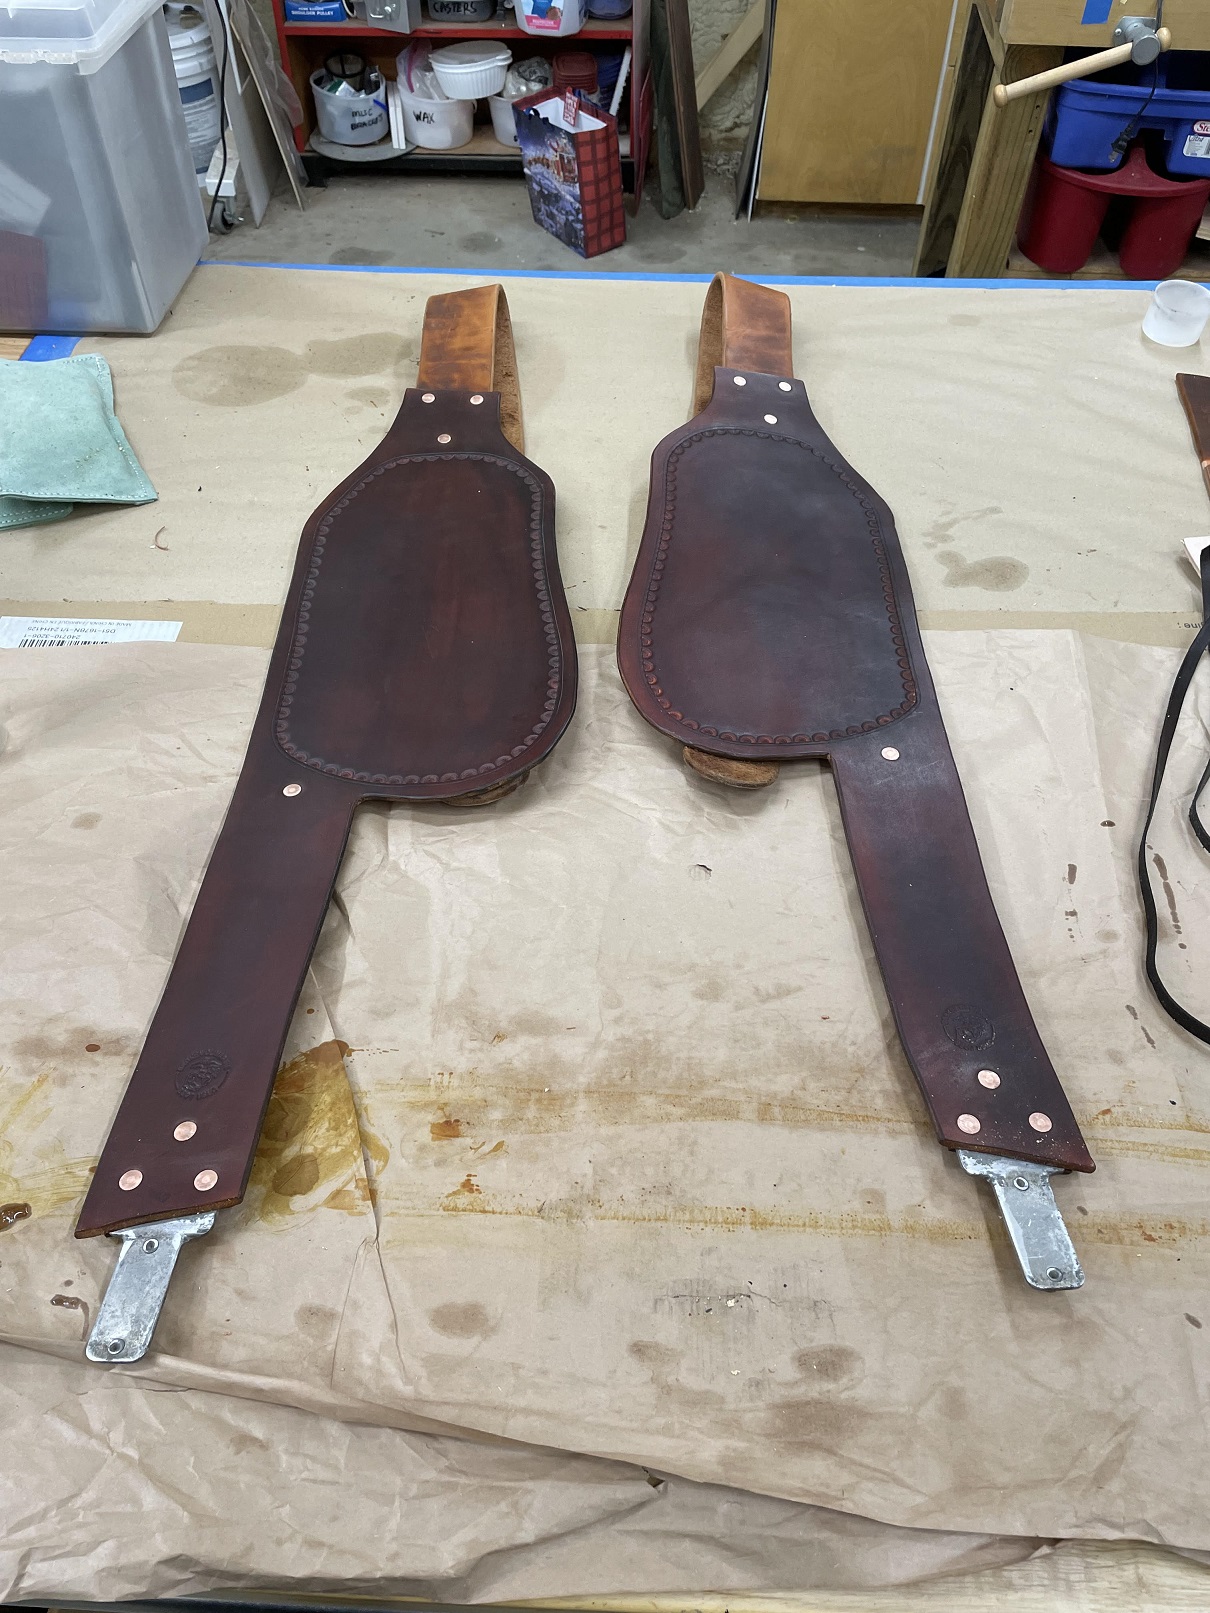
- 33 done front.jpg (606.77 KiB) Viewed 3132 times
You may remember Miss T had to cut the stitching so I could remove the Rivet on the Belly Band to attempt to repair that broken loop that held the D-Ring. She discovered the two layers had been glued together. I proposed a repair that would work and the daughter's friend approved it.
Cut Stitches:
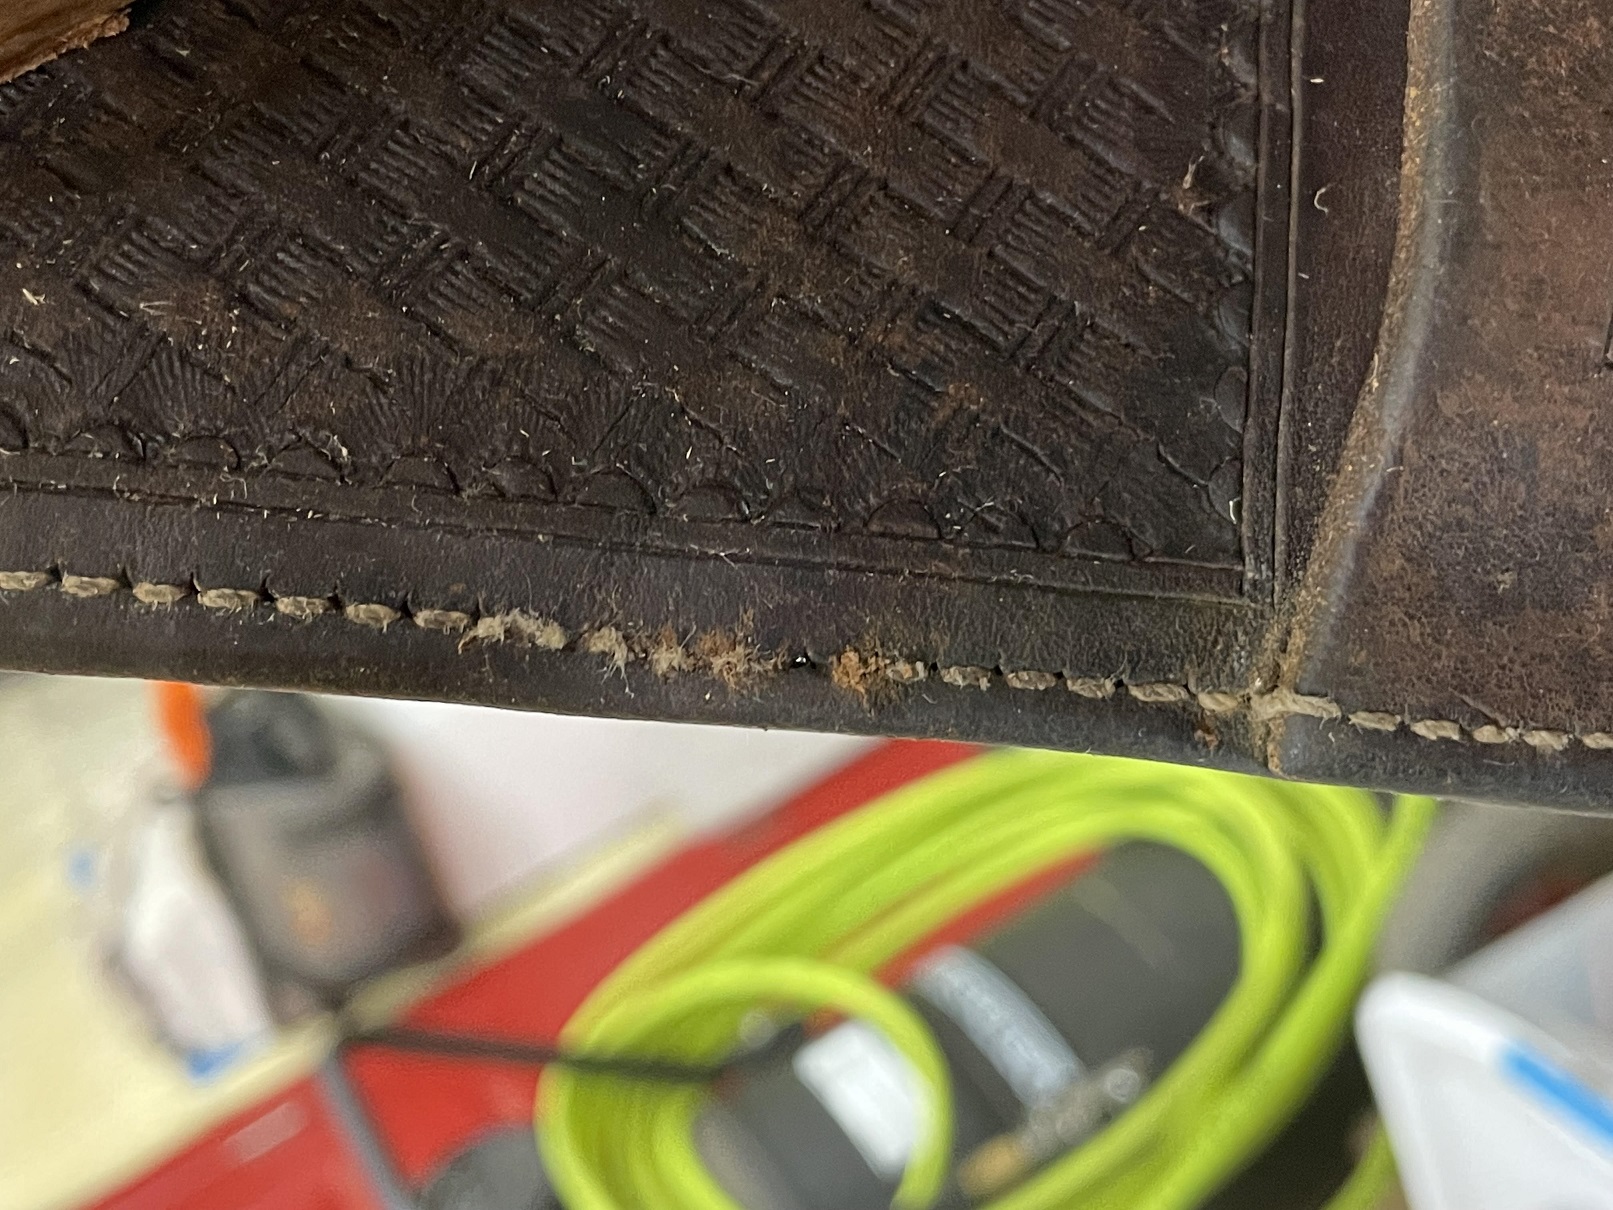
- 34 belly band laces.jpg (637.35 KiB) Viewed 3132 times
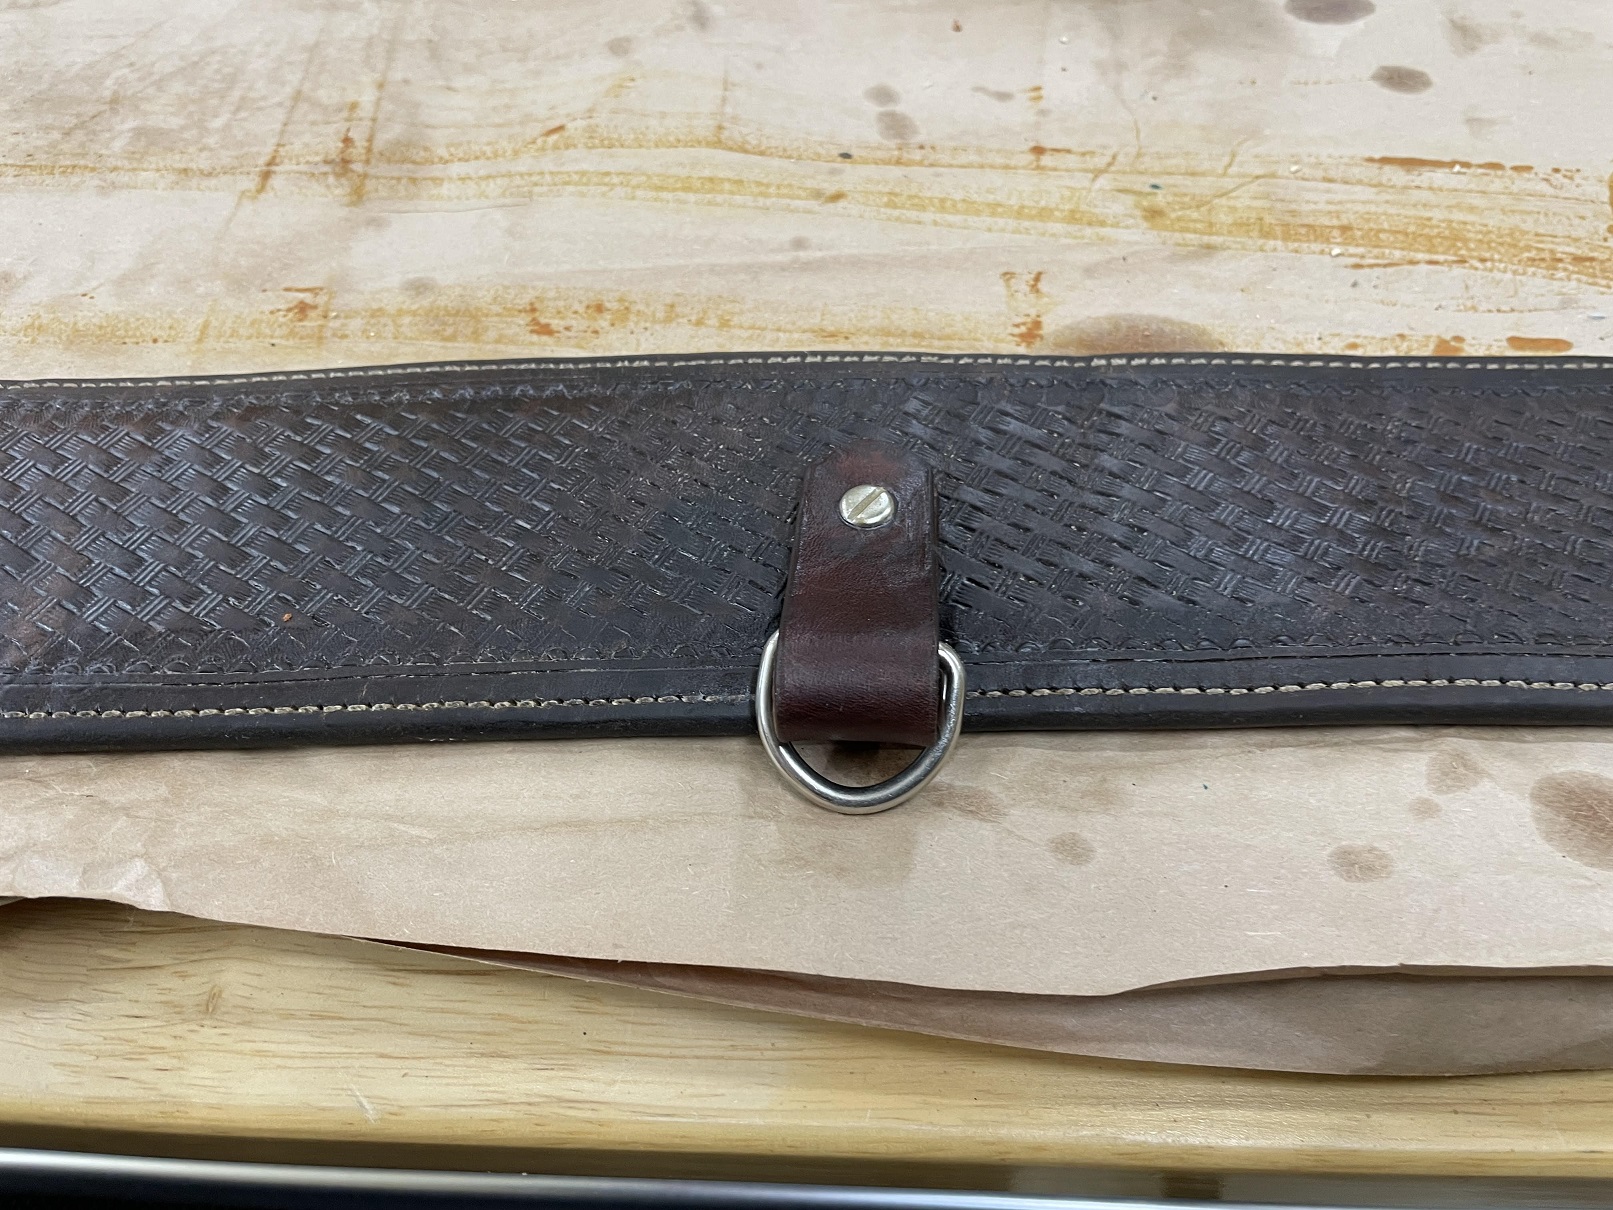
Here is a long view of the Belly Band, which had been caked with sweat, oil, dirt and grime. I washed it with a toothbrush, saddle soap, and cleaned it up. I used a chicago screw and made a new loop. I put a dab of glue IN the chicago screw to keep it from backing out.
I repaired the stitching using saddle stitching and heavy waxed thread. Unless you were looking for it, you won't find it.
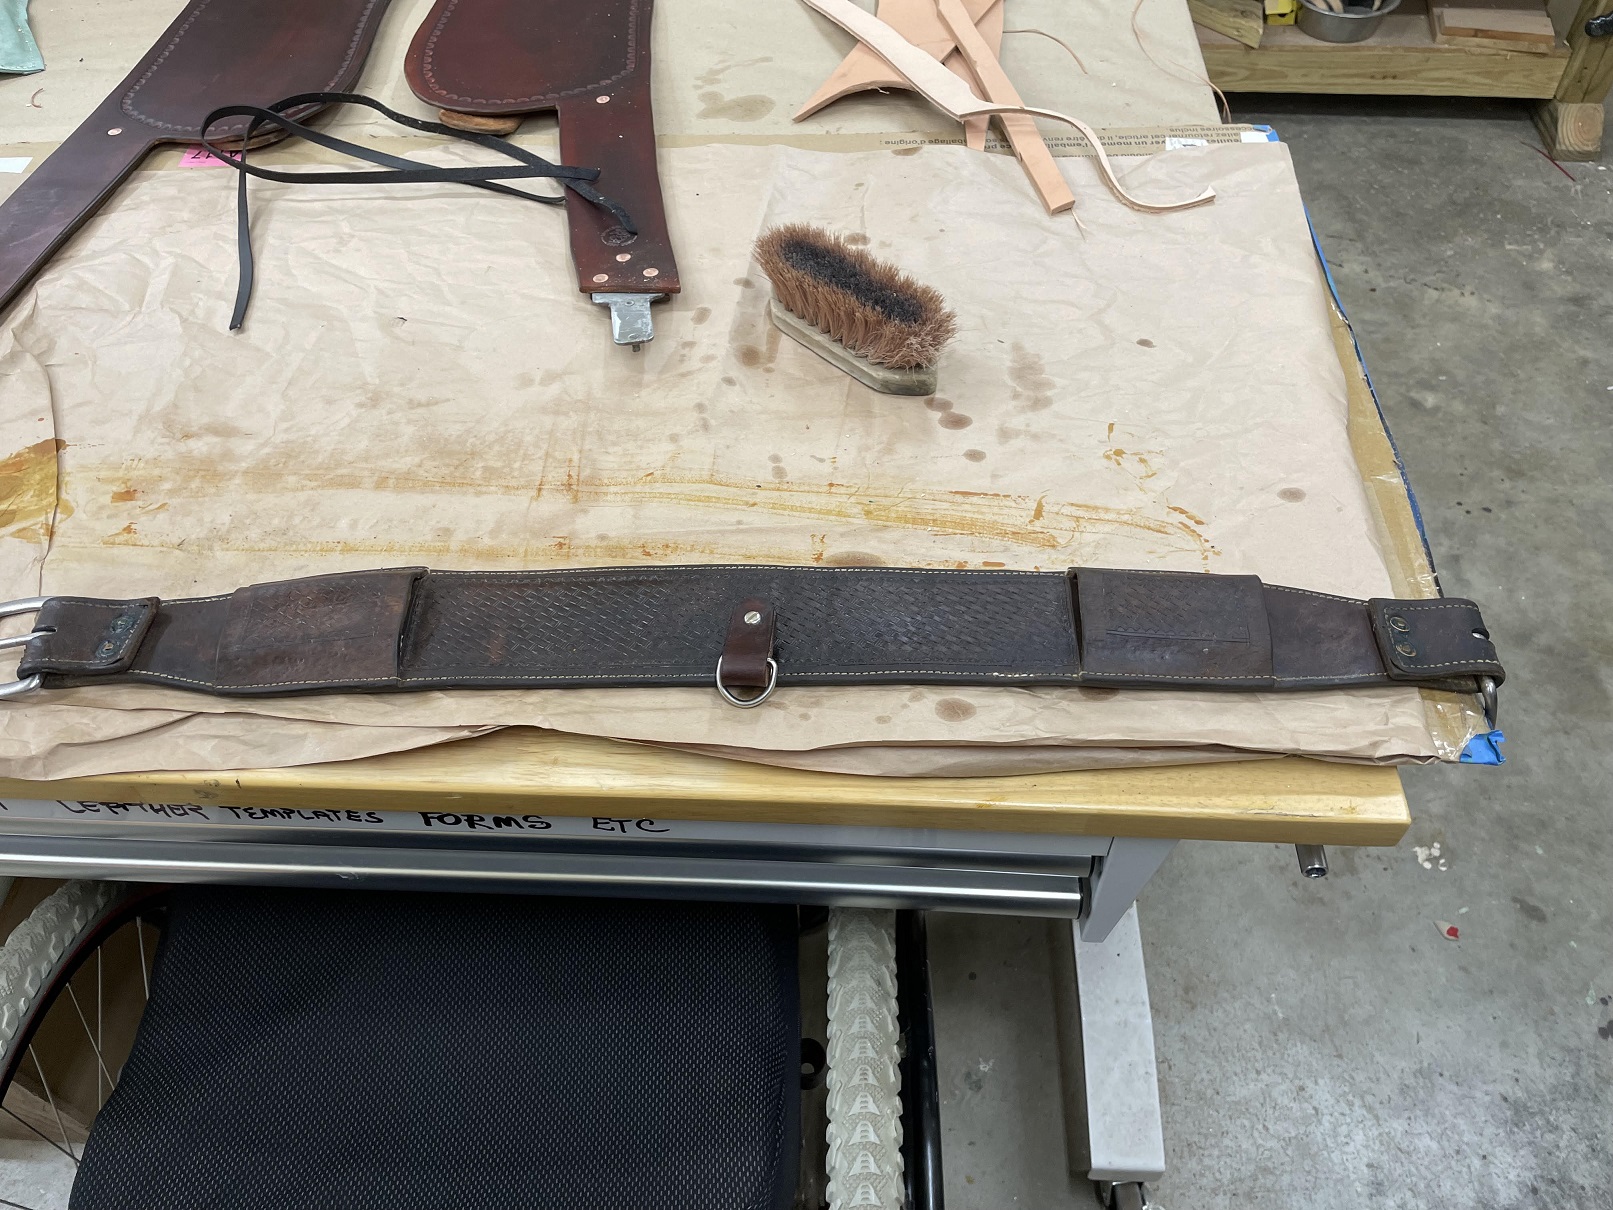
- 35 belly band washed and repaired.jpg (664.75 KiB) Viewed 3132 times
A close up view of the new loop and d-ring. In this picture the belly band has not had the Mink Oil treatment. The owner needs to clean the tack every now and then and treat the gear with some preservative, it will last longer.
- 36 close up.jpg (696.76 KiB) Viewed 3132 times
When she saw the pictures she sent a reply. "Wow!" I guess she liked the results.
I'm done.

Re: Leatherwork - Saddle Fender
Posted: Thu Feb 12, 2026 12:56 pm
by Mags
Nicely done.!
Re: Leatherwork - Saddle Fender
Posted: Thu Feb 12, 2026 1:30 pm
by CT_Shooter
Awesome job, Marine. Thanks for sharing it with us.
Re: Leatherwork - Saddle Fender
Posted: Thu Feb 12, 2026 1:43 pm
by BrokenolMarine
Sorry it took so long. (Sigh)
The weather was a female dog who has given birth to puppies.
Re: Leatherwork - Saddle Fender
Posted: Fri Feb 13, 2026 8:26 am
by The Wiz
Such talent!
Re: Leatherwork - Saddle Fender
Posted: Fri Feb 13, 2026 9:56 am
by Hatchdog
Looking great. And yes, 10 days of patience is worth the next six months of peace.
Nobody has ever said that just because an old Marine is broken his brain is too!