Page 1 of 1
An Upgrade to the Leather Bench
Posted: Mon May 09, 2022 11:15 pm
by BrokenolMarine
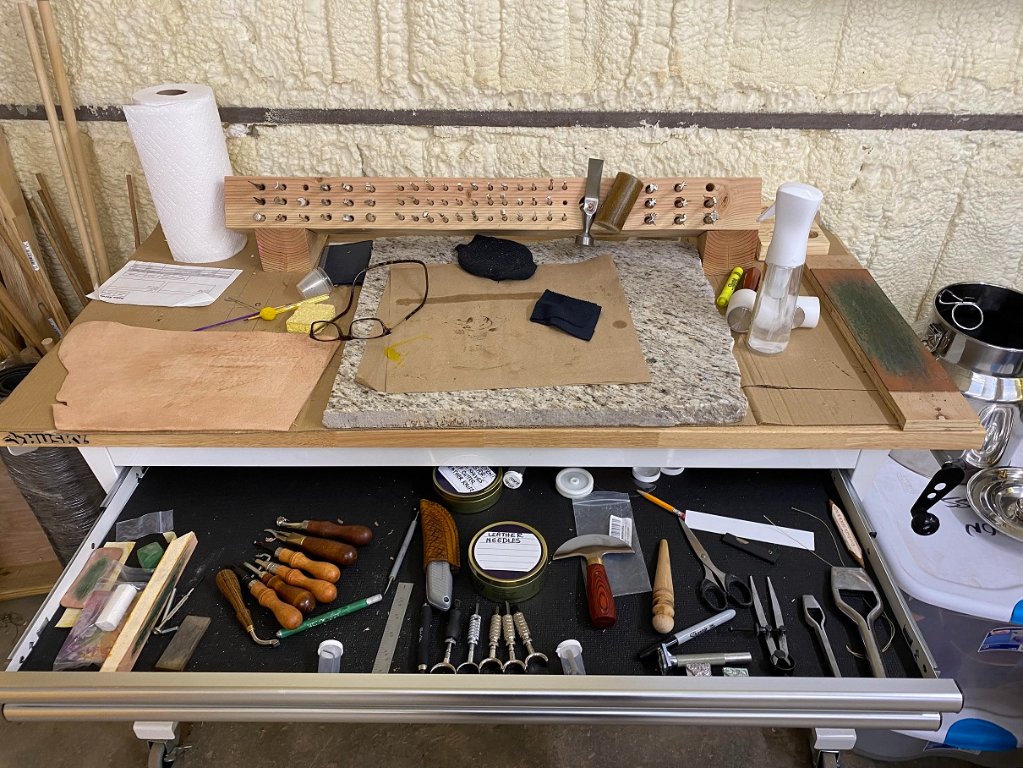
Before I start a new leather project, I have been meaning to do something about the disorganization of the drawer that contains most of my tools. I bounce the ideas around until the final plan is almost... well, final.

They never really are until the last screw is in place. But, I'd pull the drawer open and these things roll around and move and I'd have to look... frustrating, especially when you are on a roll.
- s01.jpg (210.55 KiB) Viewed 3248 times
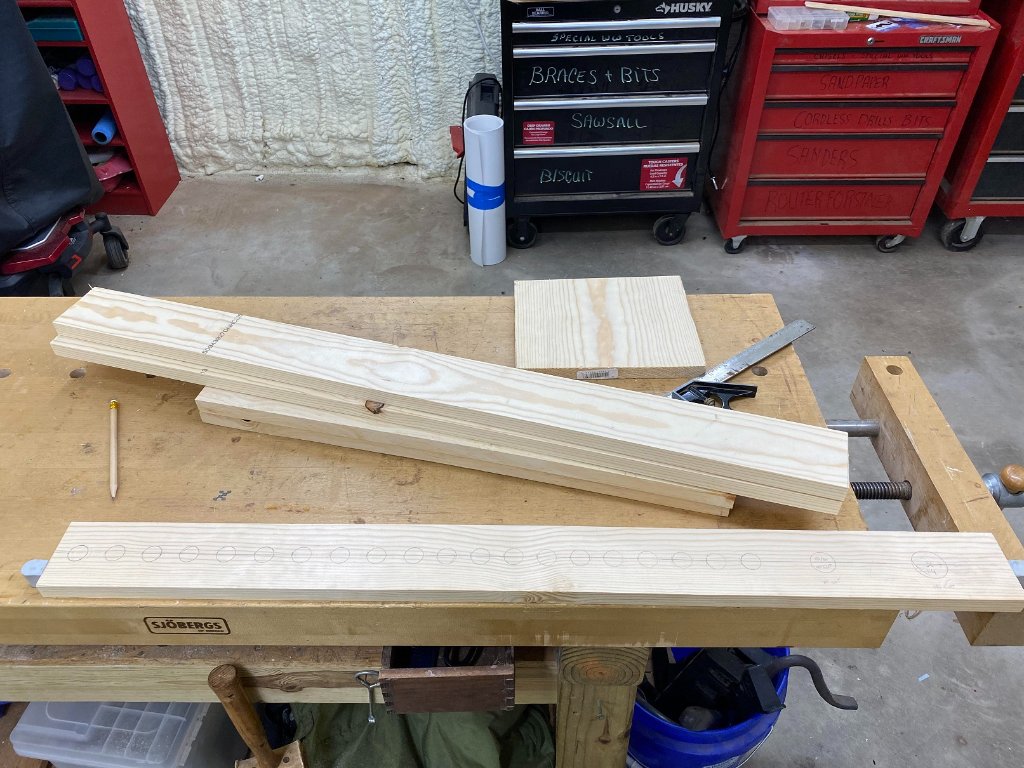
So, I had some pine shelving board on hand, it was a matter of cutting it into a kit.

I had a short piece left over from another job, can't remember what... but I ripped that into three 3" x 36" lengths to serve as shelves.
then I cut a 24" piece and ripped two 4" x 24" pieces to serve as the legs. The shelf will mount over the canted 4x4 that is the leather punch block.
I will put a luan backing on it to keep things from falling thru.
I have marked the holes for the lower shelf where most of the hand tools will reside. Some will drop in, but most will slide in slots, held in place by gravity. If the idea doesn't work I'm out a bit of pine I had on hand, although it WAS a very nice piece of pine, a bit warped, but not too bad.

Should finish this tomorrow, depending on when the delivery takes place. Miss Tina ordered me something.
- s02.jpg (168.01 KiB) Viewed 3248 times
The "head knife" can't go into the rack though, until I make a leather cover for the blade. That's the one in the right side of the drawer with the fan shaped blade... wicked sharp. It's going to drop handle first/blade up, in the last hole on the right on that shelf. Don't want to lose any fingers.

Back at it tomorrow ...
Re: An Upgrade to the Leather Bench
Posted: Wed May 11, 2022 1:00 am
by BrokenolMarine
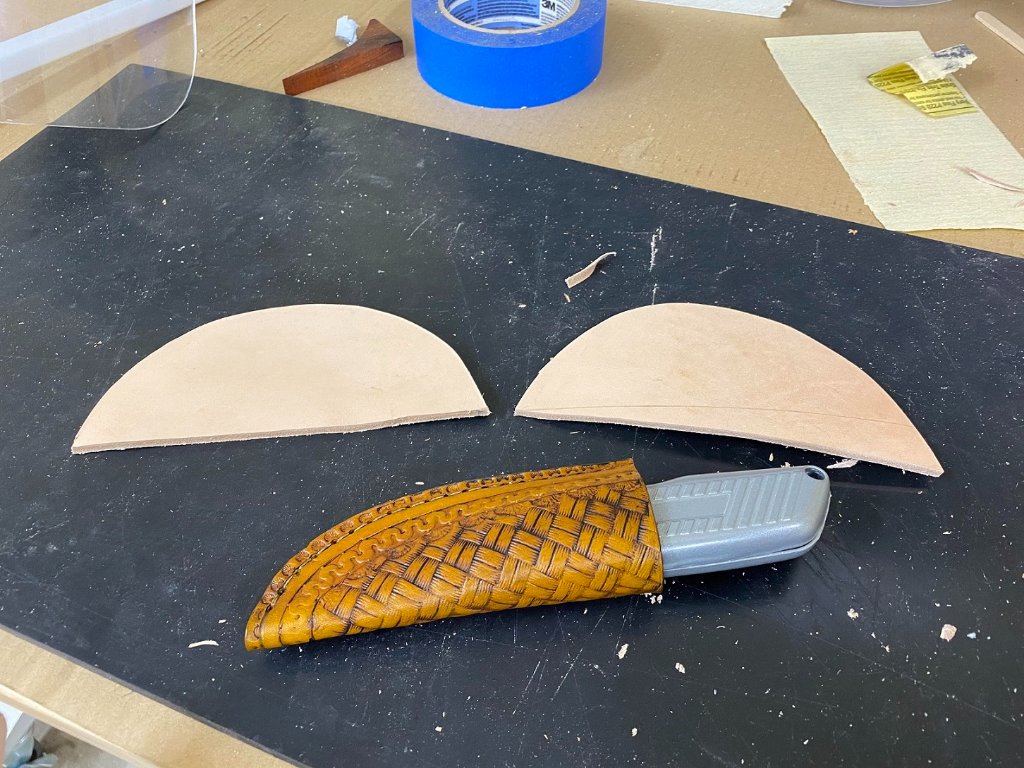
Quickie shot at the head knife cover. I wanted to work in the shop a bit this evening since I couldn't sleep and I needed this before the knife could go in the rack when it was done. I fiddled with the design, then drew it on a scrap of leather and cut it out.
- cutout.jpg (176.32 KiB) Viewed 3227 times
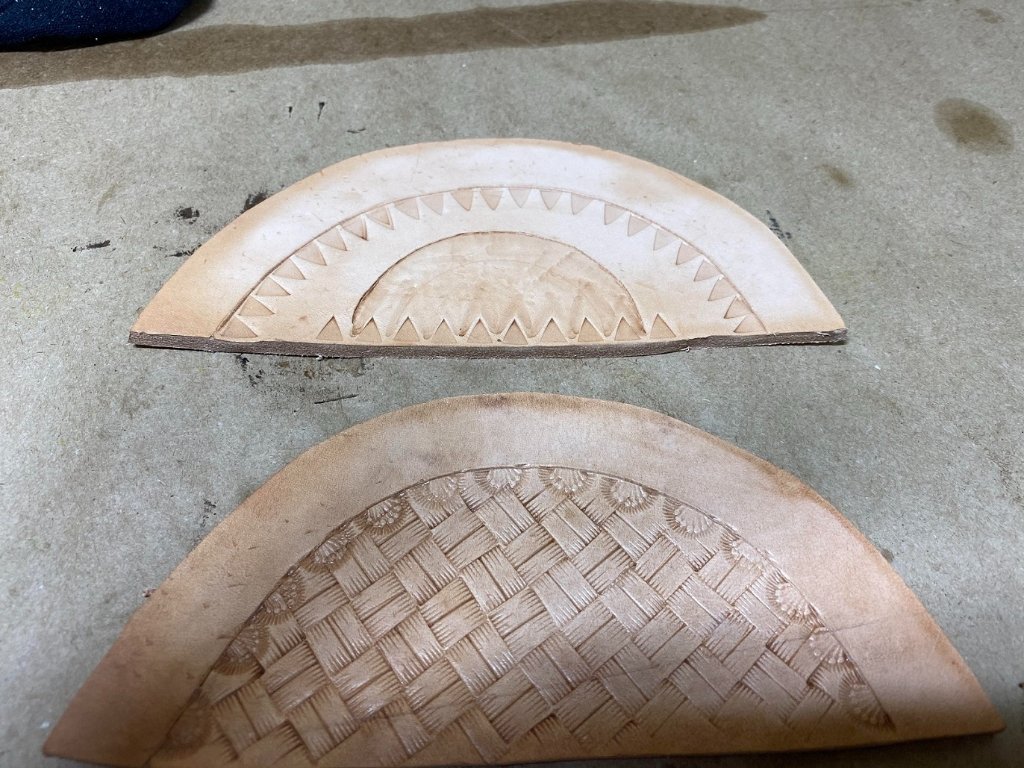
Of course I decided to tool it. Since I had the new basket weave stamp, I practiced on the back side of the cover, or is it the front... with the design, it won't matter. Then, because I had said it could eat you, I gave the front side some teeth. This is supposed to look like a shark maw coming at you. Maybe after it's painted?
- tooling.jpg (183.07 KiB) Viewed 3227 times
Have to drive three hours to the oral surgeon tomorrow. Two (or three?) Extractions. Bad crowns that have to come out and can't be redone. They will do implants later when the jaw heals. Miss T will drive me down, spend the time I am in surgery visiting with my daughter.... then drive me home again. Blows the day and I'm guessing the following day will be blown too. Maybe not.
Re: An Upgrade to the Leather Bench
Posted: Wed May 11, 2022 7:45 am
by DsGrouse
nice, having a good bench makes a difference
Re: An Upgrade to the Leather Bench
Posted: Wed May 11, 2022 10:14 am
by markiver54
What a great shop setup. I see you got that razor knife sheath finnished. Looks great!
Good luck with the oral surgery.

Re: An Upgrade to the Leather Bench
Posted: Wed May 11, 2022 10:31 am
by Hatchdog
I had one of those extractions/implants and it wasn’t bad at all. And I’m a wimp for pain.
Re: An Upgrade to the Leather Bench
Posted: Wed May 11, 2022 7:49 pm
by BrokenolMarine
We left at 8 this morning and drove down, I always plan to arrive early. This way if I run into trouble along the way, I still make my appointment. Turned out I was about two hours early. Checked with them to see if they had a cancellation, you never know.

It had happened. We went and grabbed brunch, got back thirty minutes before my appointment and I signed in. Tina and fiona hung out.
The doc saw me two hours late.

But, once they got started, the xrays, prep, shots, and extraction took an hour. The extraction took maybe ten minutes, and all I felt was pressure. I'm sure I'll feel them (3) tomorrow.

We pulled in the drive about 6:30. Easy drive, mostly back roads thru Oklahoma farm land, just looong.
Re: An Upgrade to the Leather Bench
Posted: Wed May 11, 2022 9:14 pm
by RanchRoper
Pride of ownership in your tools, shop and workmanship. Always great to see what you're up to.
Re: An Upgrade to the Leather Bench
Posted: Wed May 11, 2022 9:31 pm
by markiver54
BrokenolMarine wrote: ↑Wed May 11, 2022 7:49 pm
We left at 8 this morning and drove down, I always plan to arrive early. This way if I run into trouble along the way, I still make my appointment. Turned out I was about two hours early. Checked with them to see if they had a cancellation, you never know.
It had happened. We went and grabbed brunch, got back thirty minutes before my appointment and I signed in. Tina and fiona hung out.
The doc saw me two hours late.
But, once they got started, the xrays, prep, shots, and extraction took an hour. The extraction took maybe ten minutes, and all I felt was pressure. I'm sure I'll feel them (3) tomorrow.
We pulled in the drive about 6:30. Easy drive, mostly back roads thru Oklahoma farm land, just looong.
Through my own dental woes, Ibuprophen was my friend!
Re: An Upgrade to the Leather Bench
Posted: Wed May 11, 2022 11:09 pm
by BrokenolMarine
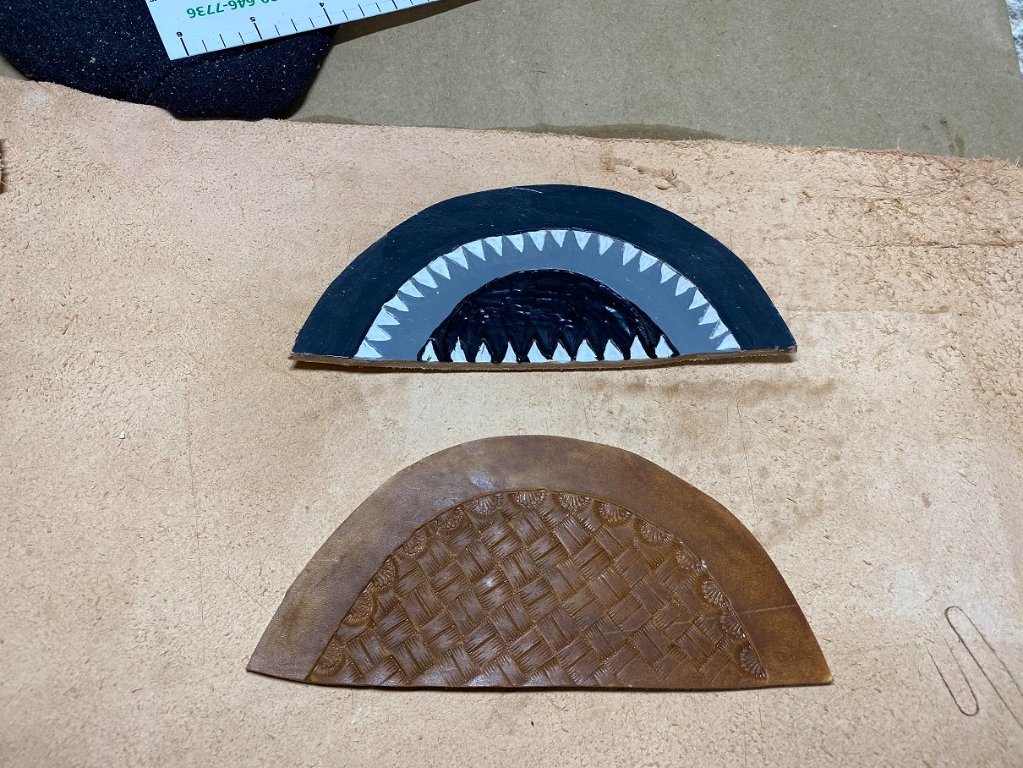
I couldn't work with any power equipment tonight due to the pain meds from the oral surgery, but... as I told Miss T, I could paint and apply finishes.
I went out to the shop to unwind from the ten hour trip to the dentist in Lawton and painted the one "shark" design and applied the brown dye to the basket weave design on the other. The paint and dye will require a second coat, and of course the dyed side will need the mink oil. Both sides will need a topcoat. The shark side will get "Googlie Eyes to complete the look.

Who says you can't have fun and be safe at the same time?
- designs.jpg (221.04 KiB) Viewed 3182 times
Re: An Upgrade to the Leather Bench
Posted: Thu May 12, 2022 8:16 am
by BrokenolMarine
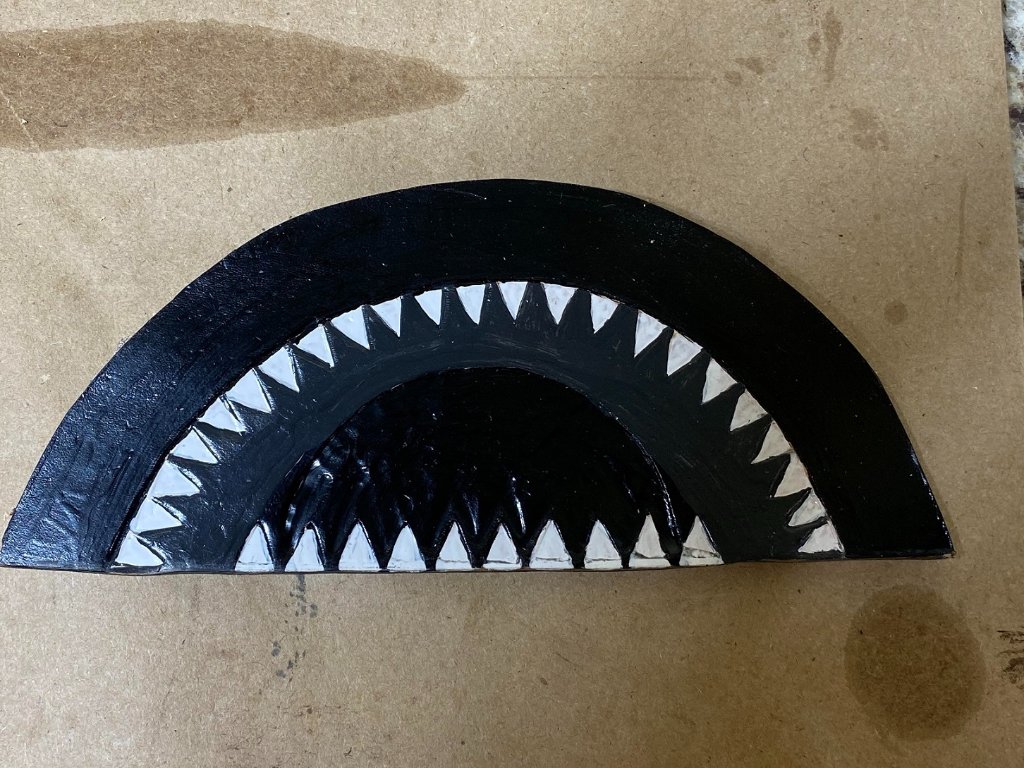
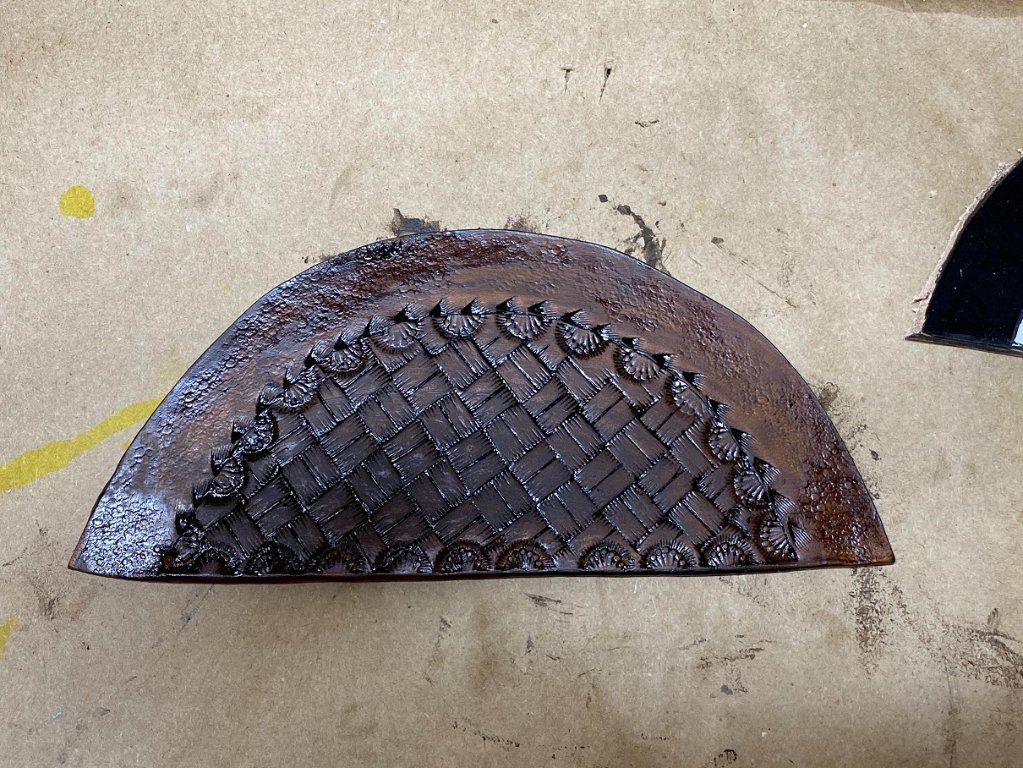
Couldn't sleep last night, so I went back out in the shop for a while. Gee, when I looked at the clock again, it was 1am. I had applied the second coat of paint and dye, burnished the edges on the two halves of the head knife cover, and antiqued the dyed half. Burnishing put cracks in the teeth on the bottom of the shark design, so Jaws will need a bit of dental work this morning, but we are looking good.
Once coffee time is done, I'll wipe off the excess antiquing and put the topcoats on. (You know, once Jaw's dental work dries.)
- 2nd coat of paint.jpg (183.34 KiB) Viewed 3177 times
- antiquing applied.jpg (234.97 KiB) Viewed 3177 times
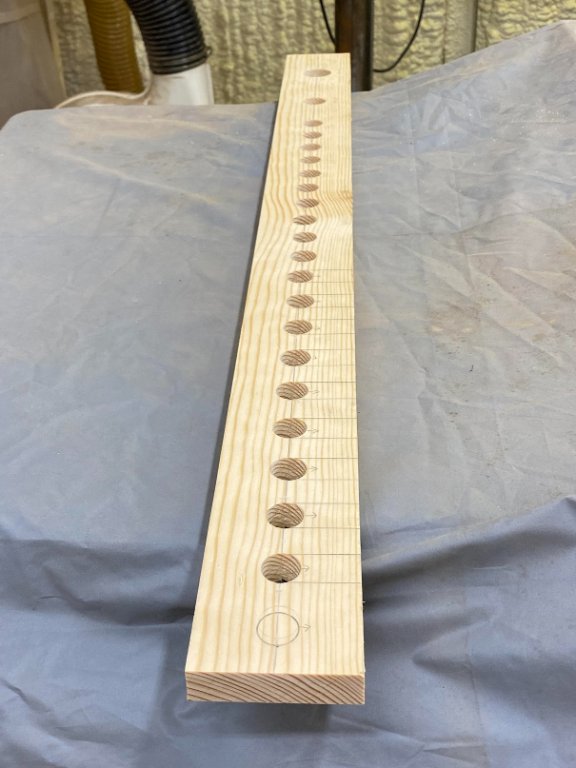
I also set up the drill press and used the forstner bits to drill the holes as laid out. I
did NOT drill that first hole as I decided it was too close to the end of the board and might weaken the shelf when the frame was screwed and glued. This morning, I'll cut the slots marked with the jigsaw then set up the router. (groan, I hate that thing) and round over the edges of the slots and all the holes. I do this not only for appearances, but to reduce the wear and tear on the tools that will ride in the slots and rest in the holes.
- s03 first cuts.jpg (62.53 KiB) Viewed 3177 times
I will also figure out the layout (If any) of the other two shelves as we might get as far as assembly today. Wow, that would be cool. I will have to get out and put some hinges on a gate for Miss T. Hammer drill thru a steel tube and bolt those in place.
More Power Arh Arh Arh...
Re: An Upgrade to the Leather Bench
Posted: Thu May 12, 2022 4:21 pm
by BrokenolMarine
Back out this this morning and got to work. I set up the jigsaw and cut the slots to the predrilled 3/4" holes for the tools to hang in. Slow and steady got the job done. Clamped the shelf board to the work bench for an easy job of it. Couldn't use the bandsaw due to the length of the board.

- 04 jigsaw cuts.jpg (170.39 KiB) Viewed 2359 times
After that step was completed, I set up the router (Gah) with a 1/4" roundover bit and rounded over the edges of the holes, the slots, and the faces on the shelves and the vertical sides to be. Smooth and steady so it looks neat.

- 05 routed edges.jpg (180.5 KiB) Viewed 2359 times
Next I set up the long BAR clamps to use to hold the assembly of the shelf.

- 07 bar clamps.jpg (210.77 KiB) Viewed 2359 times
I offset the clamps so that we have access to the shelves to drill for the screws. Before beginning, I remeasured to insure I had the spacing on the shelves correct, and then marked the spacing and predrilled the countersinks and pilot holes in the vertical sides. Then painted the inside of the vertical sides in the marked areas with glue. Assembled and clamped then drilled and screwed. Tapped plugs into the countersinks to hide the countersunk screws.

- 06 mounted screws hidden.jpg (103.49 KiB) Viewed 2359 times
Once assembled, screwed and glued, I added a backing to the top shelf section, and then we screwed the assembly to the tool bar I had built last year. It was ready to be put to use. It seems the new shelf worked out almost as planned. ONE tool, the 1-1/2 slot punch, wouldn't fit the section where I had planned to place it, but... it did fit the slot where the head knife was going to go so it will live there for now. I may just store the slot punches in the drawer as they are little used and very expensive. The head knife is a well used item. We'll see.

- 08 worked out almost as planned.jpg (217.96 KiB) Viewed 2359 times
I may cut a scrolled back and sides for the top of the unit to make that top area useable. We shall see.
Re: An Upgrade to the Leather Bench
Posted: Fri May 13, 2022 5:53 pm
by BrokenolMarine
Went out and got some work done in the wee hours since I couldn't sleep. I made some additional pads for the clamps that I use to clamp the leather when gluing up. Hand sewn, I made two sets.

- 09 making pads.jpg (192.77 KiB) Viewed 2345 times

- 10 two new sets.jpg (194.24 KiB) Viewed 2345 times
After knocking that out, I glued the three pieces of the head knife cover together and left it to set up overnight, planning to sew it on the new machine this morning. That would be the Front panel, welt, and back panel. The cover probably would have worked without a welt, but I could foresee my trying to slip the blade in the cover, missing, and sticking it in my palm..

... SO, I added a welt to give it a wee space.
Came out this morning, After Coffee, Always, and sewed the piece together. My first time using the new machine for anything other than a test piece. I was happy with the result. I made a mistake or two, but most would never notice.
Just those of us who are picky.
The Front... Note the Shark Eyes Tina found for me in Her Shop.


- 12 head knife cover front.jpg (158 KiB) Viewed 2345 times
and the back.

- 13 and back.jpg (168.55 KiB) Viewed 2345 times
The bench is beginning to look much more organized. The stropping board for sharpening and touch up is hanging on the right side of the shelf from a screw. The back up glasses are hanging on the left side, from another screw. Clearing the bench. I will fine tune this thing as I use it.

- 14 organized.jpg (216.48 KiB) Viewed 2345 times
This will be my leather working corner... and I will fine tune the corner.

- 15 my leather corner.jpg (205.36 KiB) Viewed 2345 times
