Page 1 of 1
The Experimentation Continues....
Posted: Thu Oct 17, 2019 9:10 pm
by Mistered
This afternoon I made a 'mock up' of a receiver sight for my PCC out of a piece of hard plastic, fitted tightly in one of rail slots and I drilled it and screwed a Williams receiver sight aperture into it.
This effectively doubles the sight plane distance and gives me a perfect sight picture with a clear and sharp view of the front sight. Also this allows me to use a smaller diameter aperture which aids in sharpening the view.
I will not have an elevation adjustment but I did equate the height of the stock ghost ring on the barrel and with a straightedge transferred it to my rear to determine where to drill the hole but this is mostly to just to test the effectiveness of a rear aperture sight so as long as its on paper that is all I need - and I hope it works out.
If it does I will be searching for a low profile receiver sight for it. There are many styles available but some are obviously too high and I would like to keep the stock front sight. Also a lot of them do not have replaceable apertures and I will need this ability.
We shall see what happens!
![IMG_1698[1].JPG](./download/file.php?id=18875)
- IMG_1698[1].JPG (70.45 KiB) Viewed 5519 times
Re: The Experimentation Continues....
Posted: Thu Oct 17, 2019 9:34 pm
by Cofisher
Consider that low pro in a rail mounting hole. Easy Peasy
Re: The Experimentation Continues....
Posted: Thu Oct 17, 2019 9:42 pm
by Mistered
Consider that low pro in a rail mounting hole.
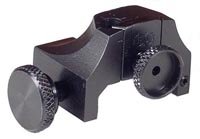
The PCC rail is machined integrally with the receiver so there are no holes and I would have no windage adjustment if it were mounted in a hole - but I think I have found the sight from New England Custom Gun.
It has a good range of adjustment and drops lower than what I need and comes with two apertures.
- Weaver Peep Lrg.jpg (18.88 KiB) Viewed 5512 times
Re: The Experimentation Continues....
Posted: Thu Oct 17, 2019 10:04 pm
by GFK
Great ingenuity!
Re: The Experimentation Continues....
Posted: Fri Oct 18, 2019 10:29 am
by North Country Gal
Appreciate your ingenuity. Have done similar things on some of our guns to get them setup how I want. Let us know how it shoots for you.
Re: The Experimentation Continues....
Posted: Sat Oct 19, 2019 11:59 pm
by JEBar
very innovative .... looking forward to hearing how it performs
Re: The Experimentation Continues....
Posted: Sun Oct 20, 2019 12:08 am
by Mistered
very innovative .... looking forward to hearing how it performs
It's just a 'test' to see if I get the same results with a scope due to the breakdown issue that may be the problem with a sight, be it scope or otherwise, on the receiver with the breakdown at the barrel.
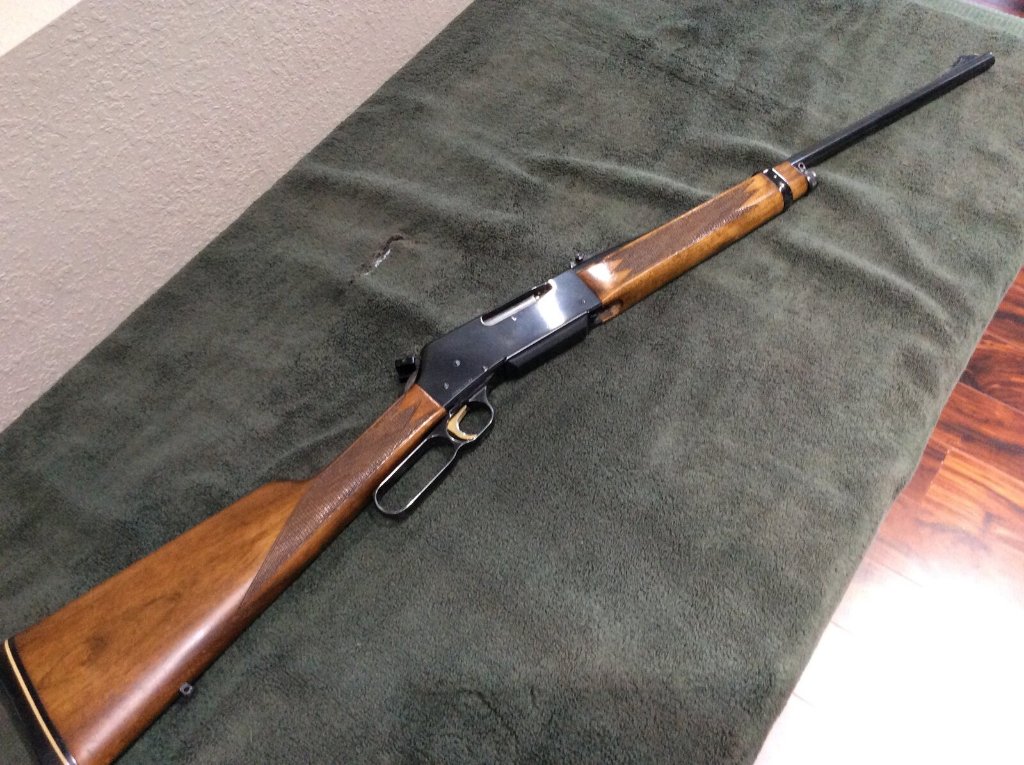
If I see good results I'll order the sight I posted the pic of and all will be well - if not then the PCC goes up for sale/trade and I'll move on - already got a line on a 1981 BLR in .243 which is something I have been 'kind of' looking for - and its local !
- blr1.jpeg (166.27 KiB) Viewed 5432 times
Re: The Experimentation Continues....
Posted: Sun Oct 20, 2019 12:24 am
by JEBar
a 1981 BLR in .243 should be fun rifle to fire ... just curious, do you fully disassemble a BLR ...

Re: The Experimentation Continues....
Posted: Sun Oct 20, 2019 12:48 am
by Mags
.
Almost. Not advisable to separate the lever gear assembly into the individual gears. If doing so it's trial and error to get the 'timing' right for proper bolt lockup.
JEBar wrote: ↑Sun Oct 20, 2019 12:24 am
a 1981 BLR in .243 should be fun rifle to fire ... just curious, do you fully disassemble a BLR ...
Re: The Experimentation Continues....
Posted: Sun Oct 20, 2019 12:51 am
by Mistered
just curious, do you fully disassemble a BLR ..
I'm thinking one would have to for mainentenance or repairs.
I'll probably be finding out if I get the BLR I am going to look at.
Re: The Experimentation Continues....
Posted: Sun Oct 20, 2019 1:06 am
by Mags
.
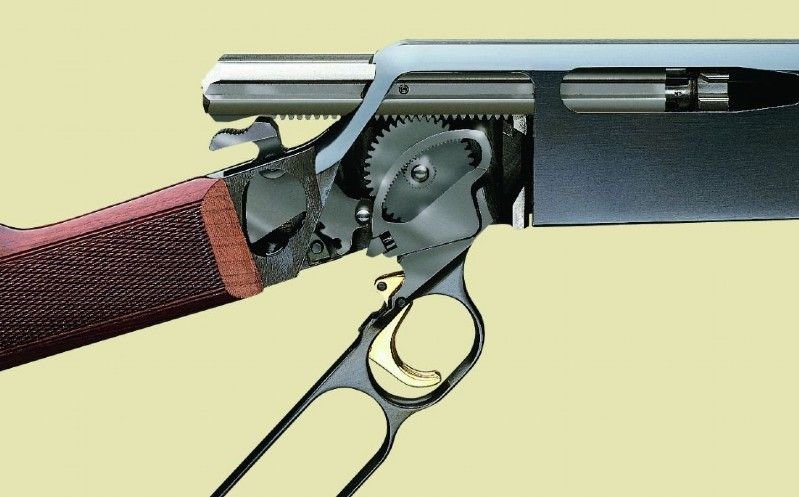
Gear interfaces in the lever assembly.
- BLR Crosssection.jpg (62.53 KiB) Viewed 5739 times
Re: The Experimentation Continues....
Posted: Sun Oct 20, 2019 1:14 am
by Mistered
Gear interfaces in the lever assembly.
This will help me on my first disassembly if I get the BLR.
I have no fear or apprehension of disassembling one. Looks pretty basic actually - and if the gear teeth are marked before disassembly this will facilitate reassembly.
Re: The Experimentation Continues....
Posted: Sun Oct 20, 2019 1:29 am
by Mags
.
The Henry LR disassembly and assembly videos might prove useful too.
https://www.henryusa.com/own-a-henry/he ... ng-ranger/
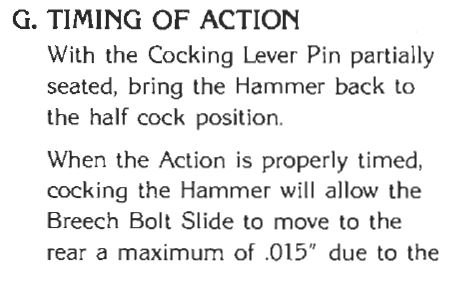
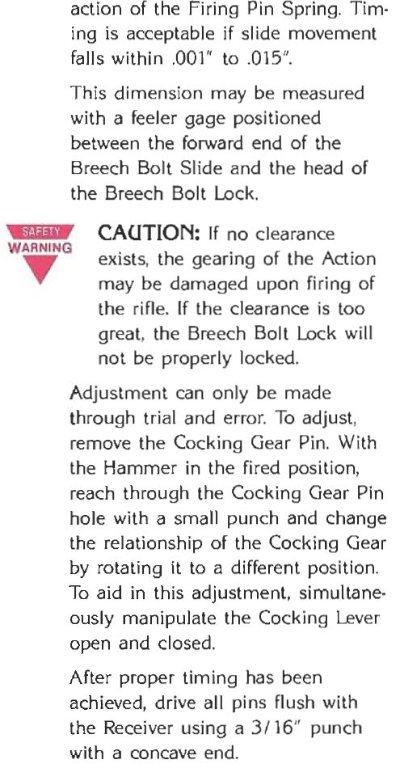
This excerpt from the BLR service manual from when I was researching the Long Ranger.
Note the 'trial and error' portion of setting/adjusting the timing.
- timing 1of2.JPG (33.93 KiB) Viewed 5735 times
- timing 2of2.JPG (83.5 KiB) Viewed 5735 times
Mistered wrote: ↑Sun Oct 20, 2019 1:14 am
Gear interfaces in the lever assembly.
This will help me on my first disassembly if I get the BLR.
I have no fear or apprehension of disassembling one. Looks pretty basic actually.
Re: The Experimentation Continues....
Posted: Sun Oct 20, 2019 8:08 am
by JEBar
Mistered wrote: ↑Sun Oct 20, 2019 12:51 am
I'm thinking one would have to for mainentenance or repairs. I'll probably be finding out if I get the BLR I am going to look at.
agree .... while I'm sure there are I only know one person who can remove a BLR's innards and reassemble them correctly ....
Re: The Experimentation Continues....
Posted: Sun Oct 20, 2019 8:32 am
by Mistered
Oh I can't imagine it being any more difficult than some of the guns I have disassembled and reassembled - including the 1899 Winchester I
Did - I hate to admit I had to remove a couple parts twice due to not realizing the bolt and lock had to be installed prior to the other items but that's just lack of experience - and basing it on newer Winchesters which are much easier to disassemble/reassemble than older ones.
Actually the most difficult rifle I have ever disassembled and reassembled was a Kel-Tex gen 1 Sub 2000. Literally the most bizzare design I have ever seen.
Re: The Experimentation Continues....
Posted: Sun Oct 20, 2019 5:11 pm
by Mags
.
I hope you do proceed forward with getting it. Very interested in your tear down and reassembly story.
Something I read somewhere indicated it's not possible to mark the gear teeth because the lever assembly and bolt carrier are sandwiched between the 2 sides of the receiver. Be interested in seeing if that is really the situation.
Mistered wrote: ↑Sun Oct 20, 2019 1:14 am
... if I get the BLR.
I have no fear or apprehension of disassembling one. Looks pretty basic actually - and if the gear teeth are marked before disassembly this will facilitate reassembly.
Re: The Experimentation Continues....
Posted: Sun Oct 20, 2019 10:03 pm
by Mistered
Something I read somewhere indicated it's not possible to mark the gear teeth because the lever assembly and bolt carrier are sandwiched between the 2 sides of the receiver. Be interested in seeing if that is really the situation.
Not Possible? There ain't anything not possible - it will no doubt be challenging and require careful, meticulous work but certianly possible - however I am going to study this further before diving in.
Re: The Experimentation Continues....
Posted: Sun Oct 20, 2019 11:23 pm
by Mags
.
The BLR receiver sides don't separate. The lever assembly comes out of the bottom of the receiver and the bolt carrier slides out the back of the receiver. I'd really like to see how you are able to mark the lever gear/bolt carrier relationship while they're still installed in the receiver.
Can't do it myself cause I don't have a BLR. If you get one, you're our proxy for doing it so we can see it done.
Mistered wrote: ↑Sun Oct 20, 2019 10:03 pm
Something I read somewhere indicated it's not possible to mark the gear teeth because the lever assembly and bolt carrier are sandwiched between the 2 sides of the receiver. Be interested in seeing if that is really the situation.
Not Possible? There ain't anything not possible - Geese - are you guys a bunch of old ladies or something not able to do anything for yourselves ?